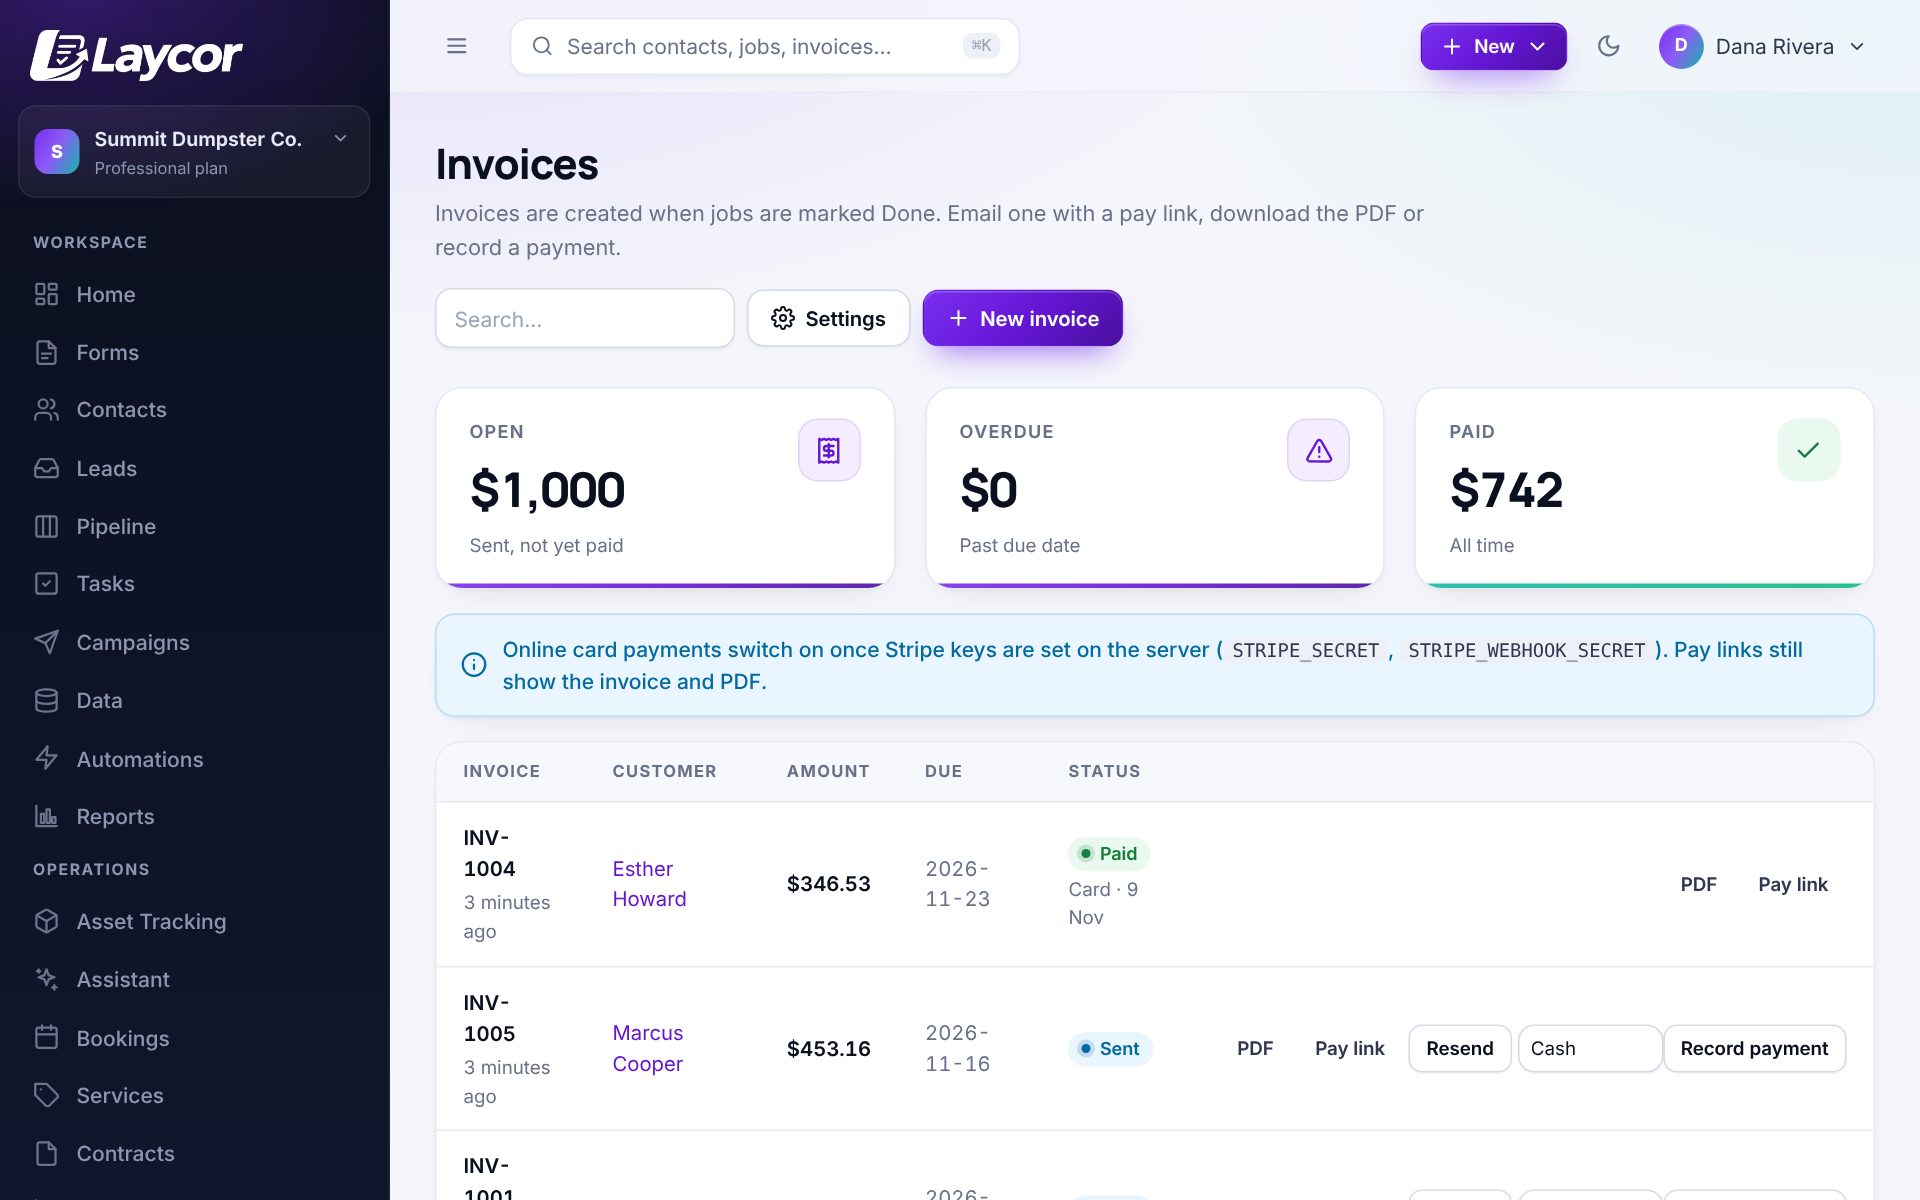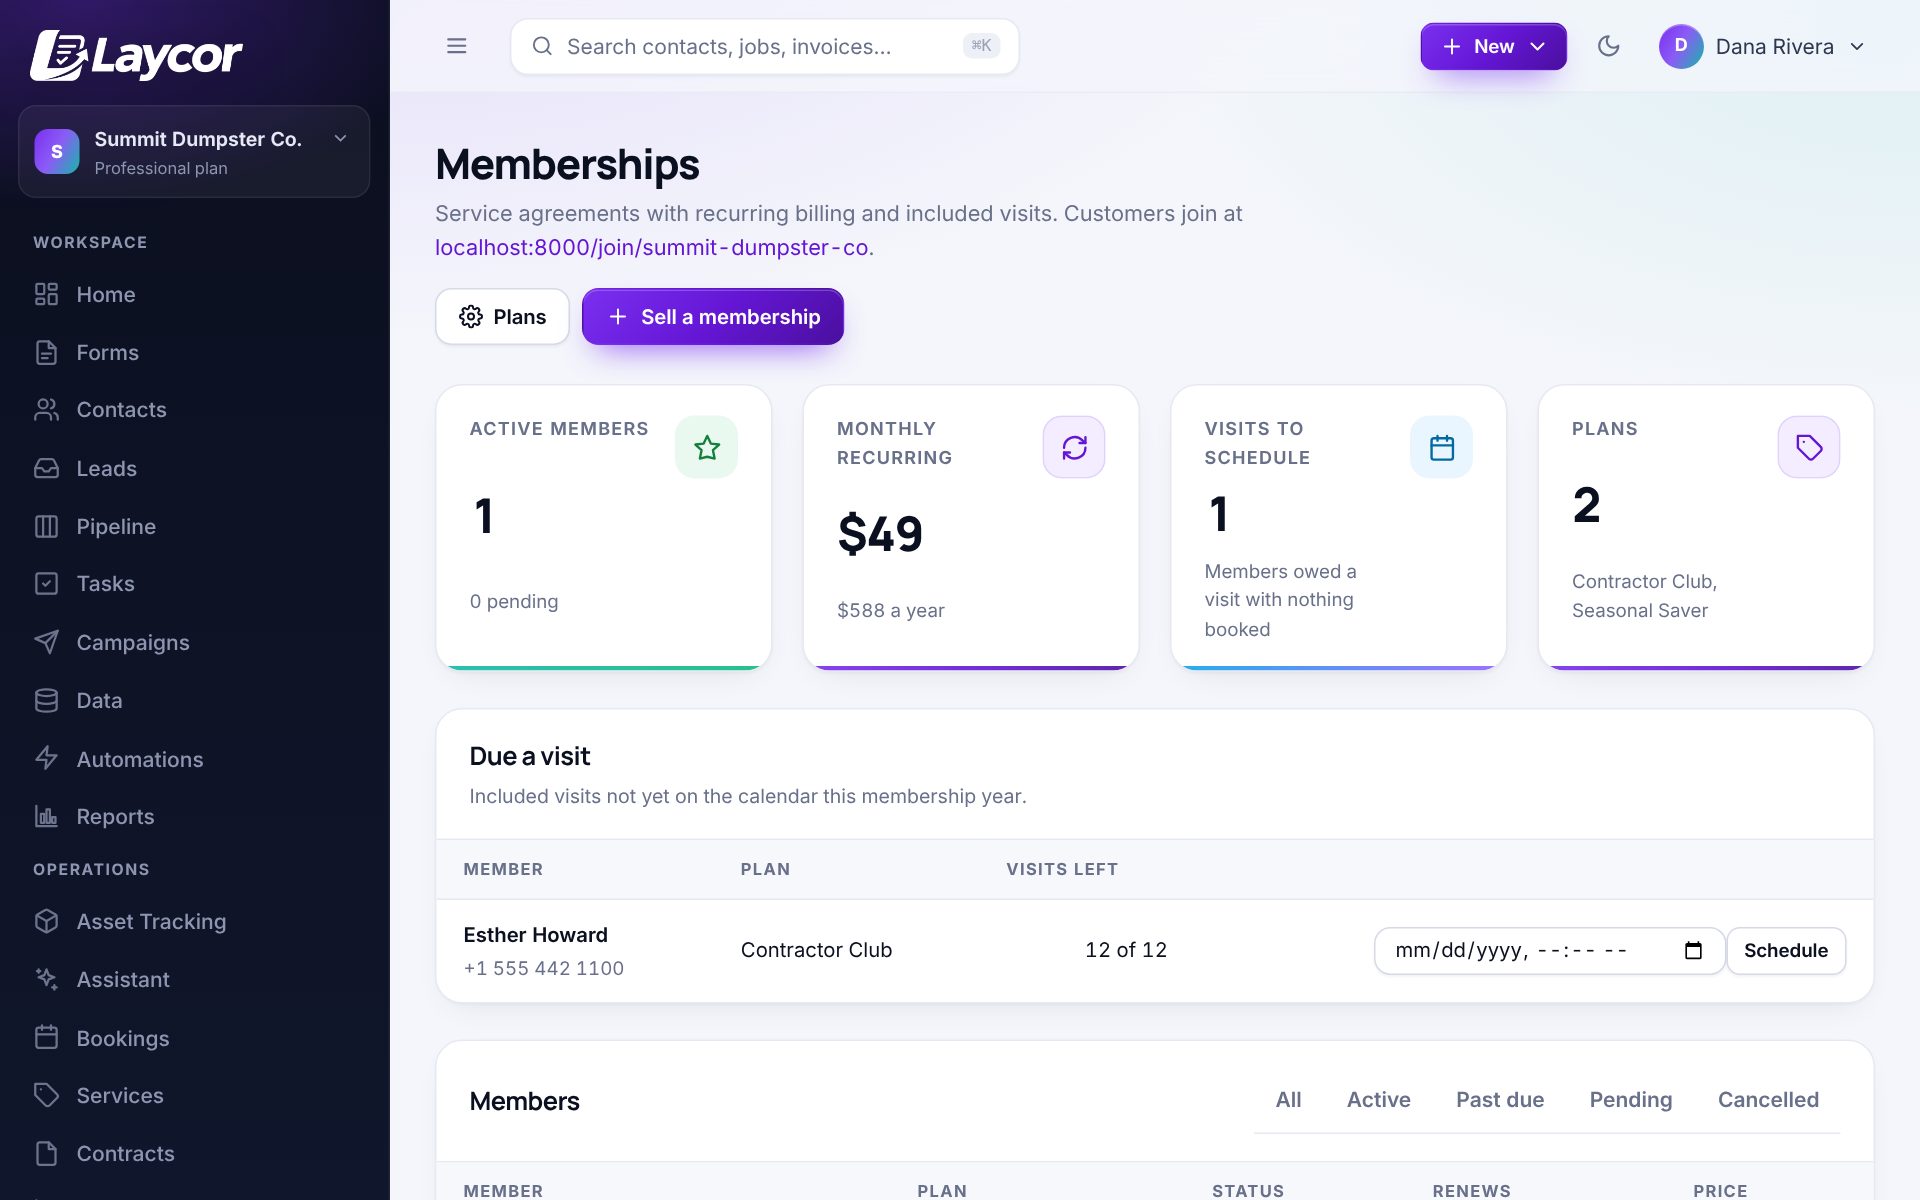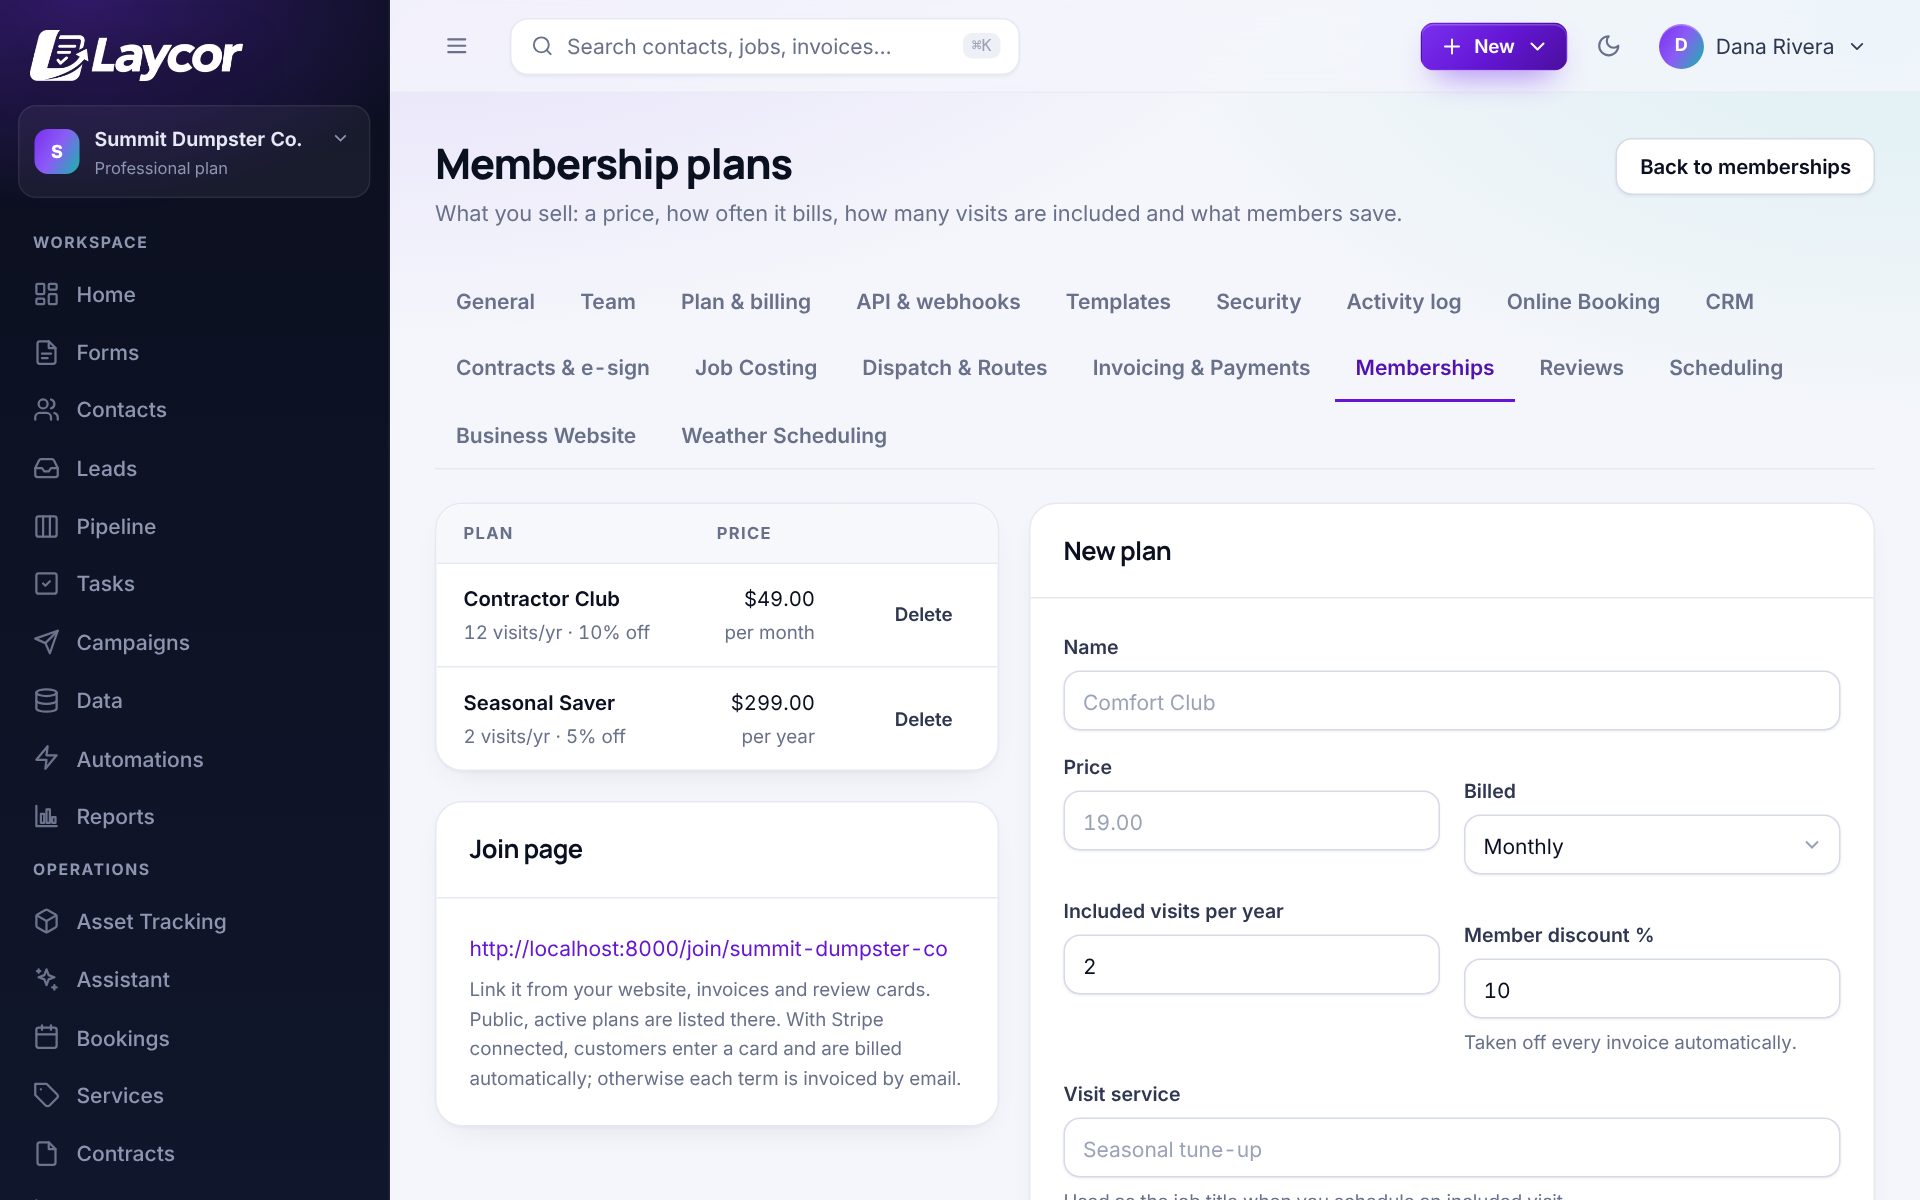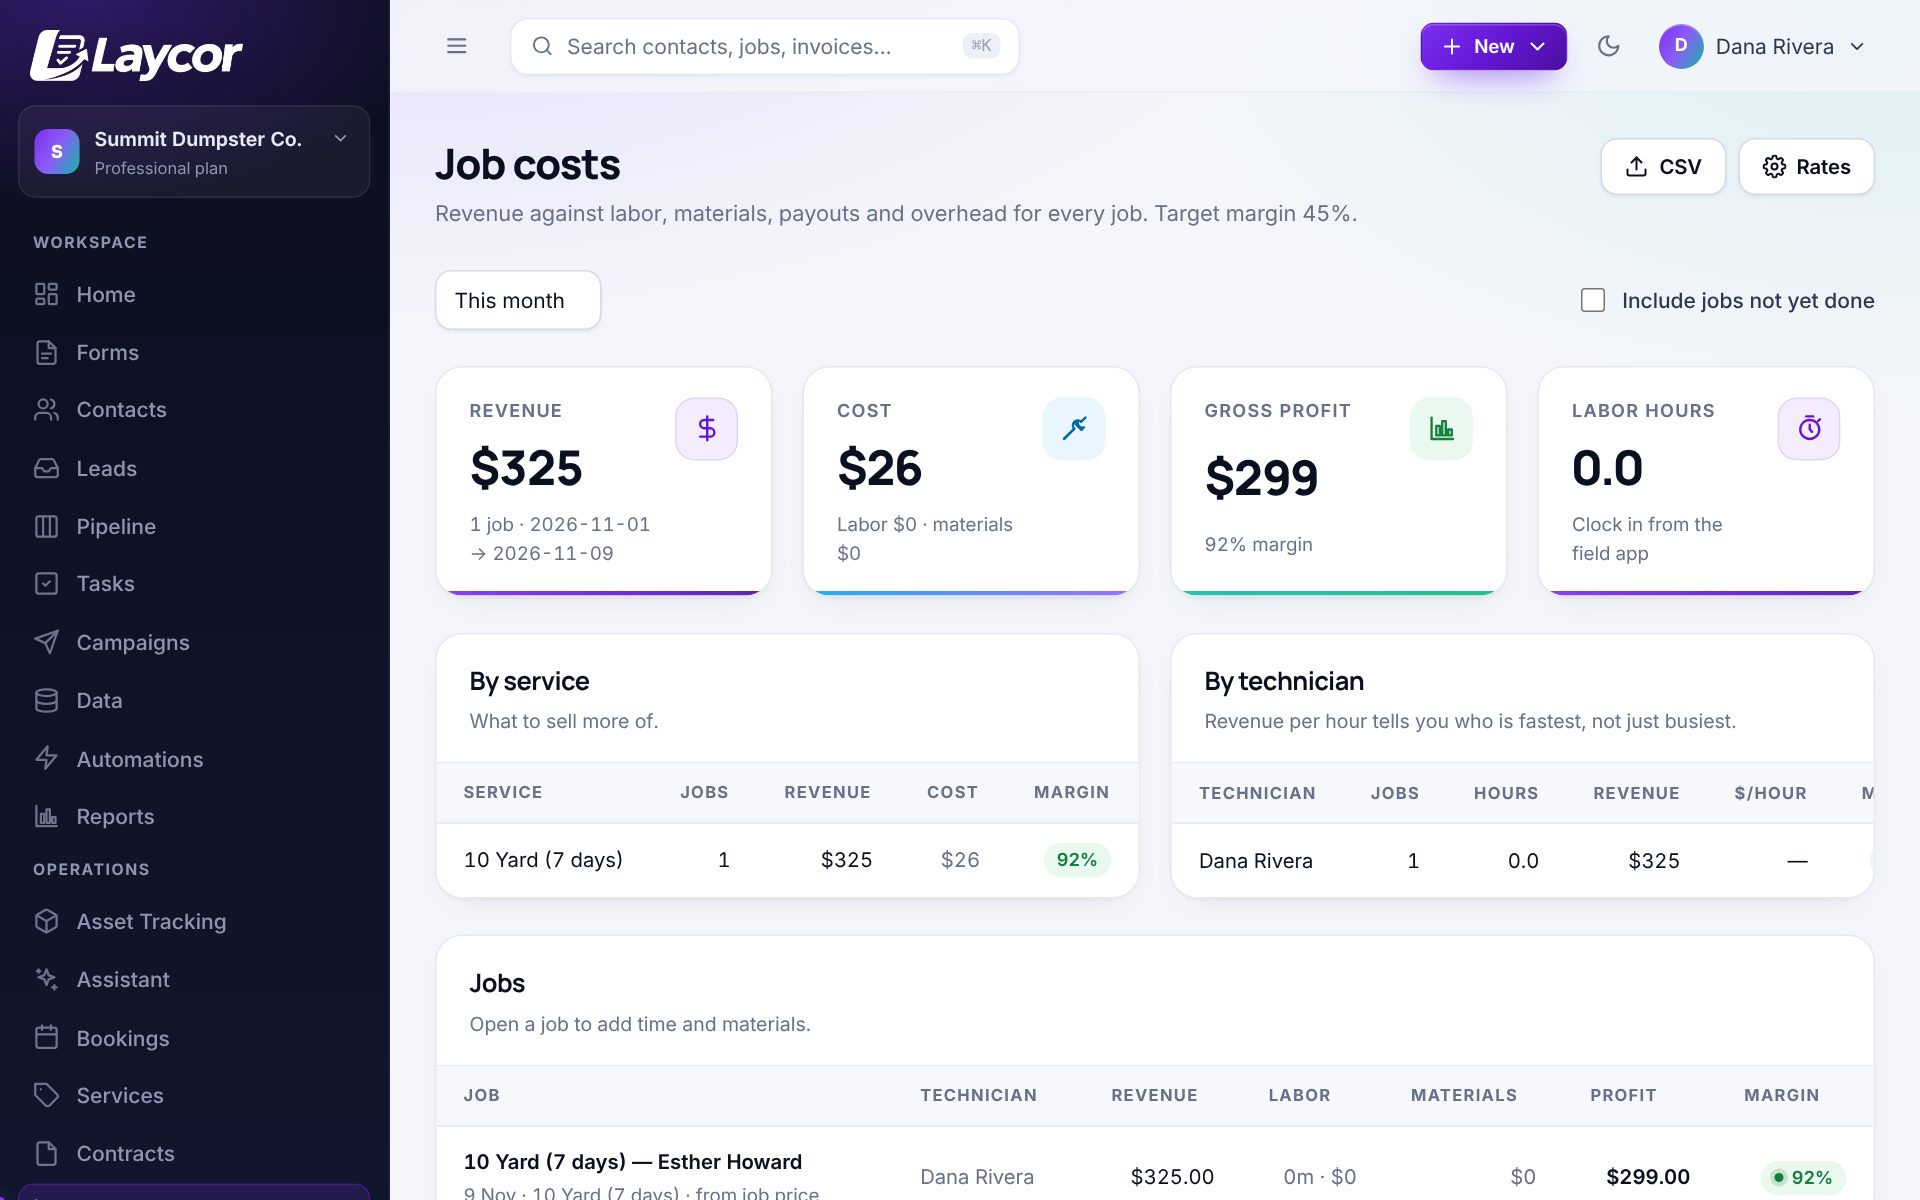
Product tour

Everything inside Laycor, explained.

The demo without the call. 30 parts of the product, what each one does, how to use it and where to find it, with real screens from a working workspace. Read it top to bottom or jump to what you care about.

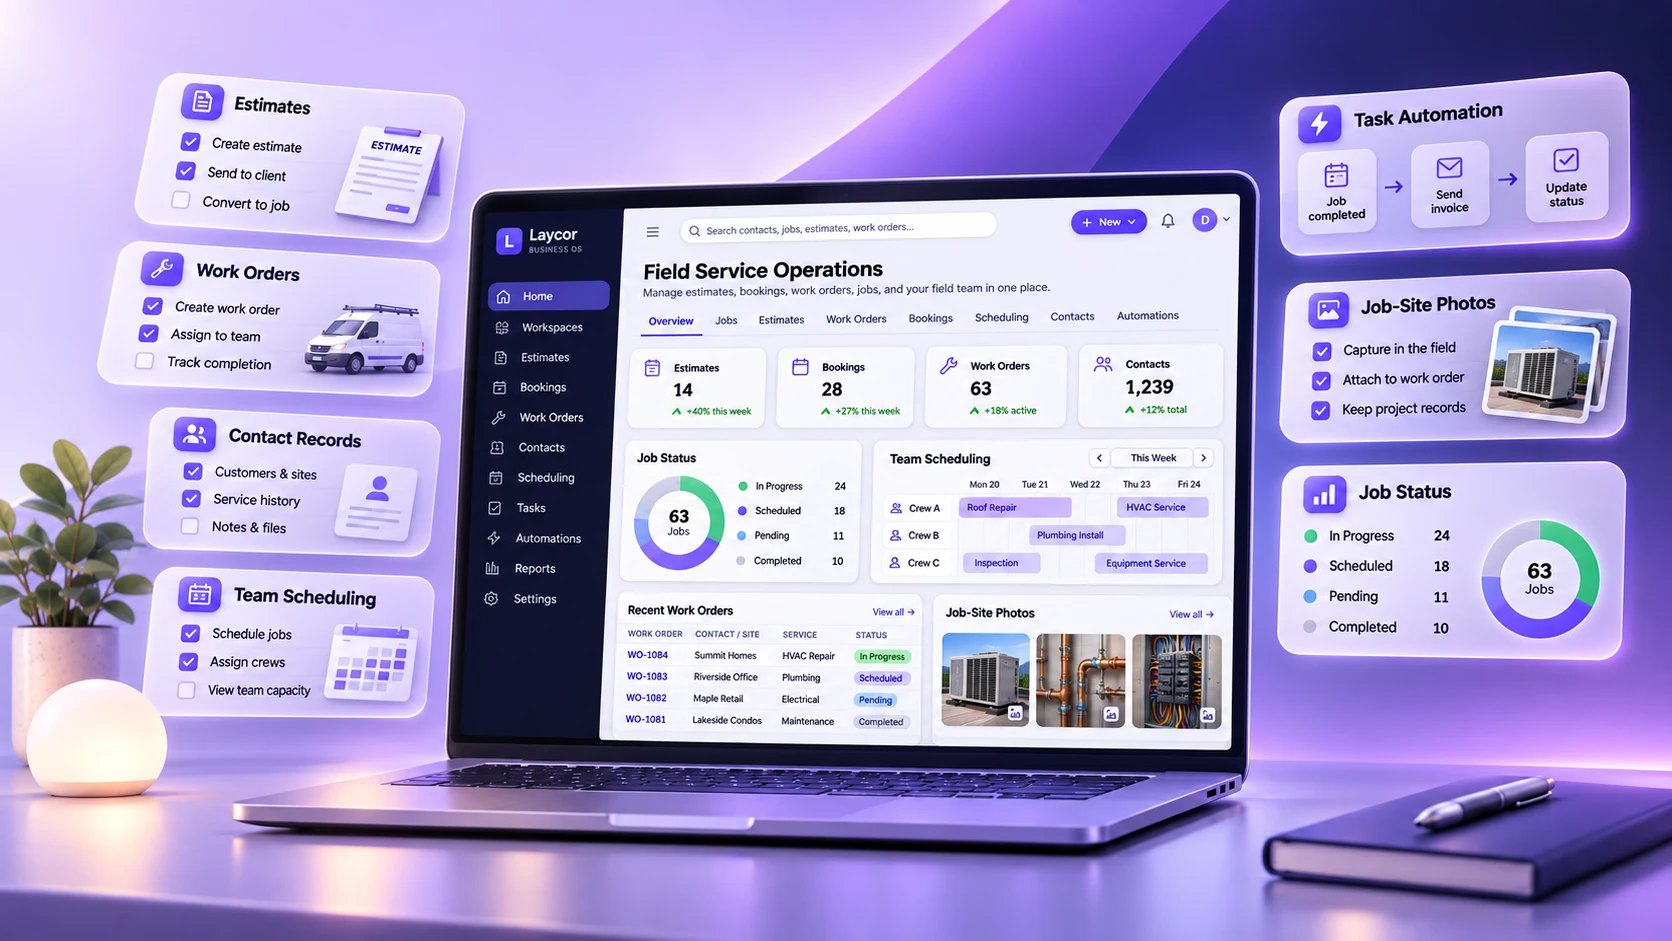
Laycor for field service: estimates, work orders, contact records, team scheduling, job-site photos and automations around one dashboard
Start here

Your first week on Laycor.

Five steps and your website is sending leads into a system that schedules, dispatches and invoices. Most workspaces are live in an afternoon.

  1. Step 1 · 2 min

    Create your workspace

    Sign up with your business name and pick your trade. Laycor switches on the modules that trade usually needs and names things the way you do.

  2. Step 2 · 10 min

    Add your services

    Under Services, list what you sell with a price and how long it takes. Booking, estimates, invoices and the website all read from this one list.

  3. Step 3 · 5 min

    Put a form or booking page on your site

    Copy one line of code from Forms → Publish or Bookings → Embed. Leads and bookings land in Laycor from that moment.

  4. Step 4 · 5 min

    Invite the team

    Settings → Team. Office staff get the full app, technicians open the Field App on their phone, subcontractors see only their own jobs.

  5. Step 5 · 10 min

    Connect payments

    Settings → Invoicing & Payments. Paste your Stripe keys and every invoice gets a pay-online link.

About half an hour, start to finish.Load sample data at any point to see every screen filled in.
Create your workspace →
app.laycor.com/dashboard
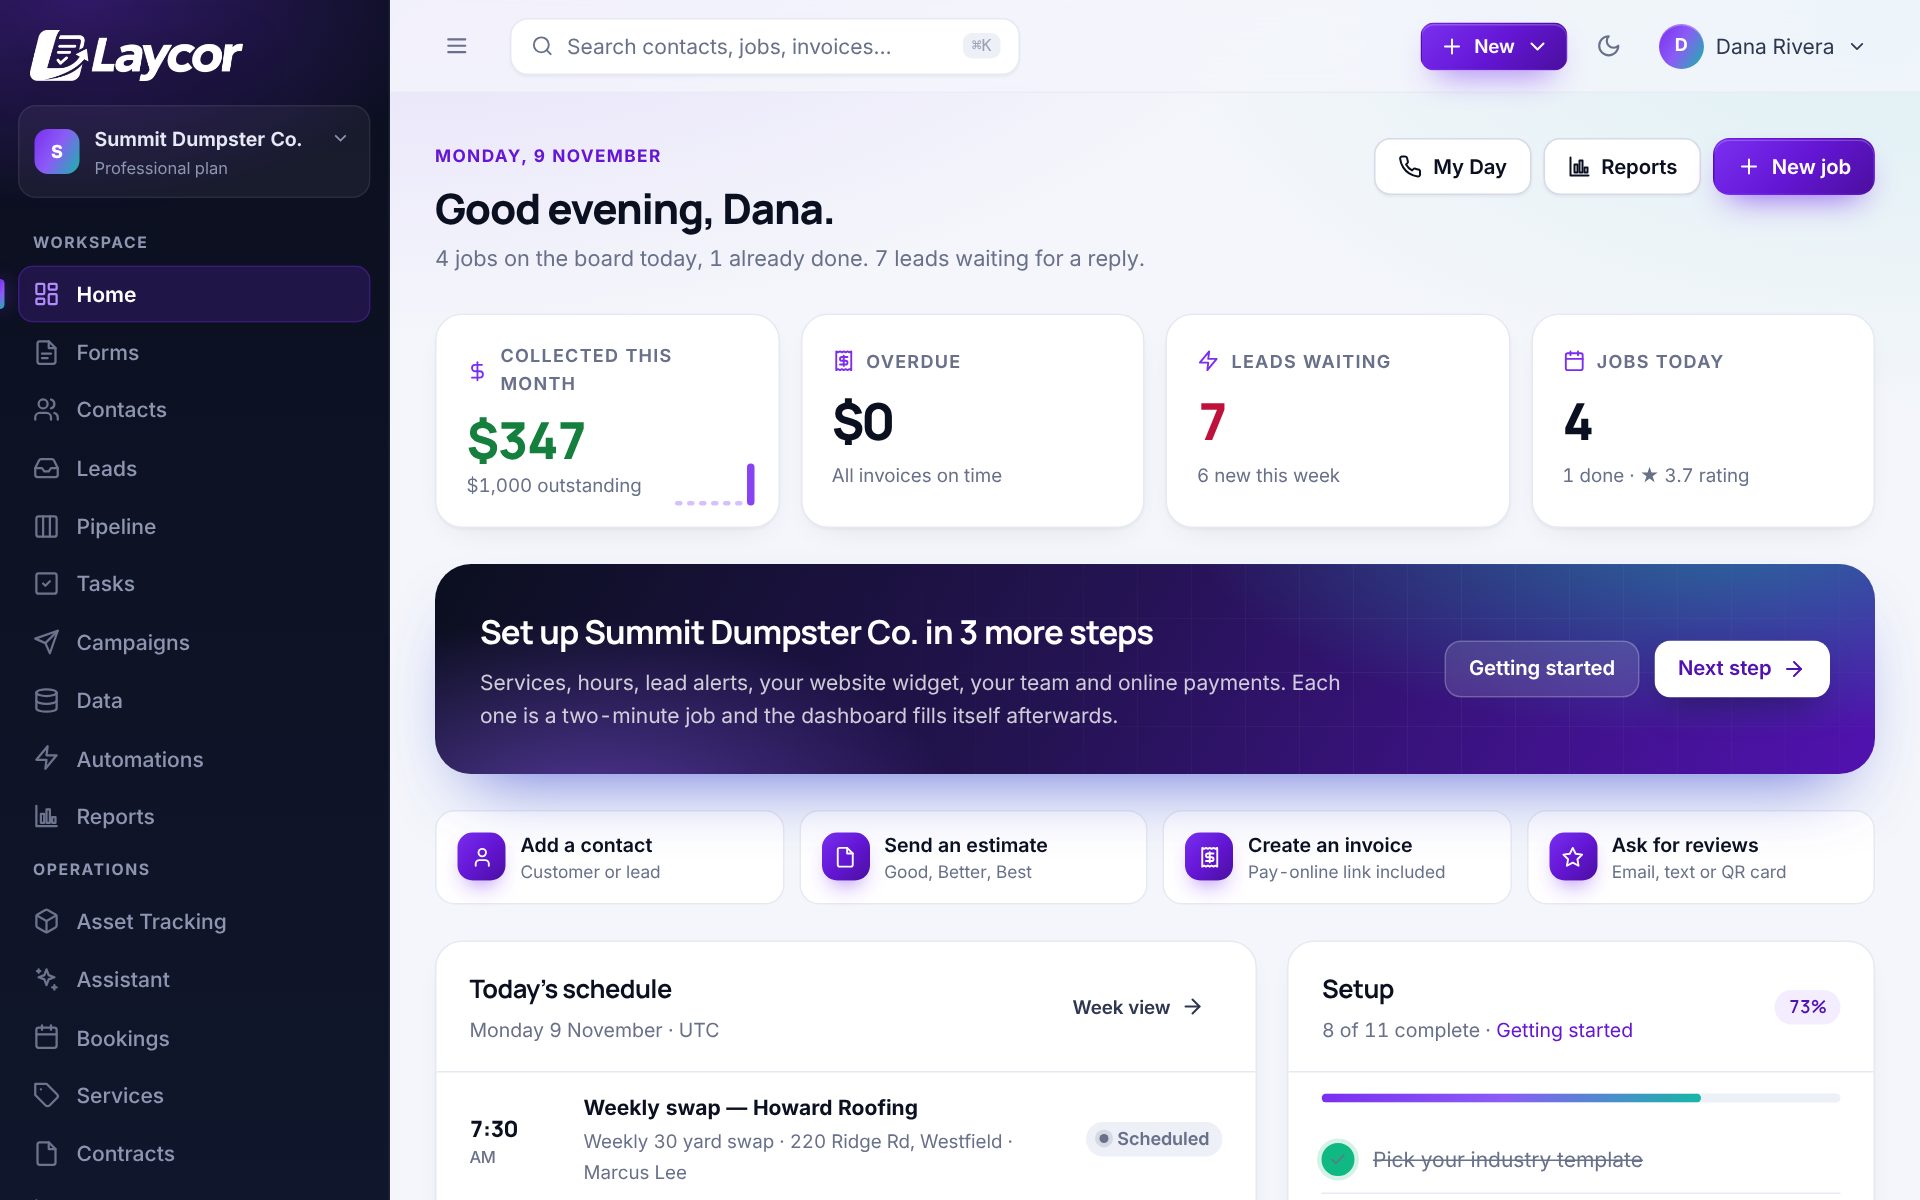
The Laycor dashboard: collected this month, outstanding balance, leads waiting, today’s schedule and the setup checklist
Get leads

Every way a customer can reach you, feeding one system.

IncludedSidebar → Forms

Form Builder

Build contact, quote and estimate forms with a drag-and-drop builder, then host them on Laycor or embed them in any website. Every submission is logged with proof of delivery, so a lead can never silently disappear.

How to use it

  1. Forms → New form. Start from a template for your trade or a blank form.
  2. Drag fields from the palette. Click a field to set its label, options, required state and conditional logic.
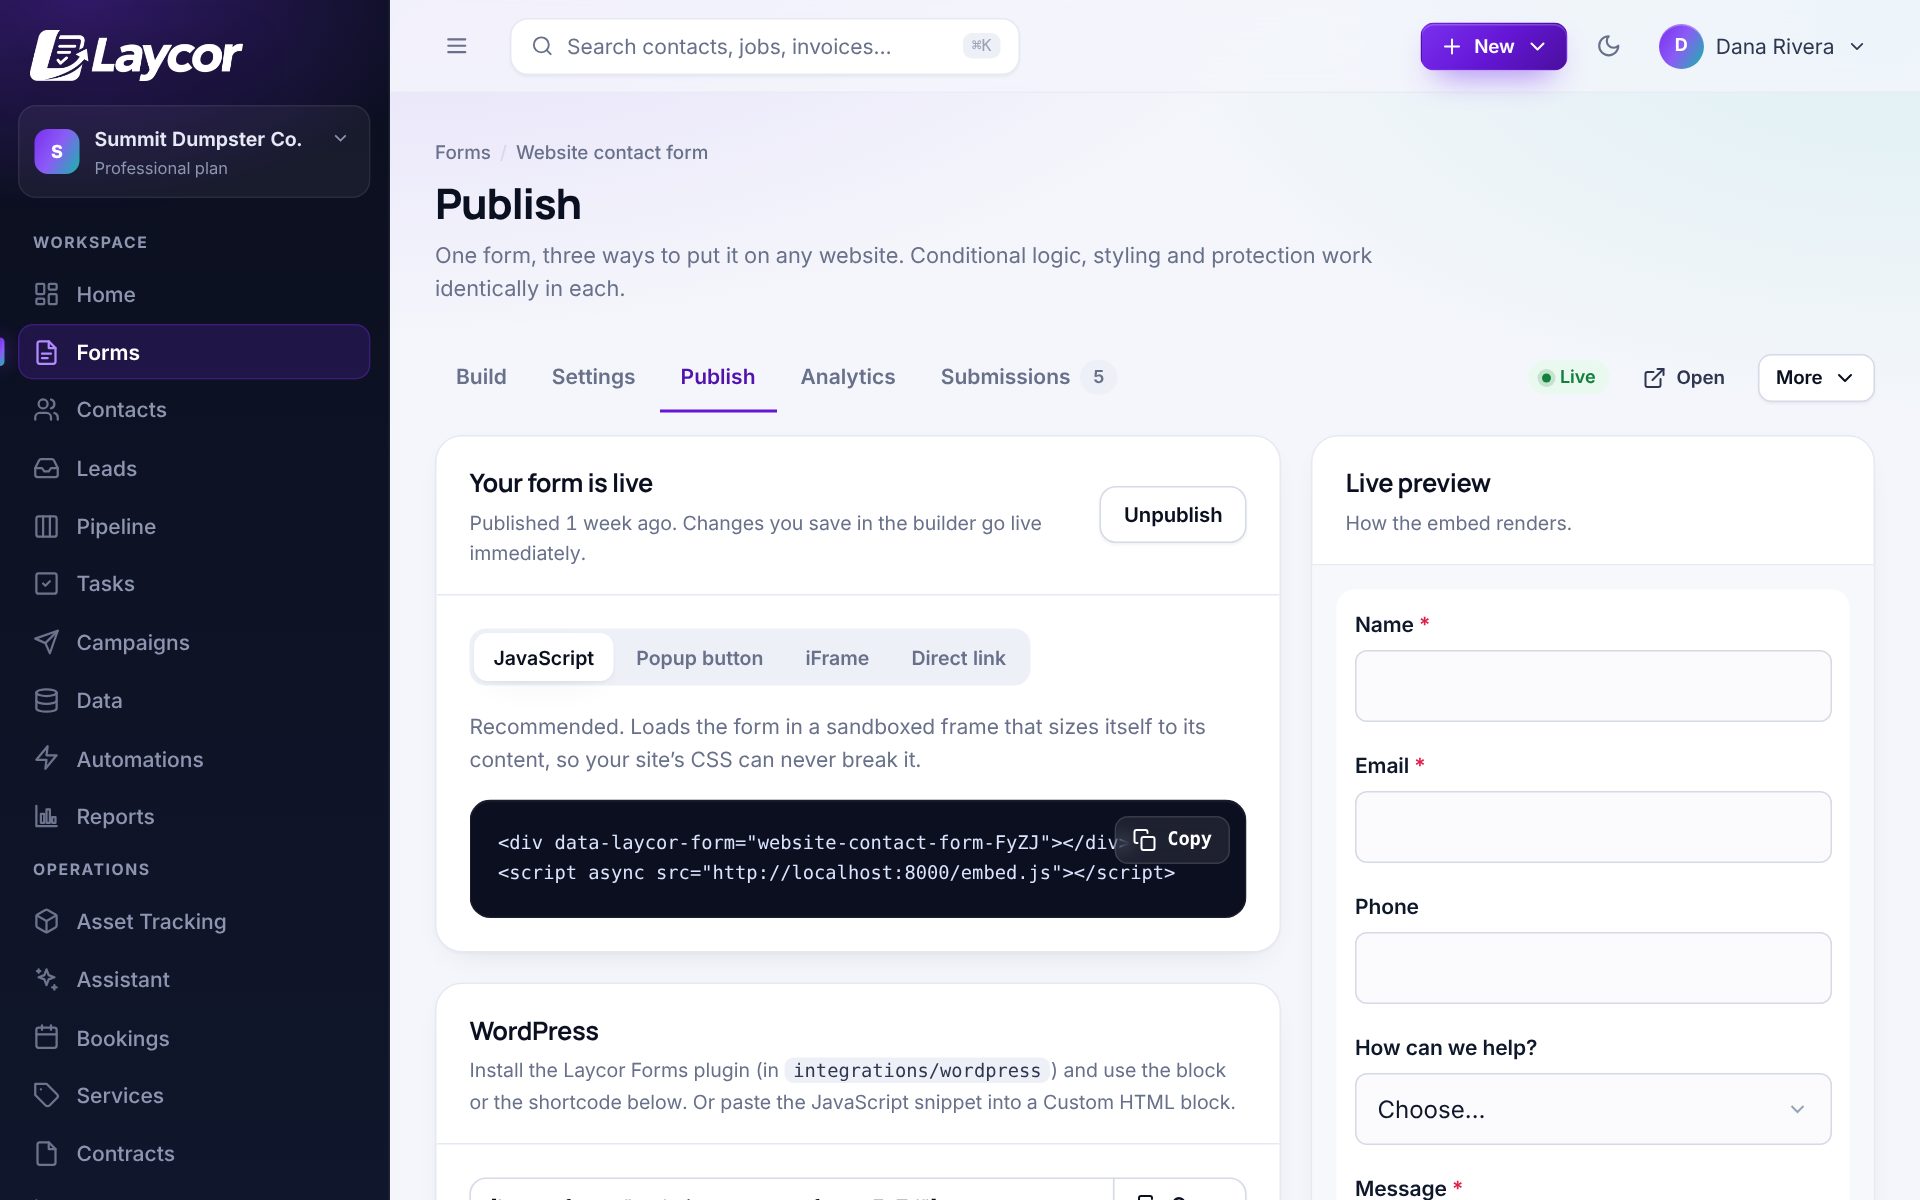
  3. Publish → copy the JavaScript embed, popup button, iframe or WordPress shortcode, or share the hosted link.
  4. Submissions shows every entry with its delivery status. Failed emails are retried and flagged.
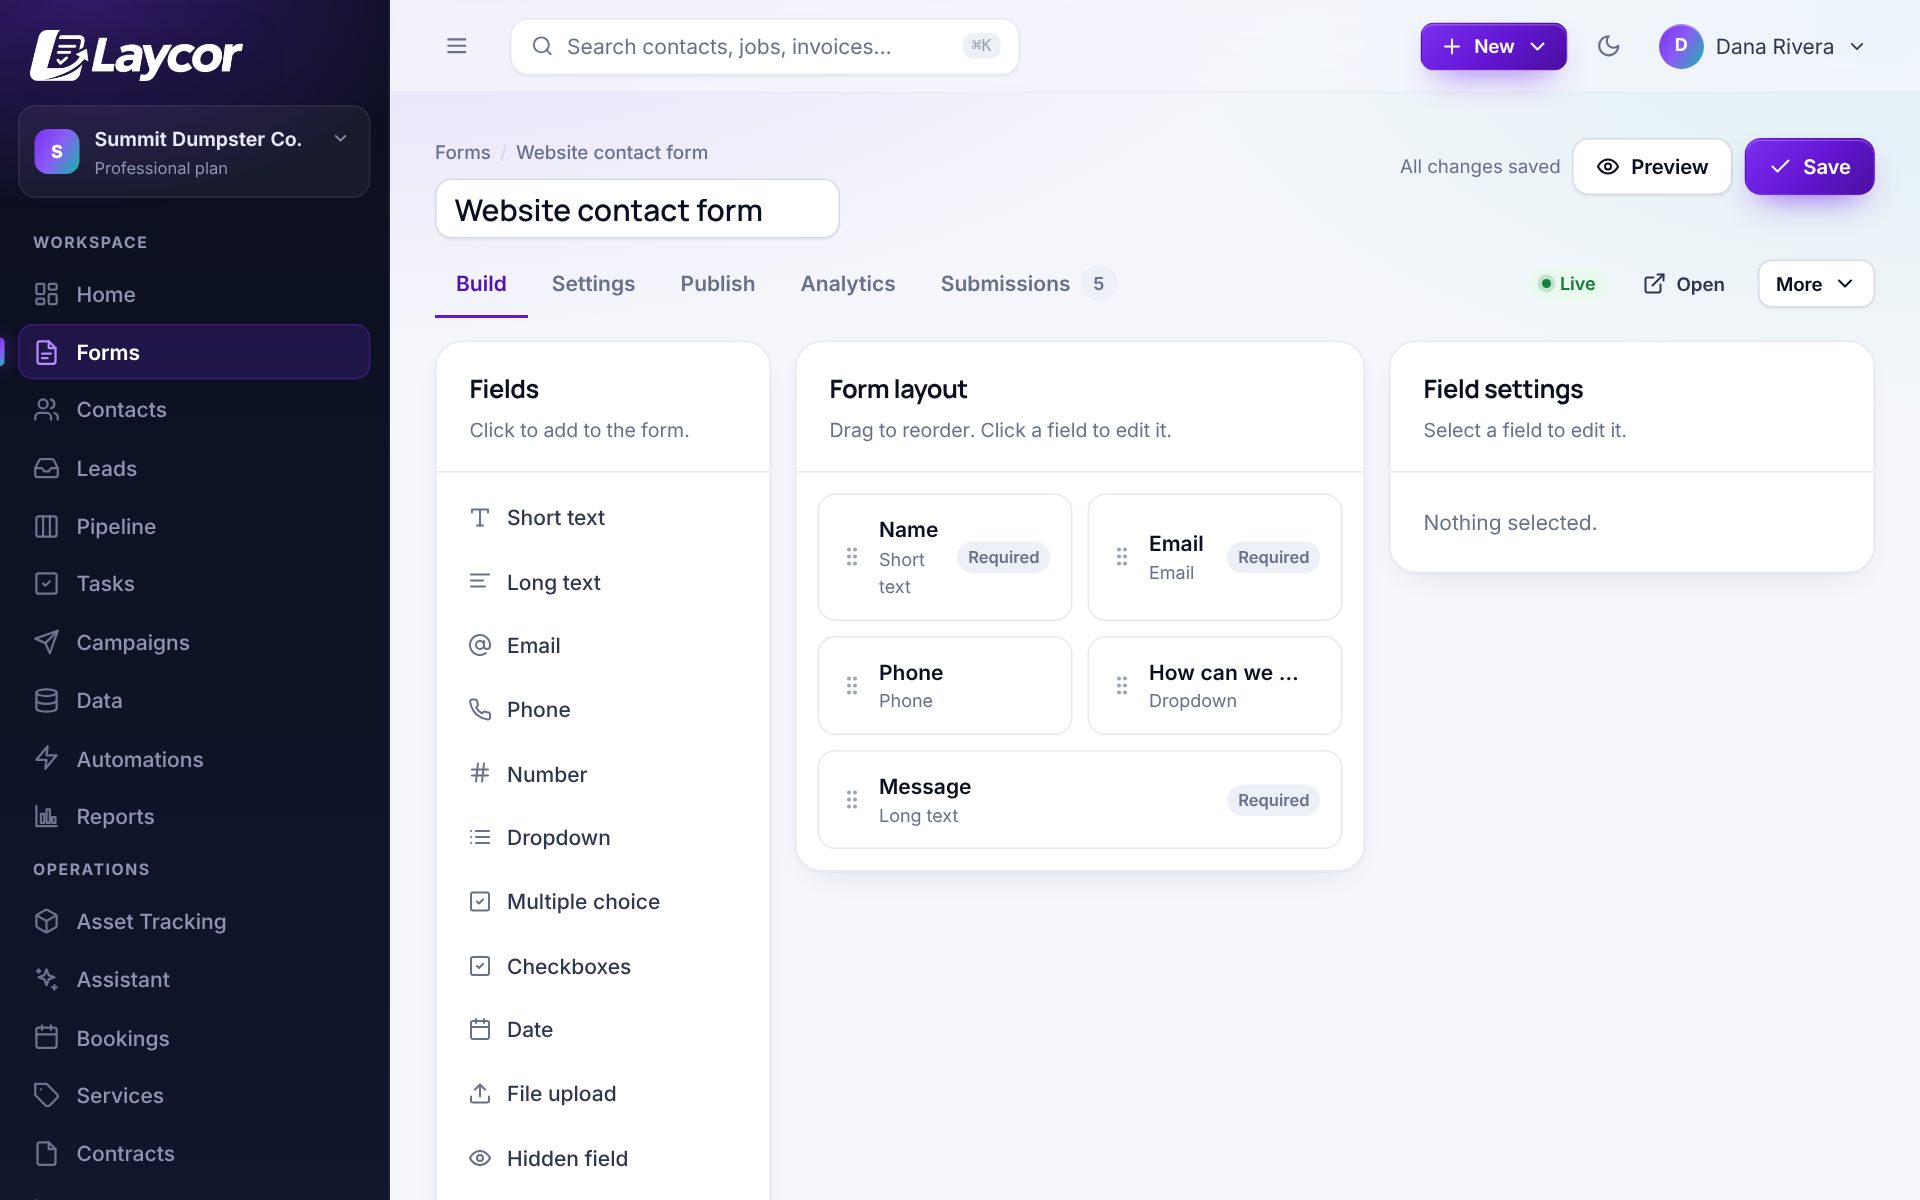
The visual form builder with a field palette, layout canvas and field settings
Publish tab with embed code, WordPress shortcode and a live preview
IncludedSidebar → Bookings

Online Booking

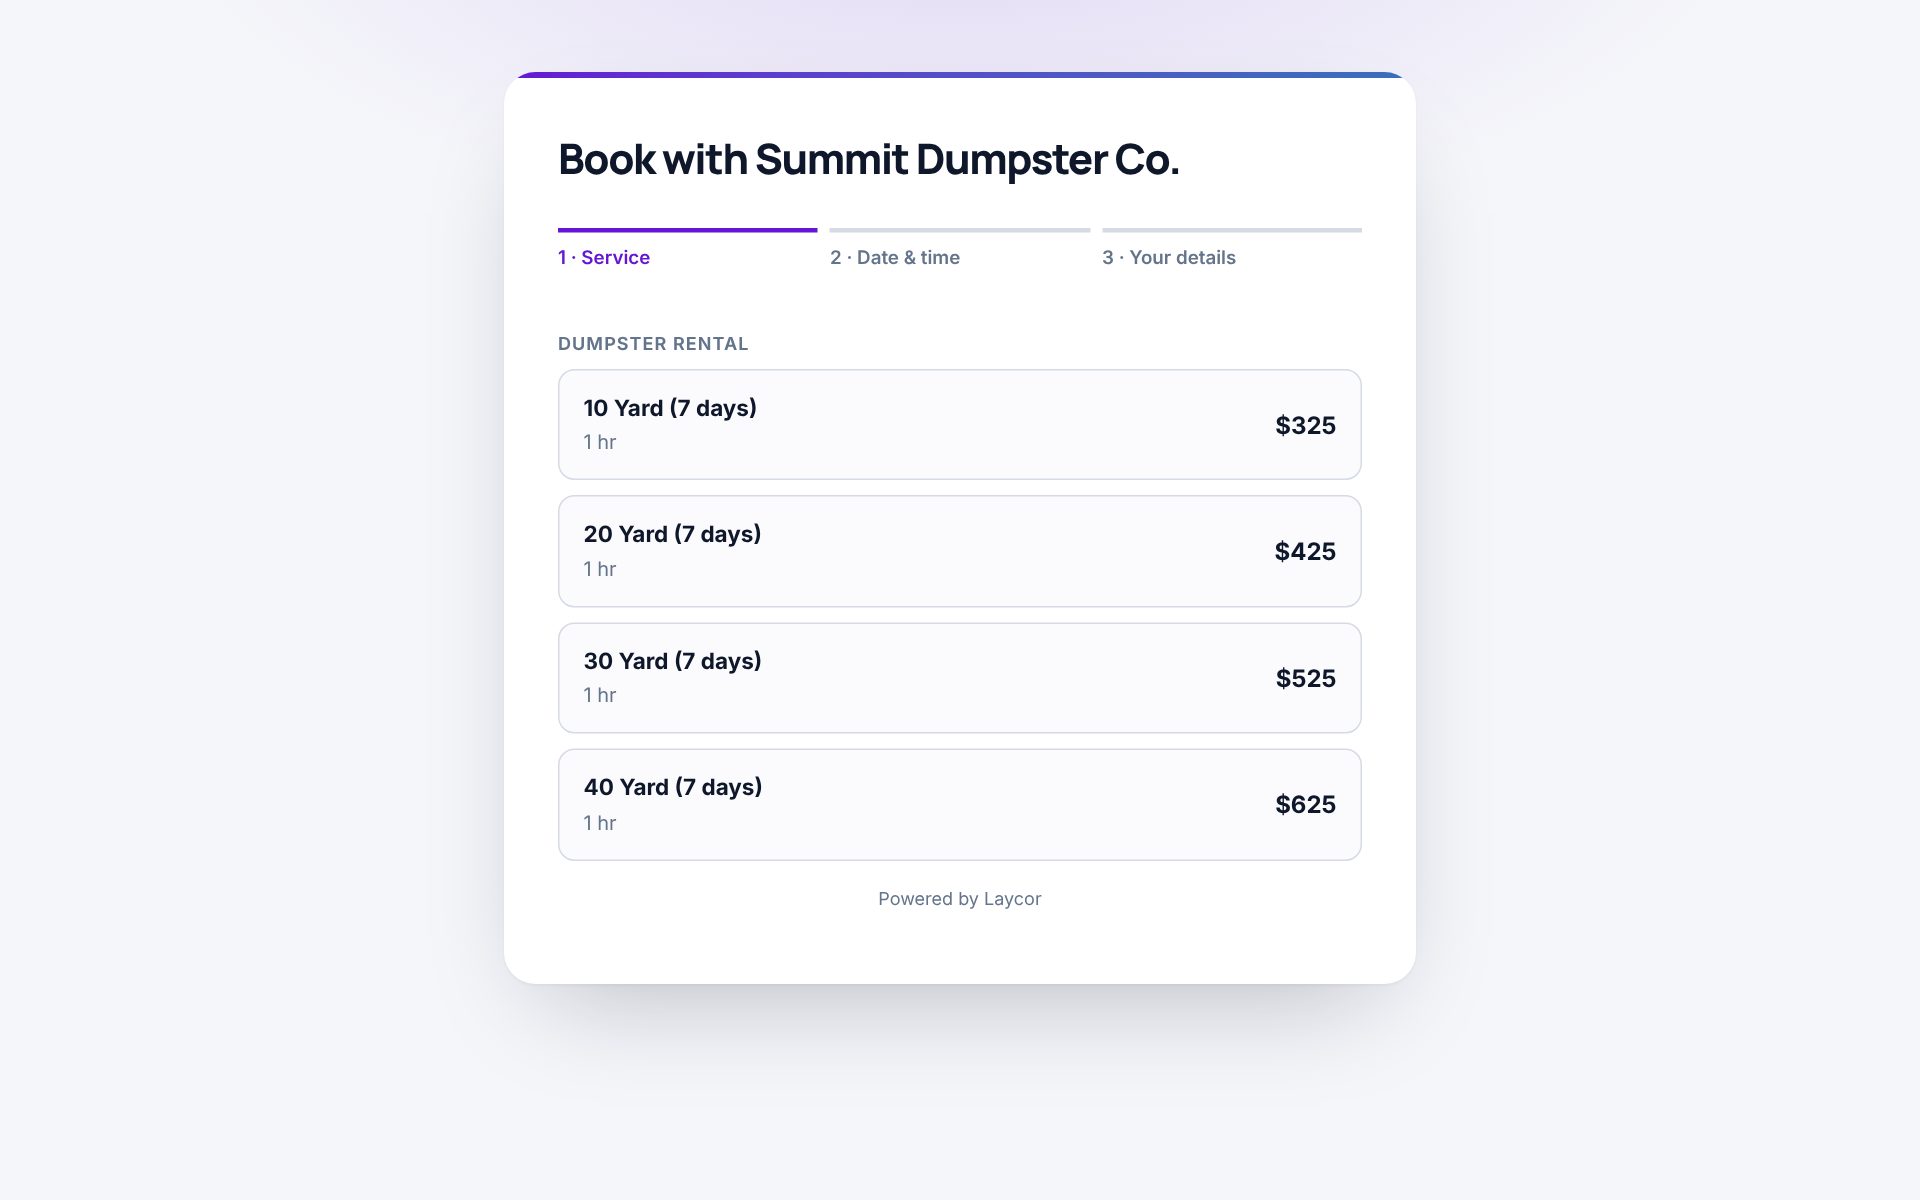
A booking page and embeddable widget with live availability. Customers pick a service, a time and pay a deposit if you want one. Confirmations and reminders go out by email and text.

How to use it

  1. Bookings → Hours & embed. Set business hours, buffer time and a deposit.
  2. Services → add what can be booked with a duration and price.
  3. Share your booking link or paste the embed code on your site, Google Business Profile or Instagram bio.
  4. New bookings appear on the Calendar and the customer’s record. Customers reschedule from a link in their confirmation.
The public booking page listing services with prices
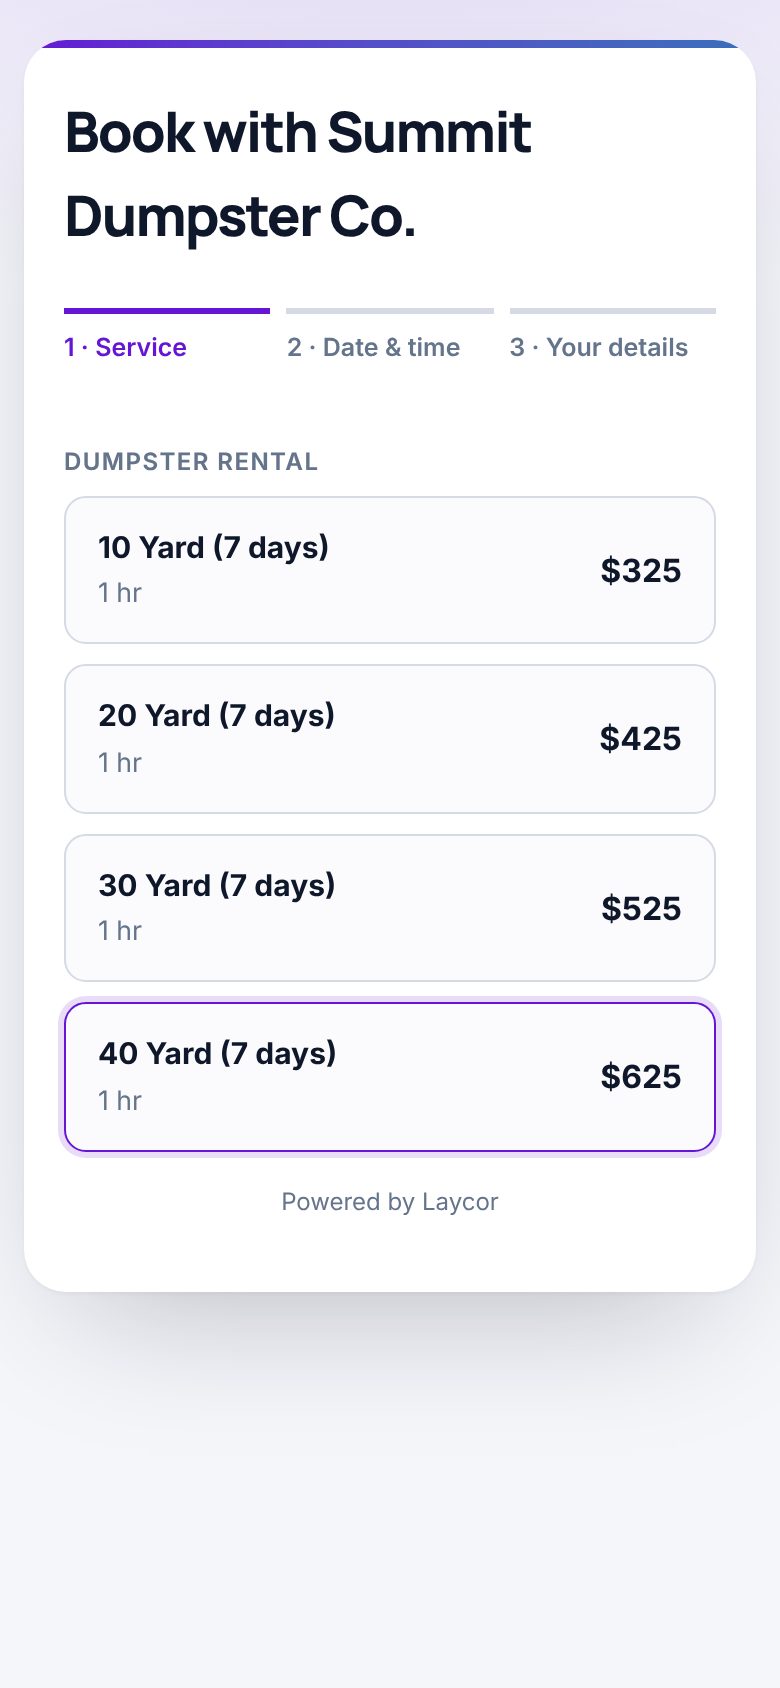
Booking page on a phone
IncludedSidebar → Leads → Lead inbox

Lead Inbox

Leads from Angi, Thumbtack, Google Local Services, Yelp and Facebook parsed into contacts automatically, each tagged with its source so you can see which ones actually close.

How to use it

  1. Leads → Lead inbox. Copy your private forwarding address.
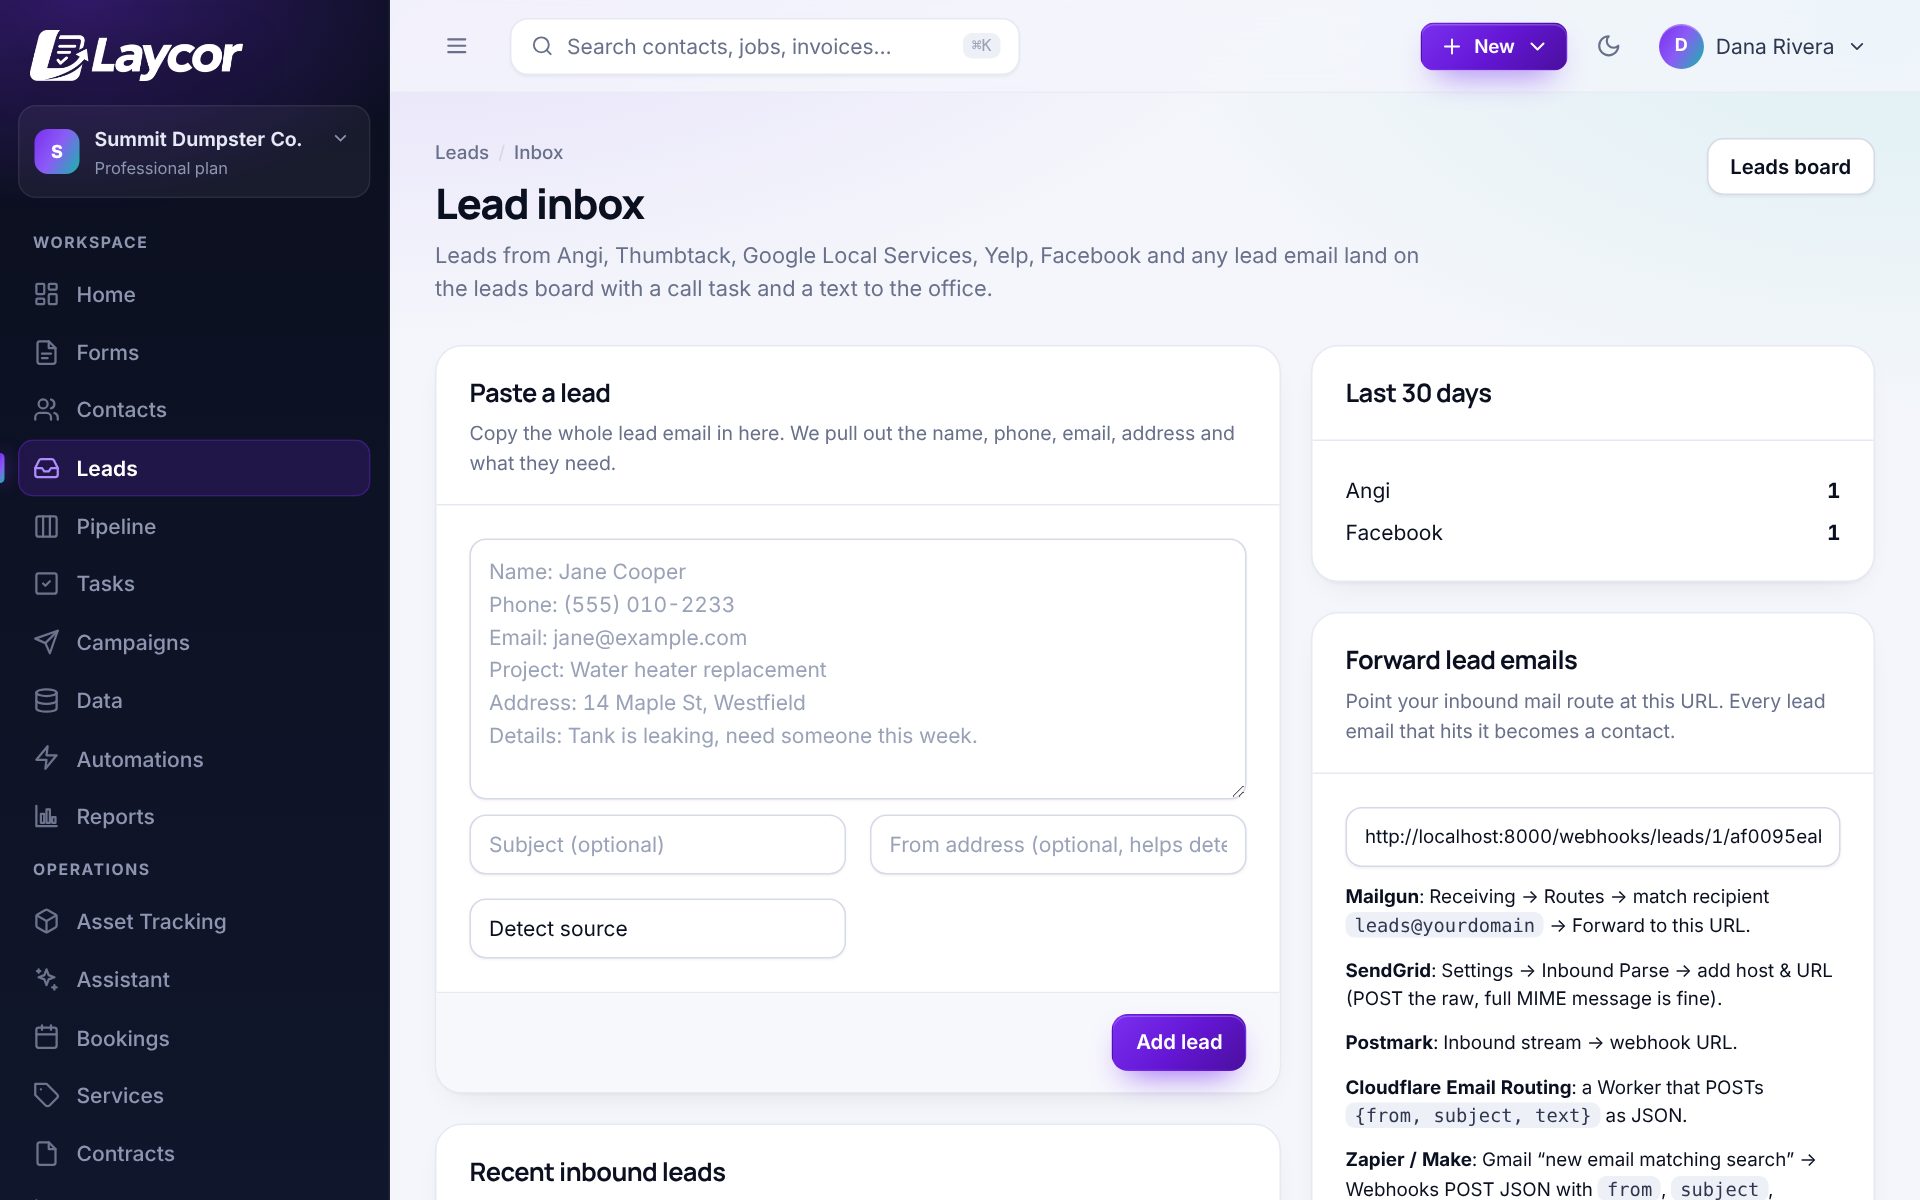
  2. In each lead marketplace, forward lead emails to that address. Laycor pulls out the name, phone, email, address and request.
  3. Connect the Facebook Lead Ads webhook for instant form leads.
  4. Each lead becomes a contact with a call task. Paste a lead by hand if one arrives another way.
The lead inbox with a paste-a-lead box and a forwarding address
IncludedSettings → Business Website

Business Website

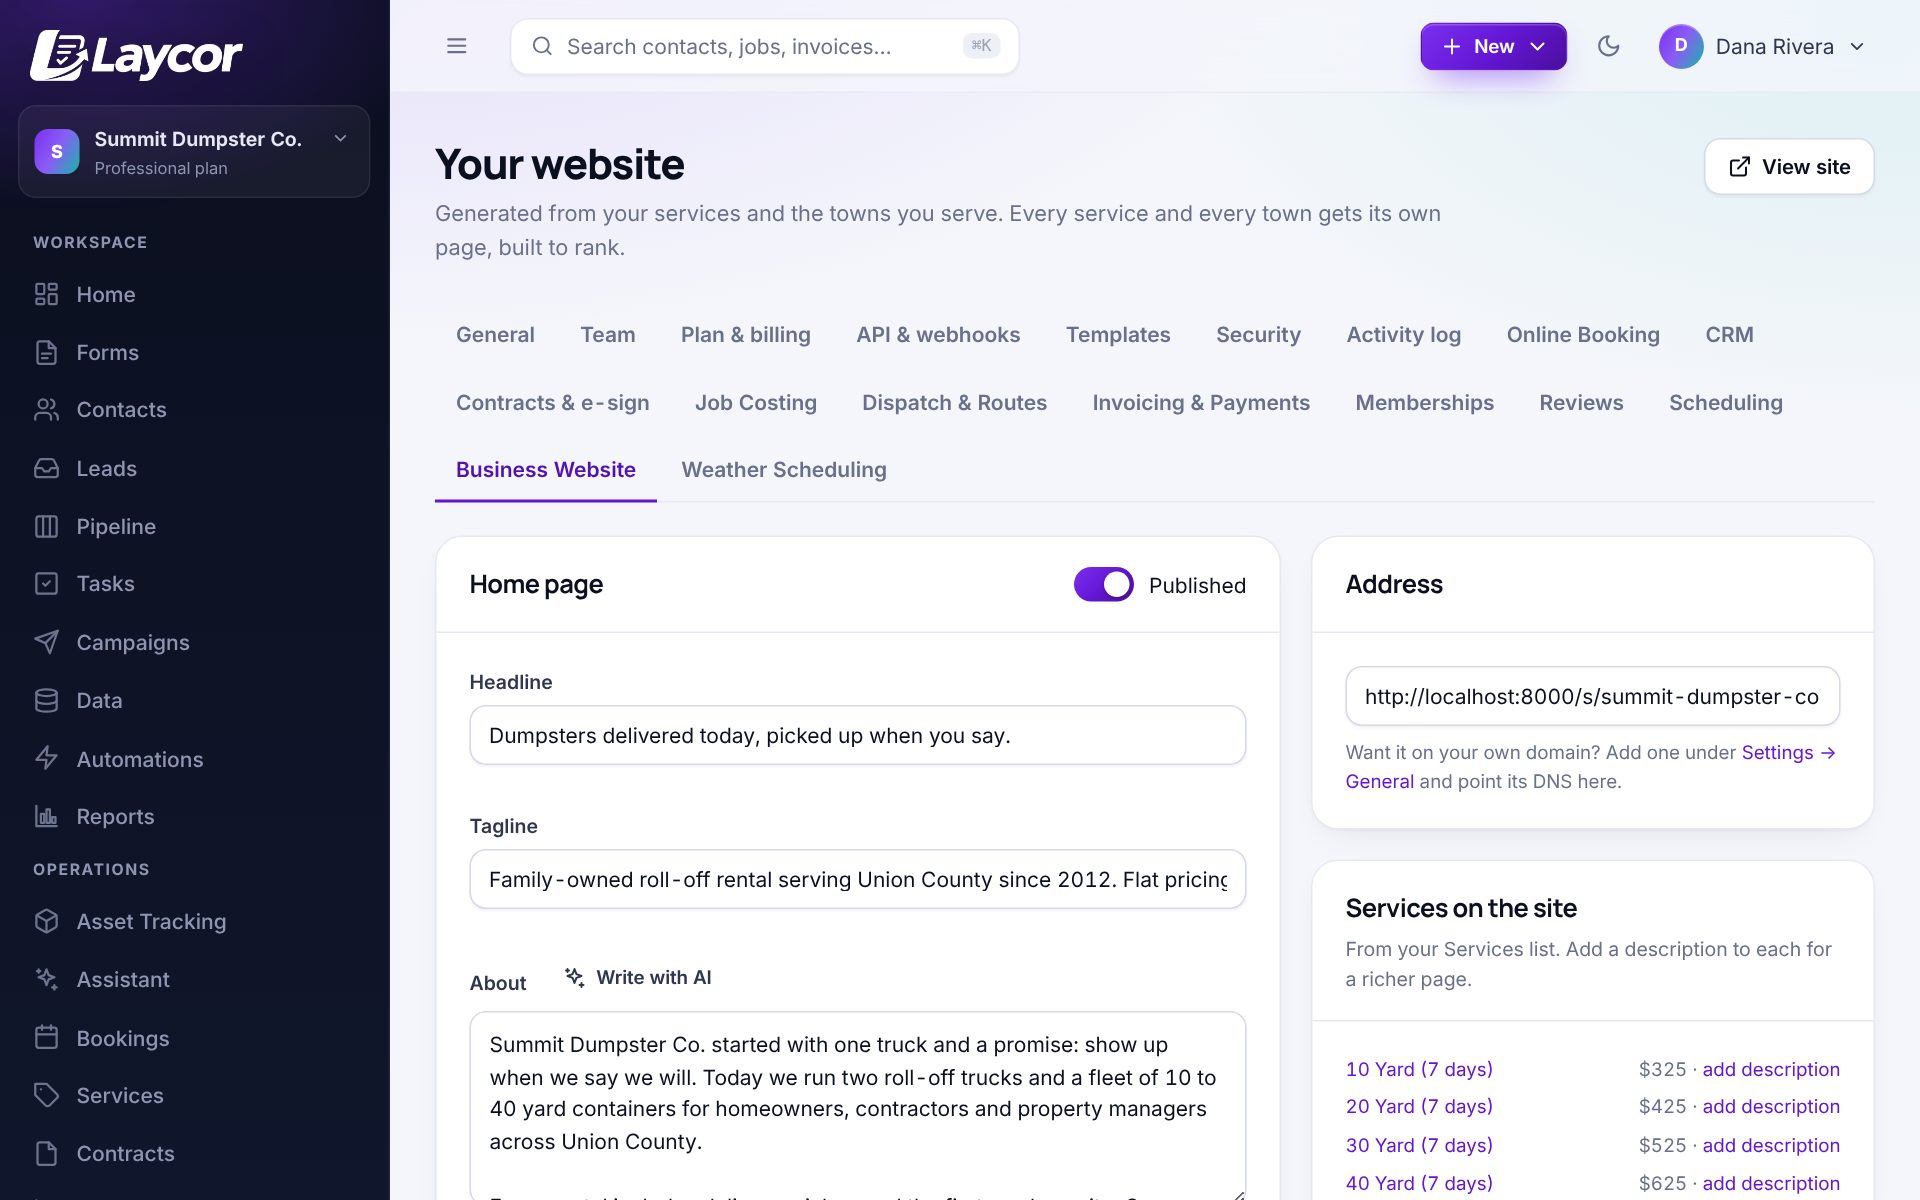
A fast, mobile-first website generated from your services and the towns you serve: a page per service, a page per town and a page for each service in each town, with structured data and a sitemap. Booking and forms are built in.

How to use it

  1. Settings → Business Website. Turn it on and write a headline, tagline and about text.
  2. Add the areas you serve. Laycor generates the service and area pages.
  3. Preview it on your Laycor address, then put it on your own domain by pointing a CNAME at Laycor under Settings → General.
  4. Every page carries your booking button and contact form.
Website settings with headline, tagline, about text and services on the site
IncludedSidebar → Reviews

Reviews

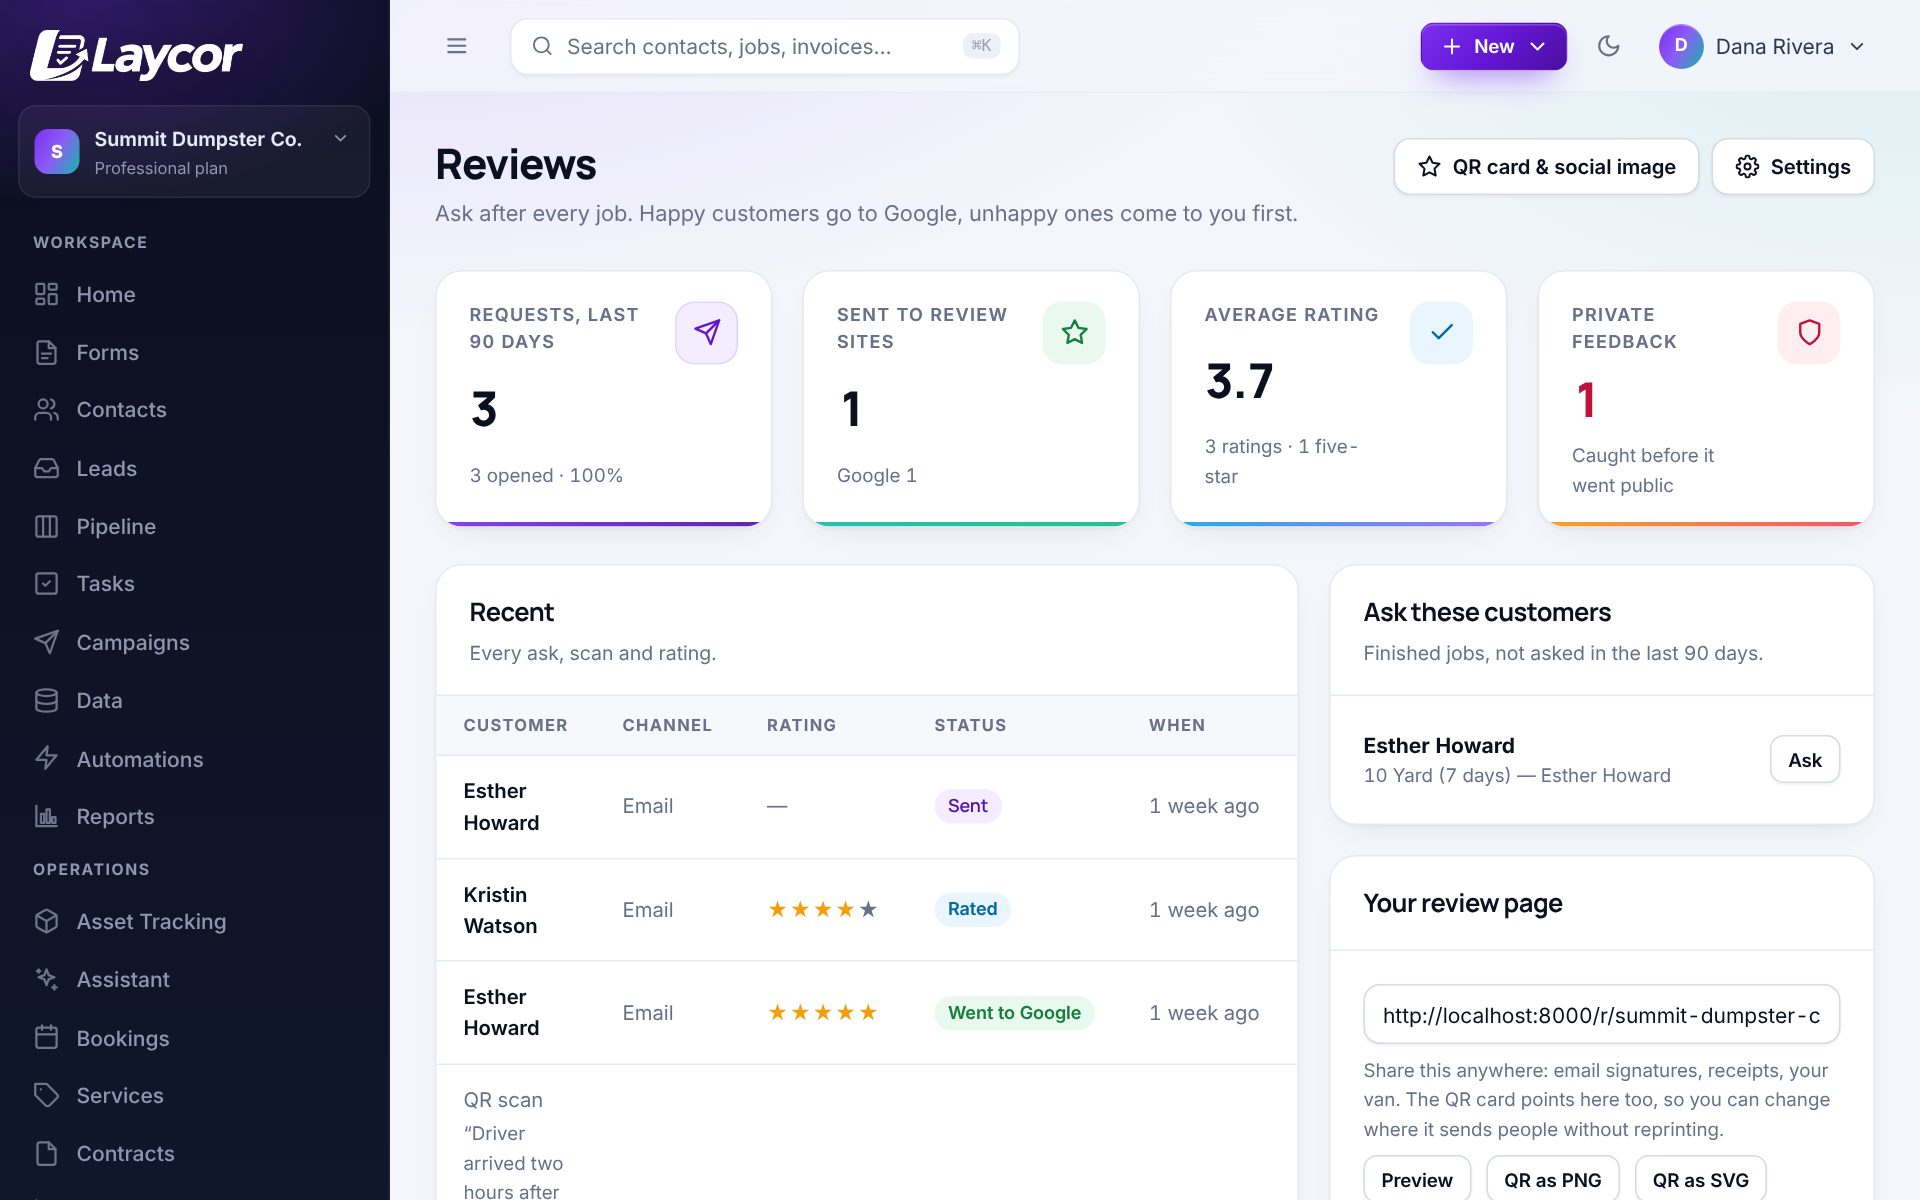
Ask for a review the moment a job is done. Happy customers go straight to Google, Yelp or Facebook; anyone unhappy lands on a private feedback form that emails you instead. Print a QR card for the truck or counter.

How to use it

  1. Reviews → Settings. Paste your Google, Yelp and Facebook review links and choose email, text or both.
  2. Set the delay after a job is marked done. Requests send themselves.
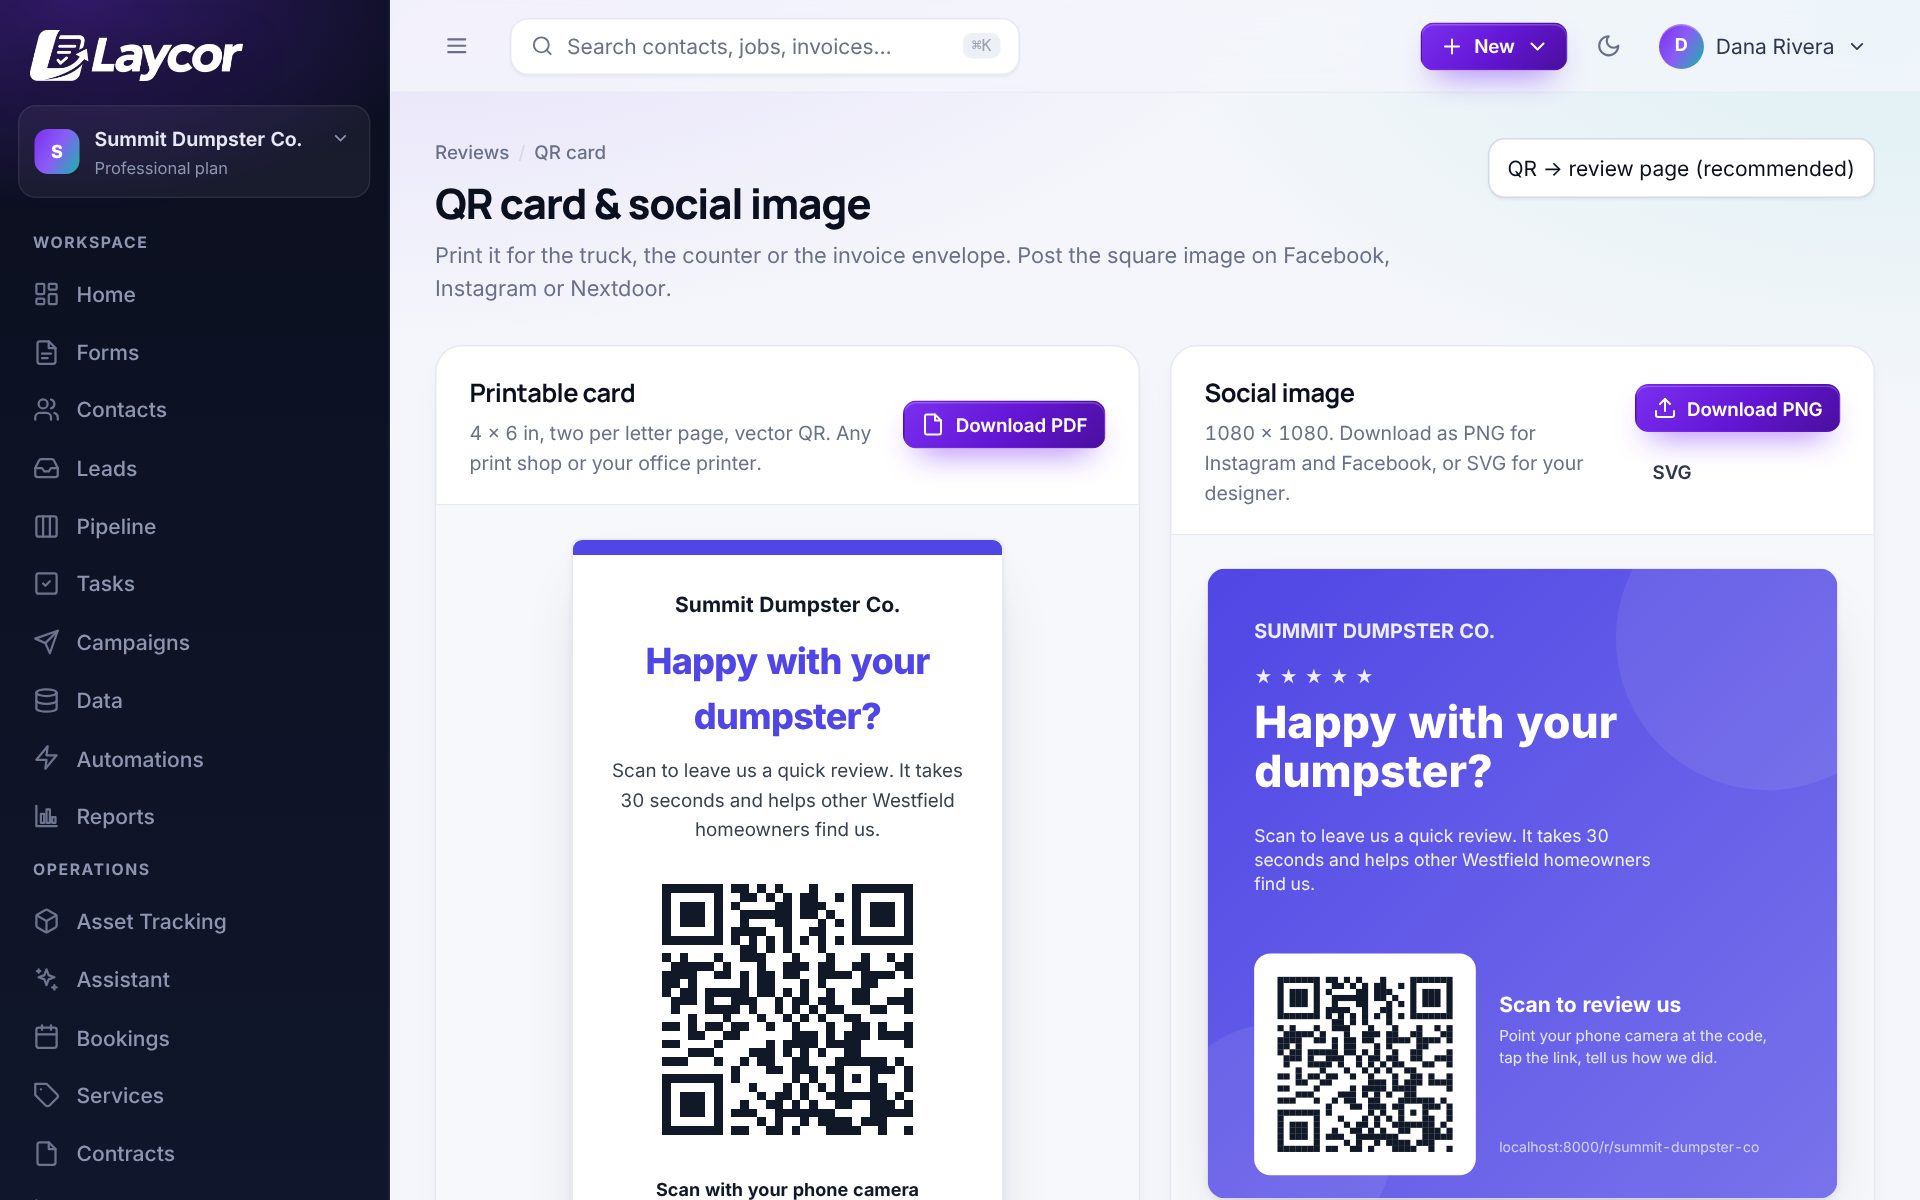
  3. Reviews → QR card: download a printable card and a square image for social media.
  4. Watch ratings, replies and the customers still to ask on the Reviews page.
Reviews dashboard with requests sent, average rating and a list of recent reviews
A printable QR card and social image for review requests
Win the work

Know every customer, follow up on every lead, quote in a way that closes.

IncludedSidebar → Contacts

CRM & Contacts

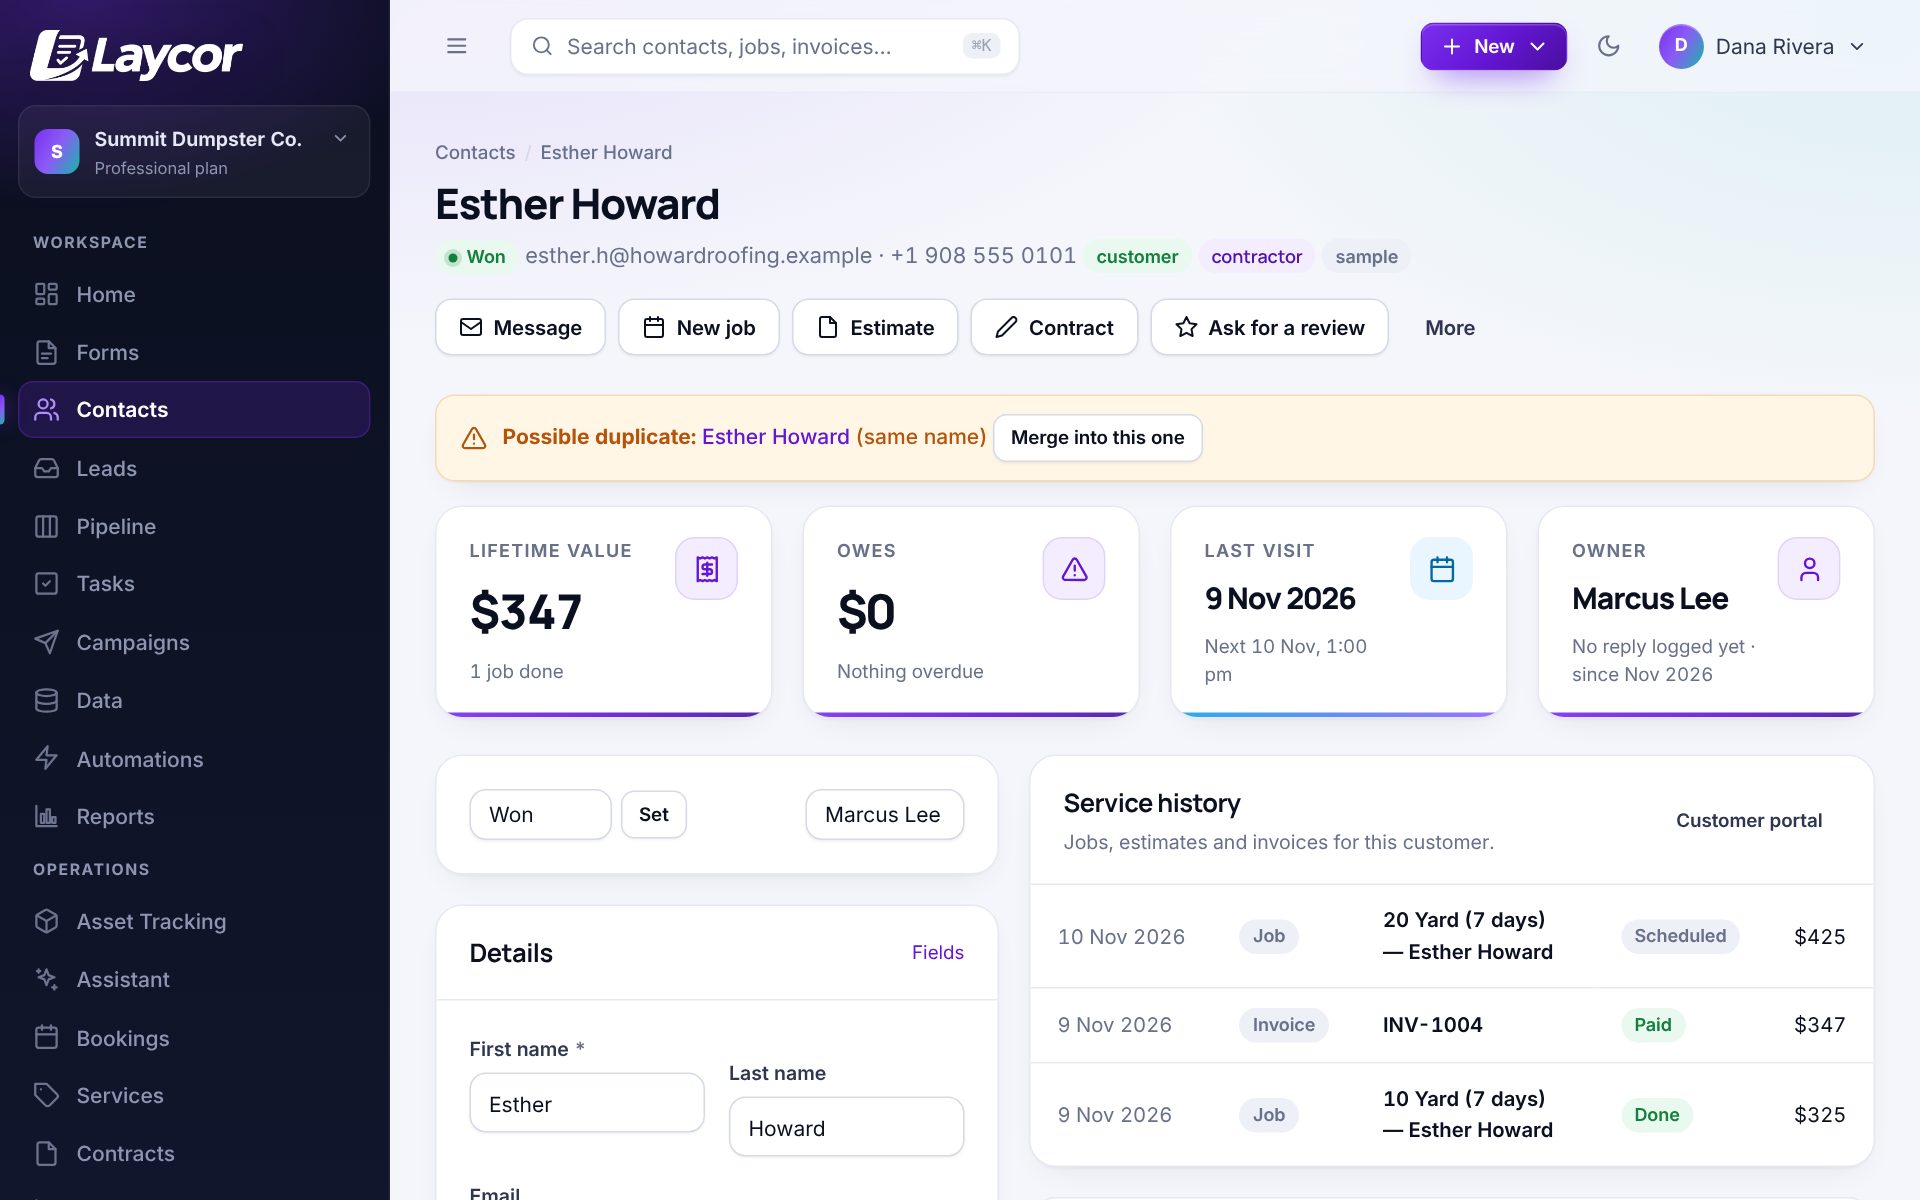
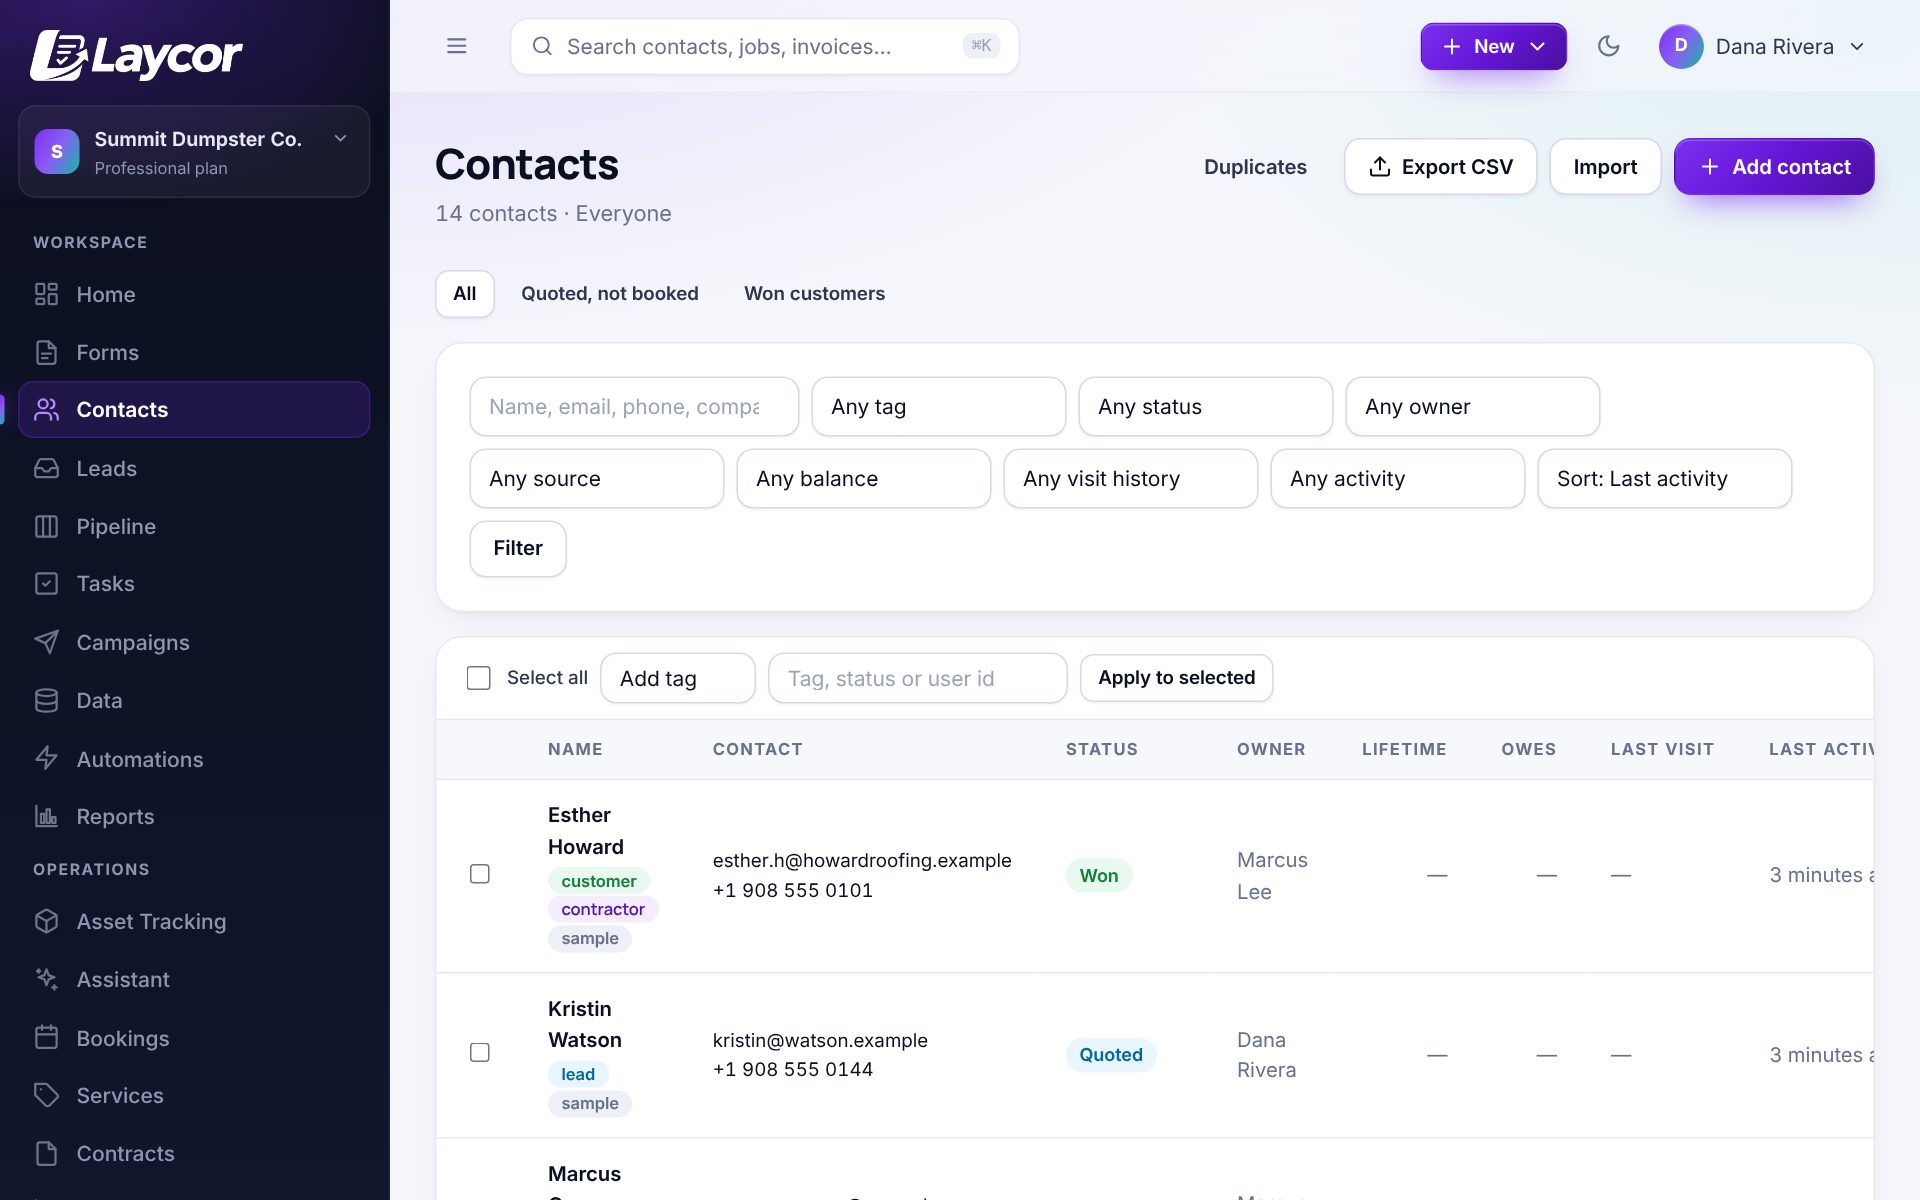
Every form, booking, estimate, invoice, text and review lands on the customer’s record. See lifetime value, open balance, properties, service history and the next visit at a glance. Filters, saved segments, tags and a CSV import and export are built in.

How to use it

  1. Contacts lists everyone. Filter by tag, lead status, balance, last visit or activity and save the view as a segment.
  2. Open a contact to message them, book a job, send an estimate or contract, or ask for a review from one toolbar.
  3. Properties keep each service address with its own history. Merge duplicates when Laycor spots them.
  4. Import an existing customer list from CSV; export any segment the same way.
A customer record with lifetime value, balance, service history and properties
The contacts list with filters
IncludedSidebar → Leads · Pipeline

Leads & Pipeline

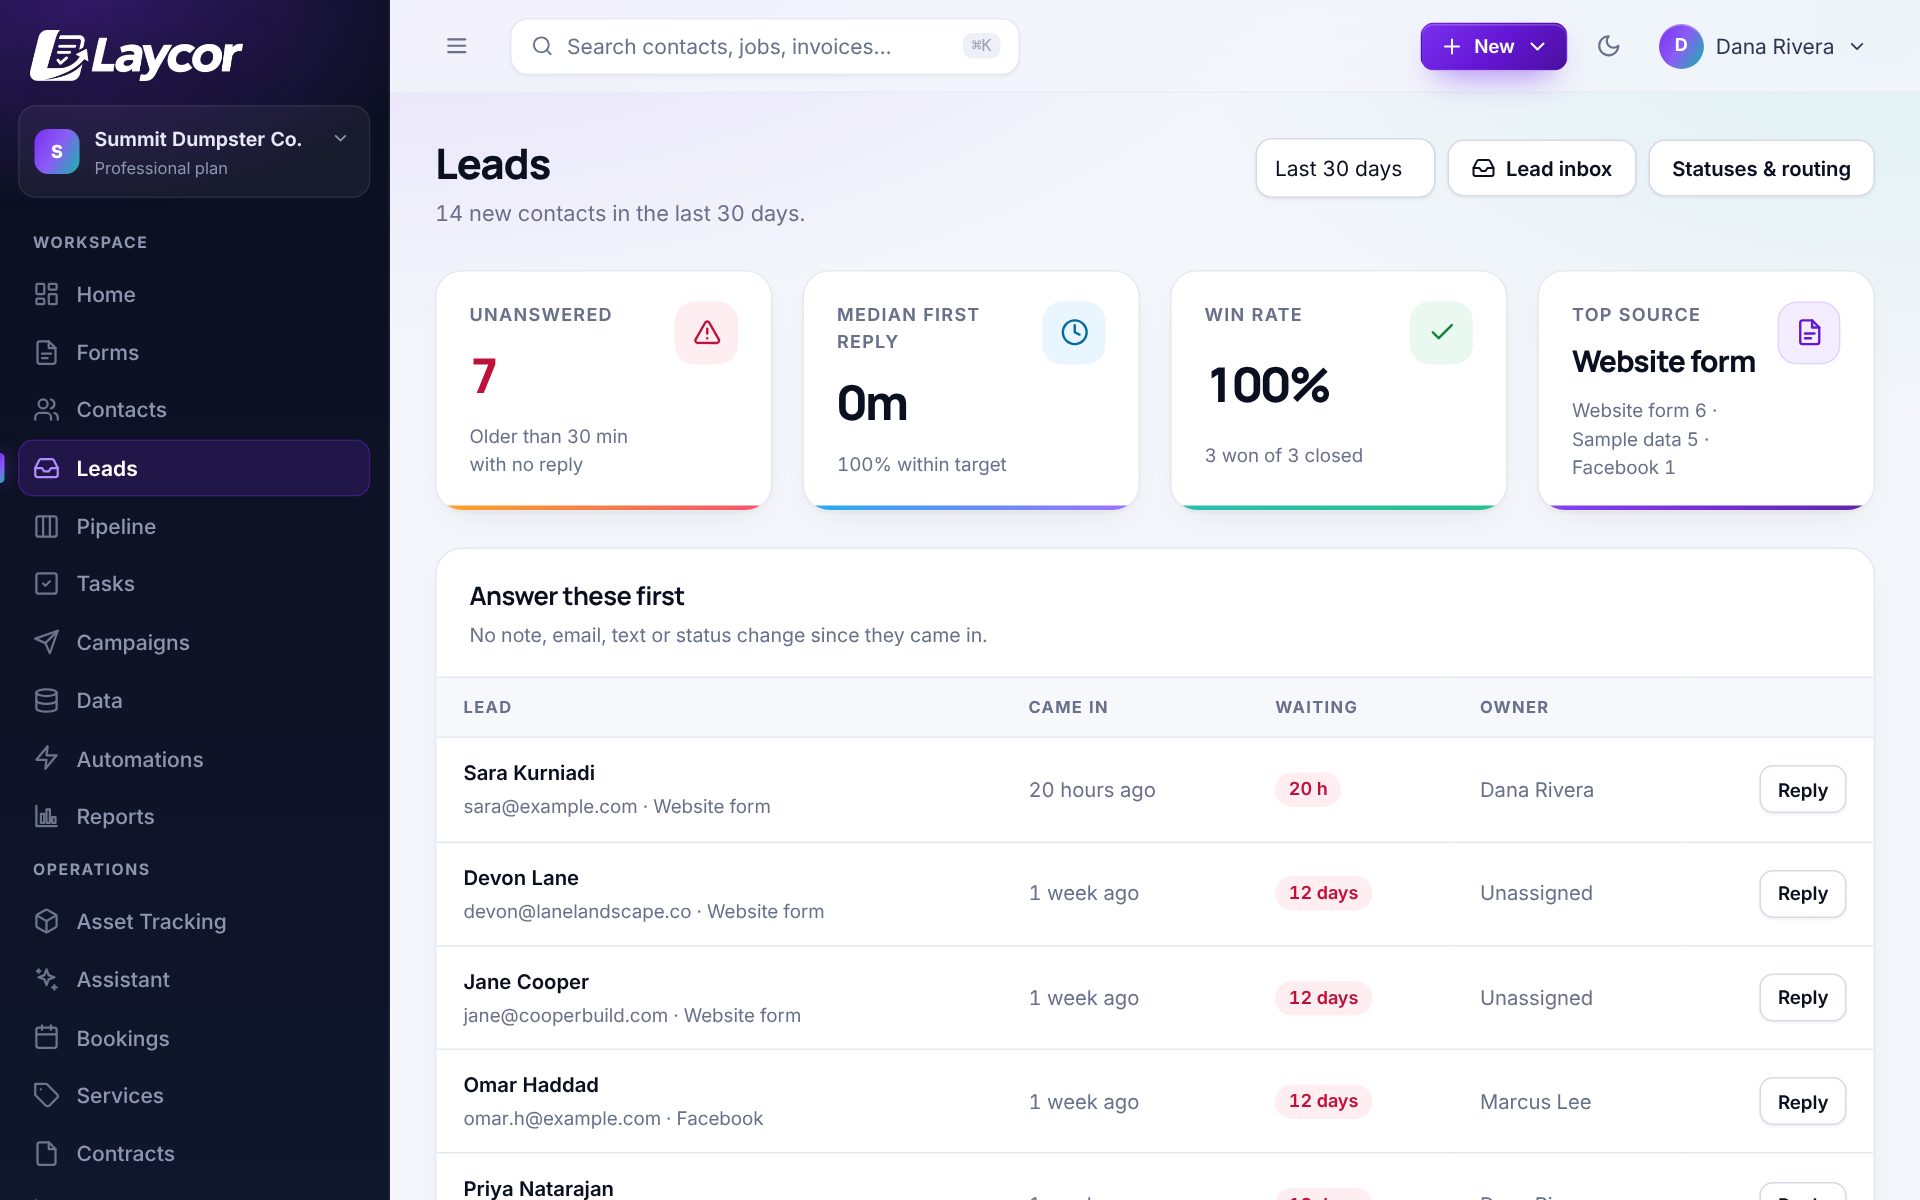
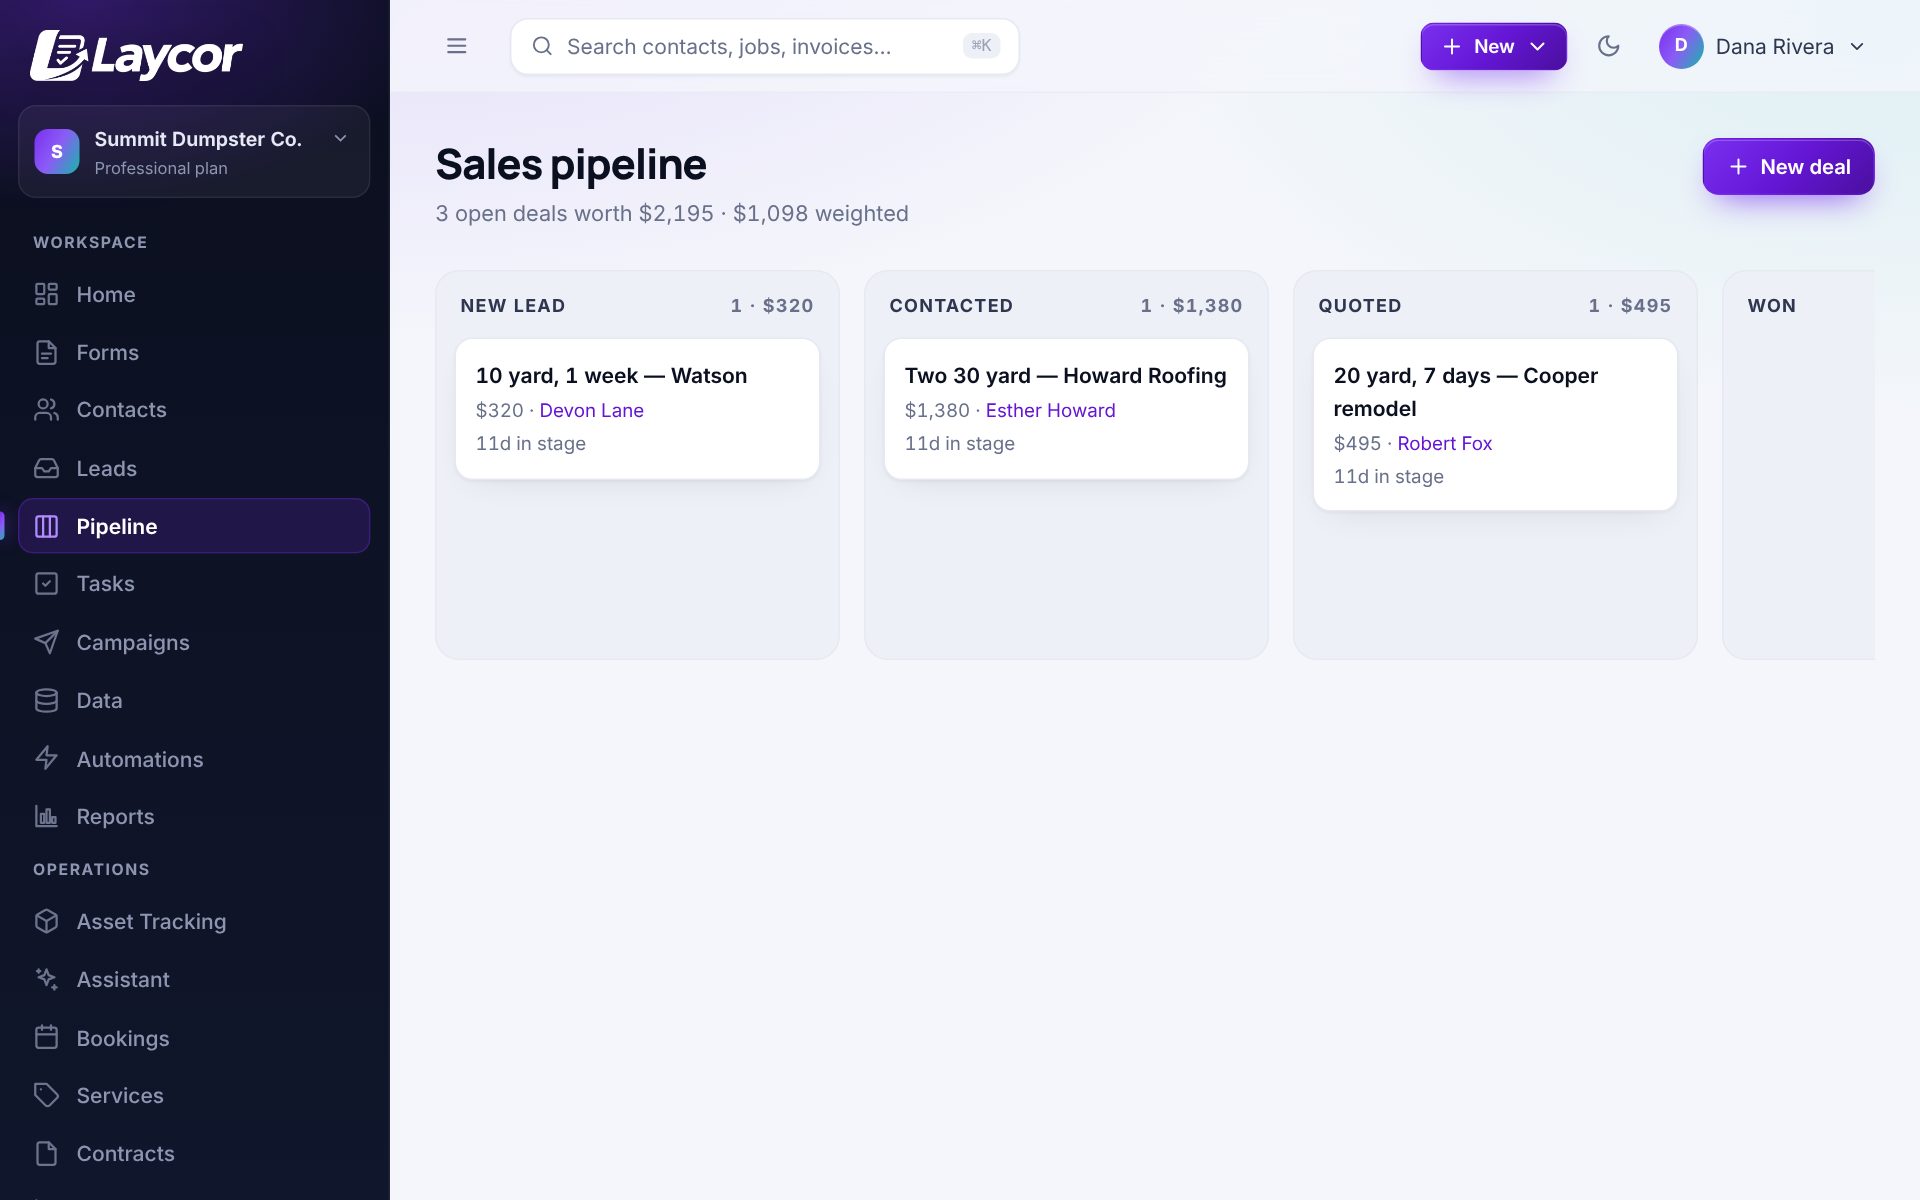
A leads board shows how fast you respond and how many you win, by source. Deals move across a pipeline from New to Won with the value at every stage.

How to use it

  1. Leads shows new enquiries from the last 30 days with their status, source and response time.
  2. Click Reply to answer by email or text; the reply is timed and logged.
  3. Pipeline shows every open deal as a card. Drag it between stages; set the value and expected close.
  4. Automations can create a deal from a form or move one when an estimate is approved.
The leads board with response time, win rate and top source
The sales pipeline board
IncludedSidebar → Tasks

Tasks

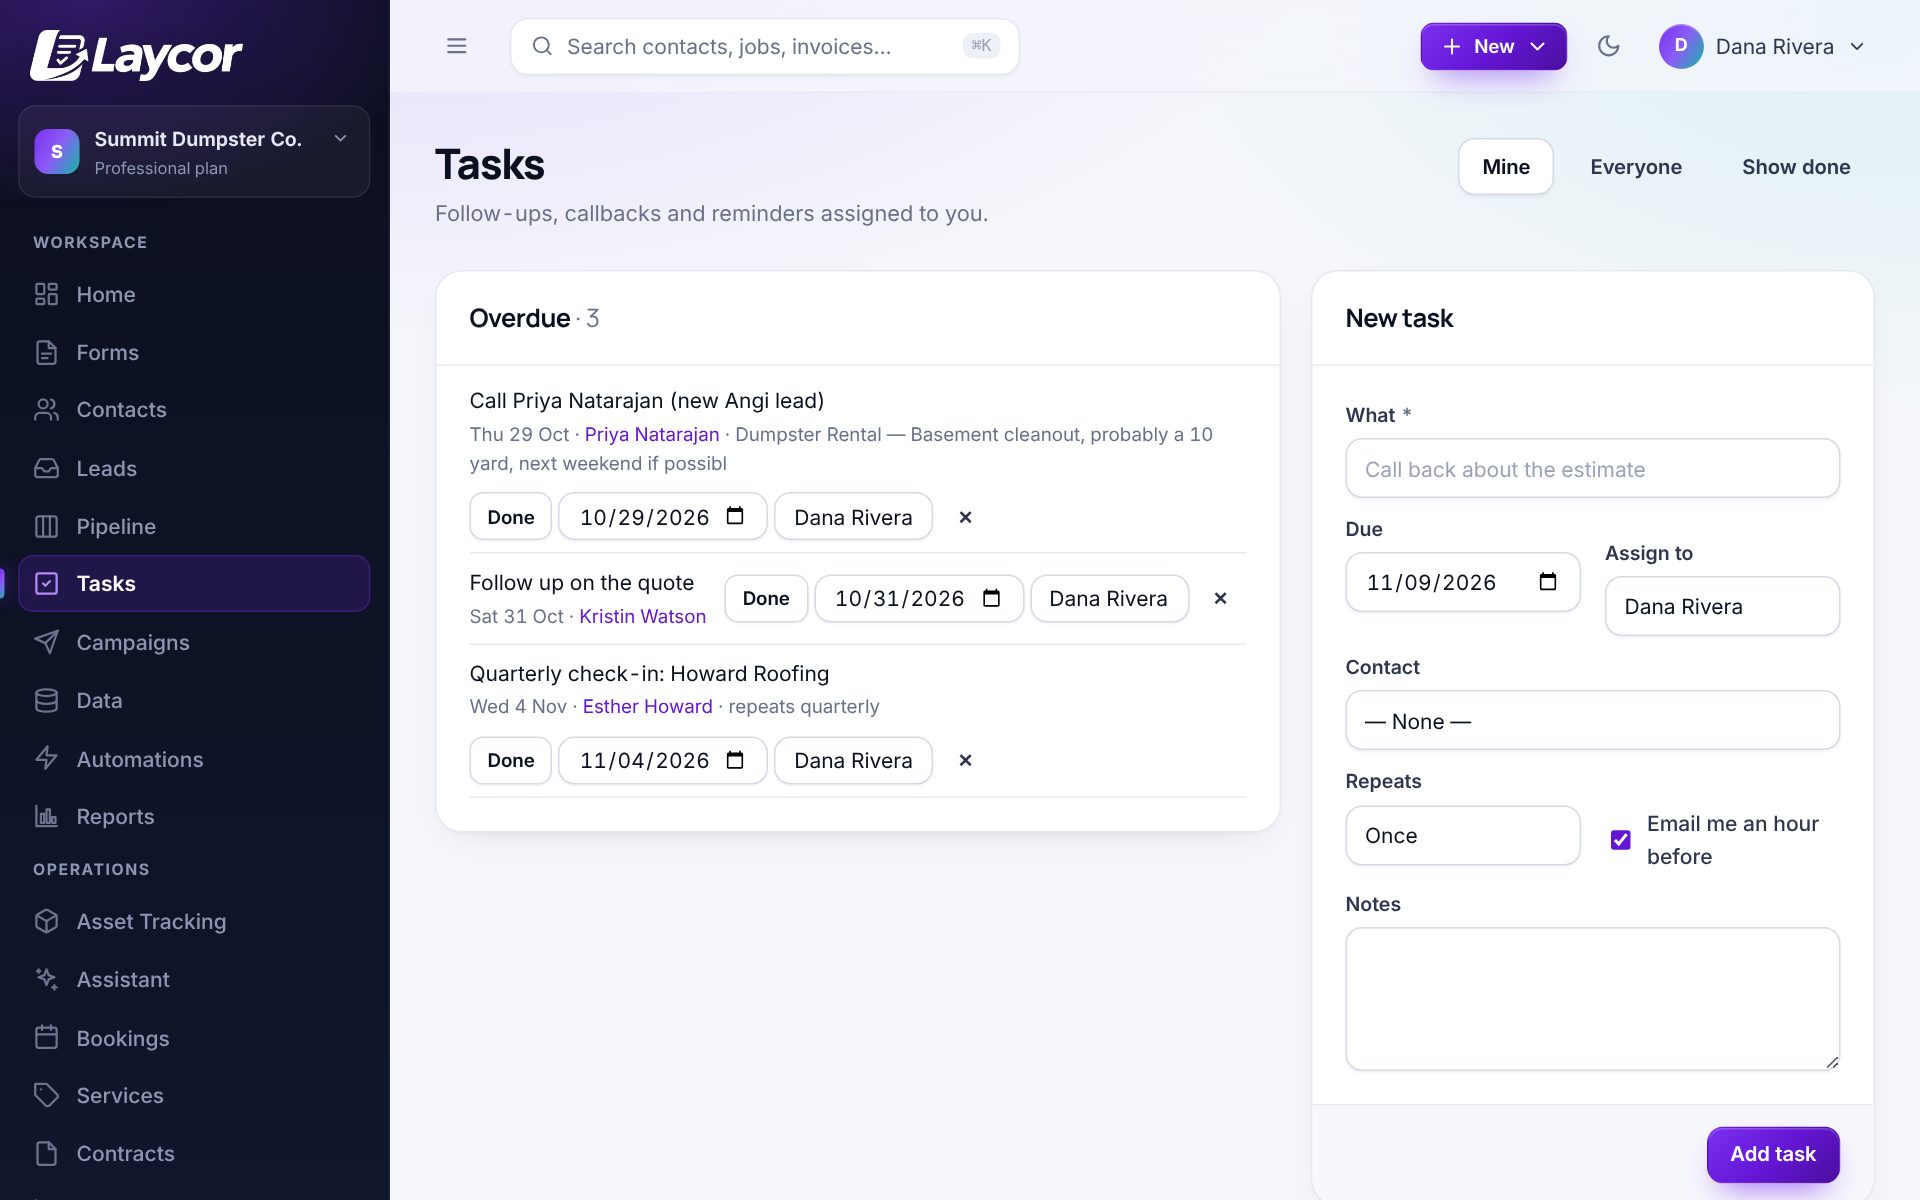
Follow-ups, callbacks and reminders tied to a contact, assigned to a person, with an email reminder an hour before they are due.

How to use it

  1. Add a task from any contact, lead or the Tasks page. Pick who owns it and when it is due.
  2. Mine shows your list; Everyone shows the team’s. Overdue items float to the top.
  3. Tick Done when it is handled; it stays on the contact’s timeline.
Tasks list with overdue items and a new task form
Sidebar → Estimates

Estimates

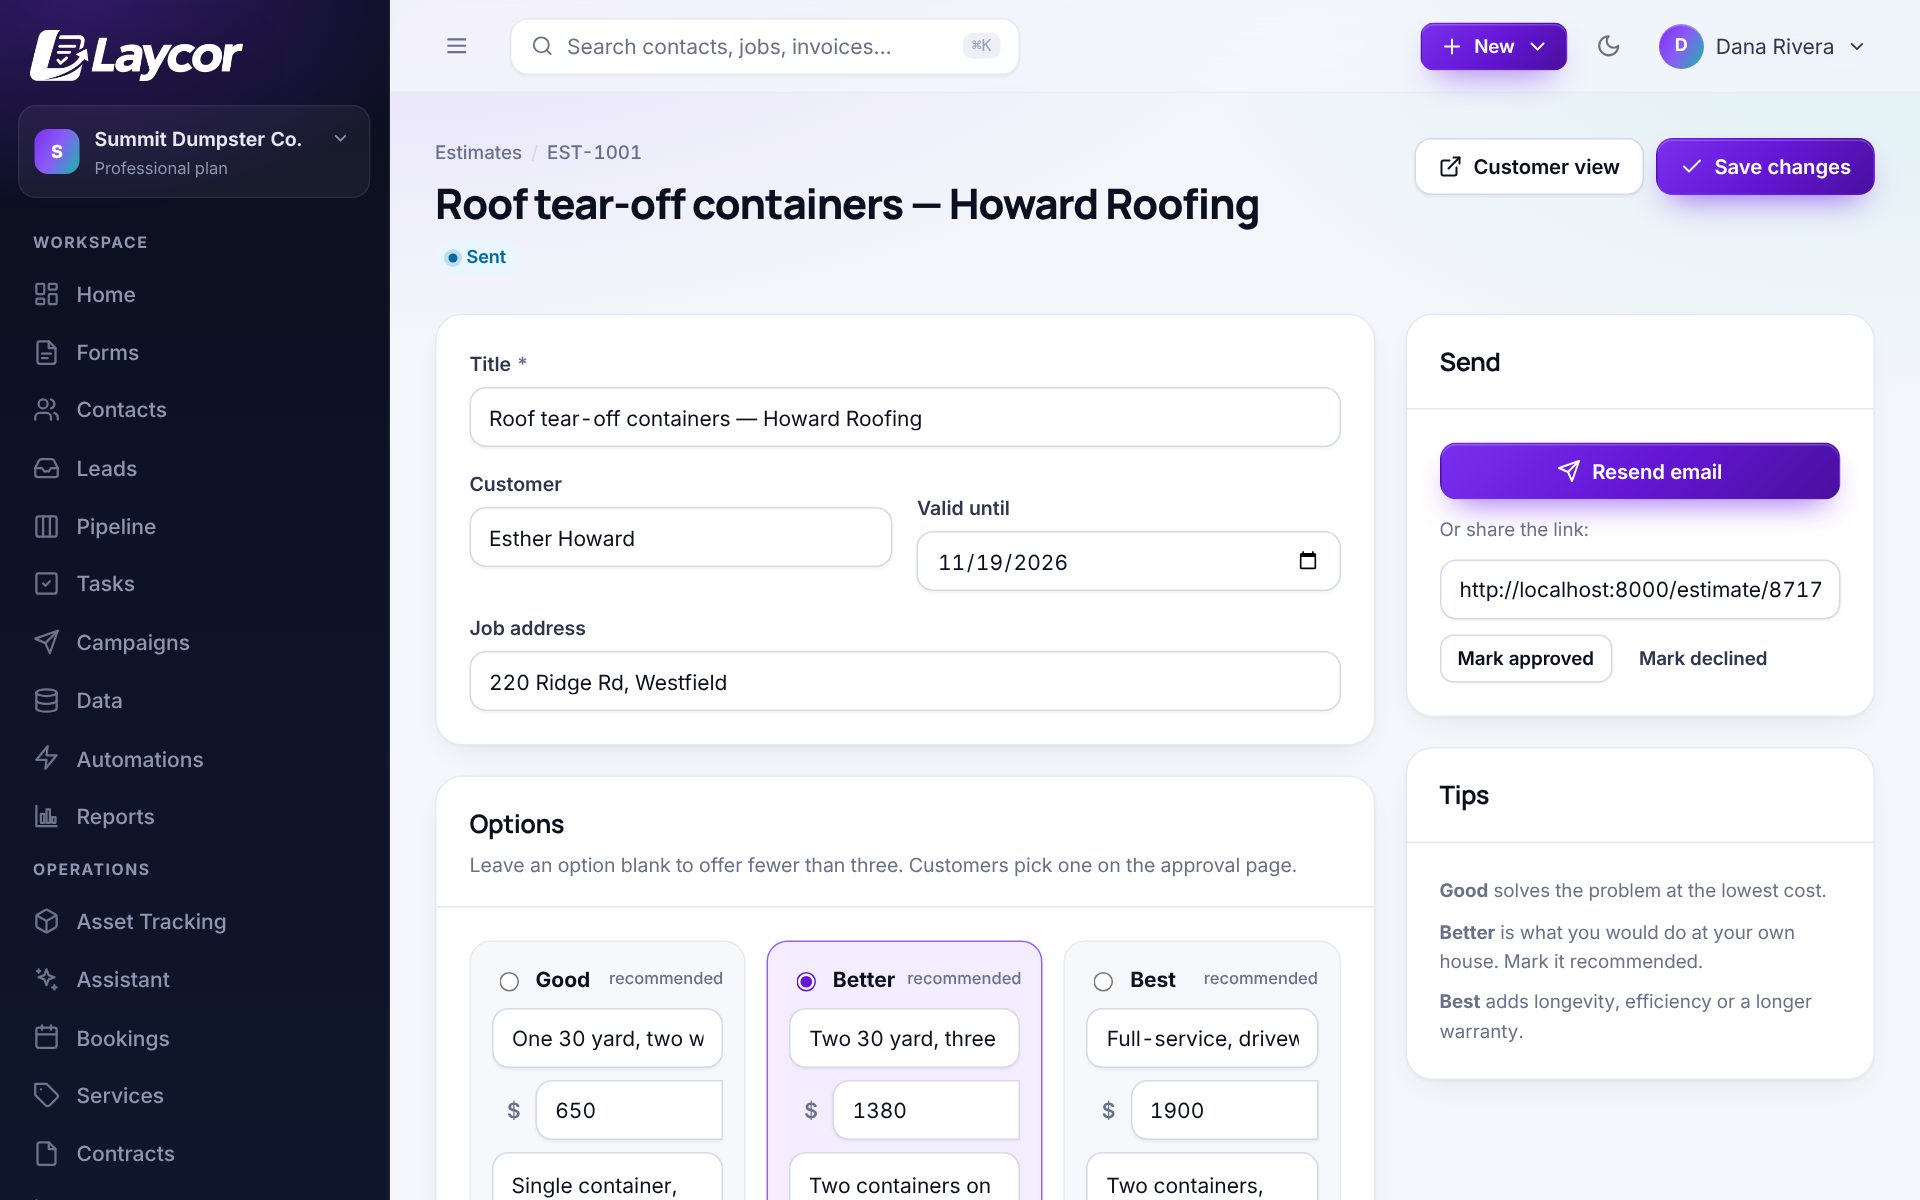
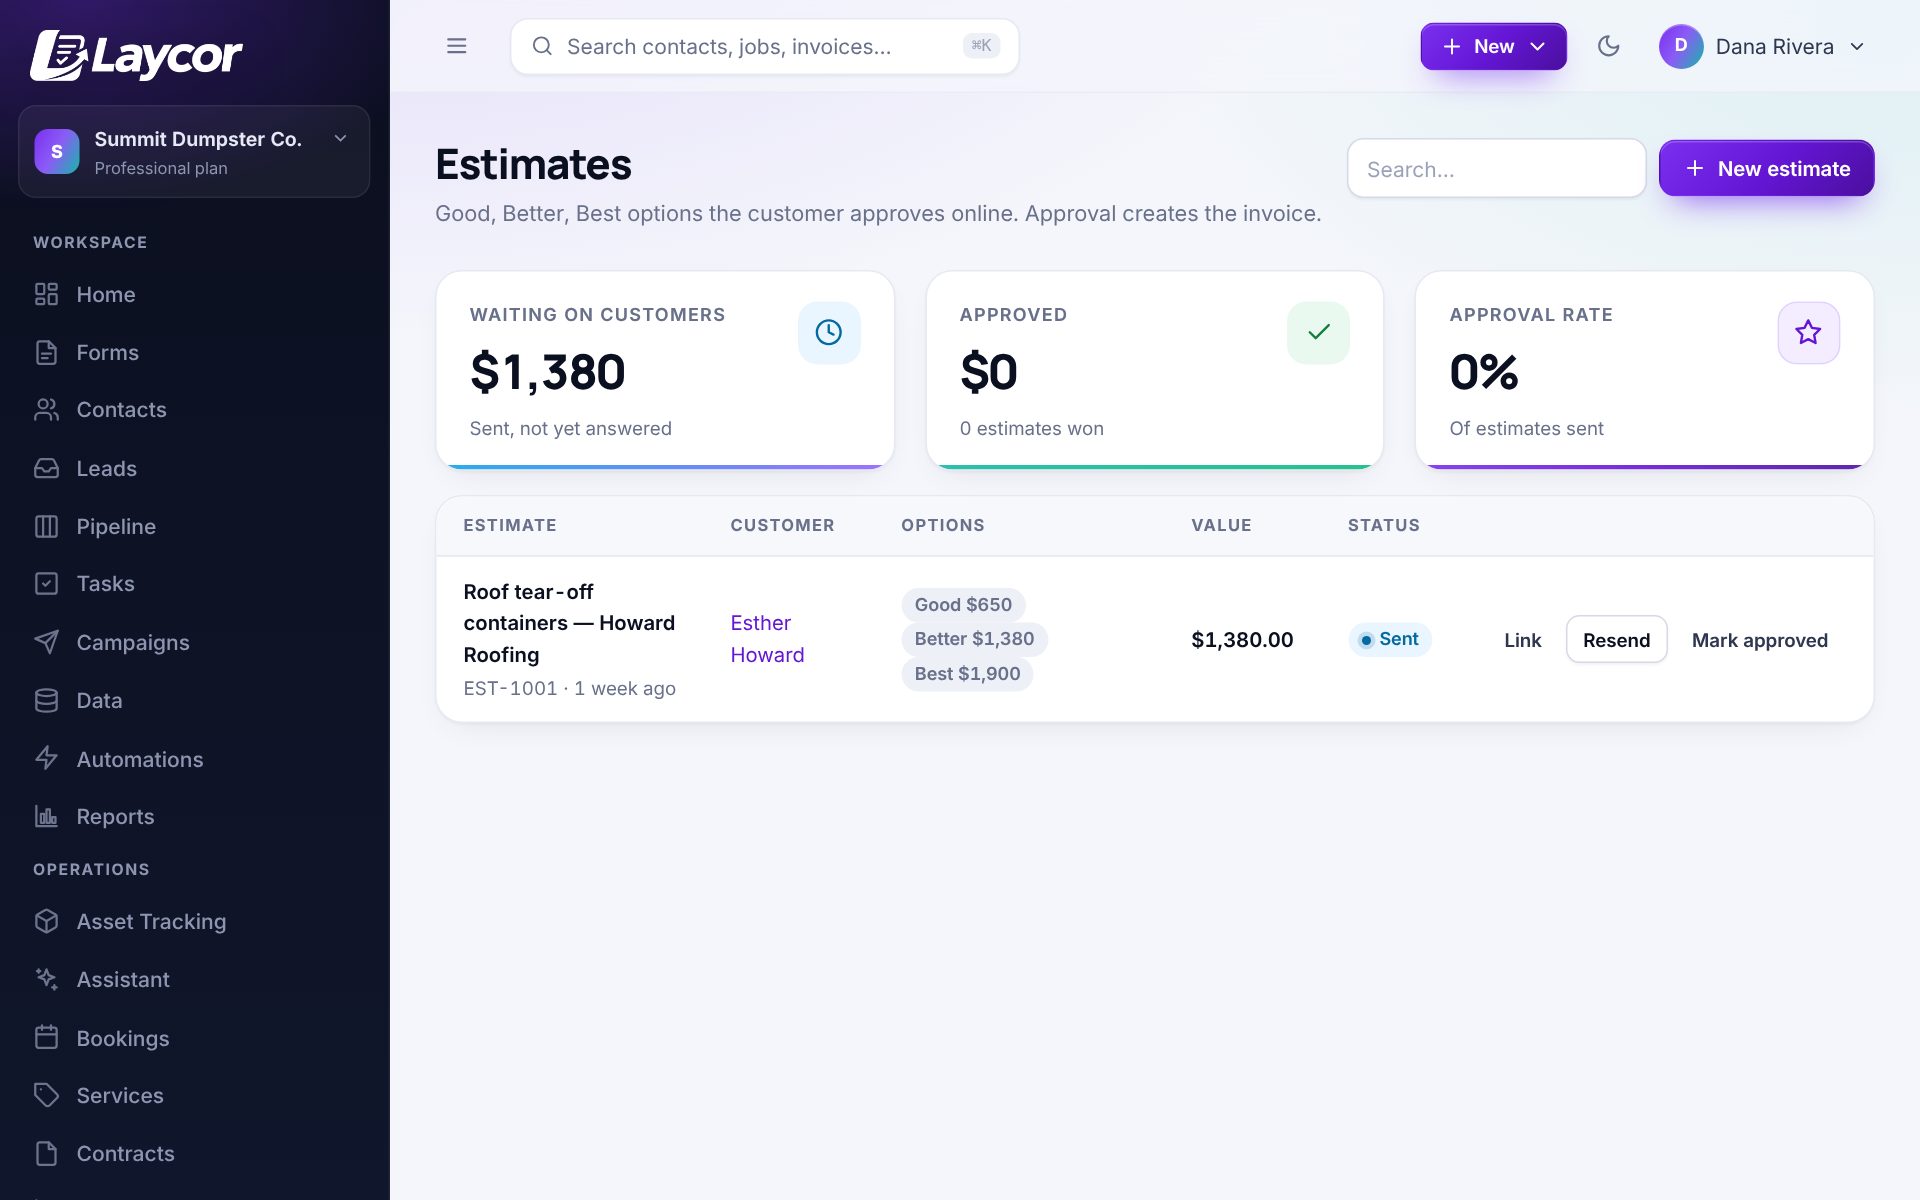
Quotes with up to three options. Email a link; the customer picks and signs on their phone. Approval creates the invoice and tells the office. Average ticket goes up when people can choose.

How to use it

  1. Estimates → New estimate. Pick the customer and address and write the Good, Better and Best options with prices.
  2. Send the link by email, or open the customer view and walk them through it on site.
  3. The customer taps an option and signs. You get a notification and the estimate flips to Approved.
  4. Approval creates the invoice with the chosen option, ready to schedule and bill.
An estimate with Good, Better and Best options and a send panel
The estimates list with amounts waiting on customers
IncludedSidebar → Contracts

Contracts & e-sign

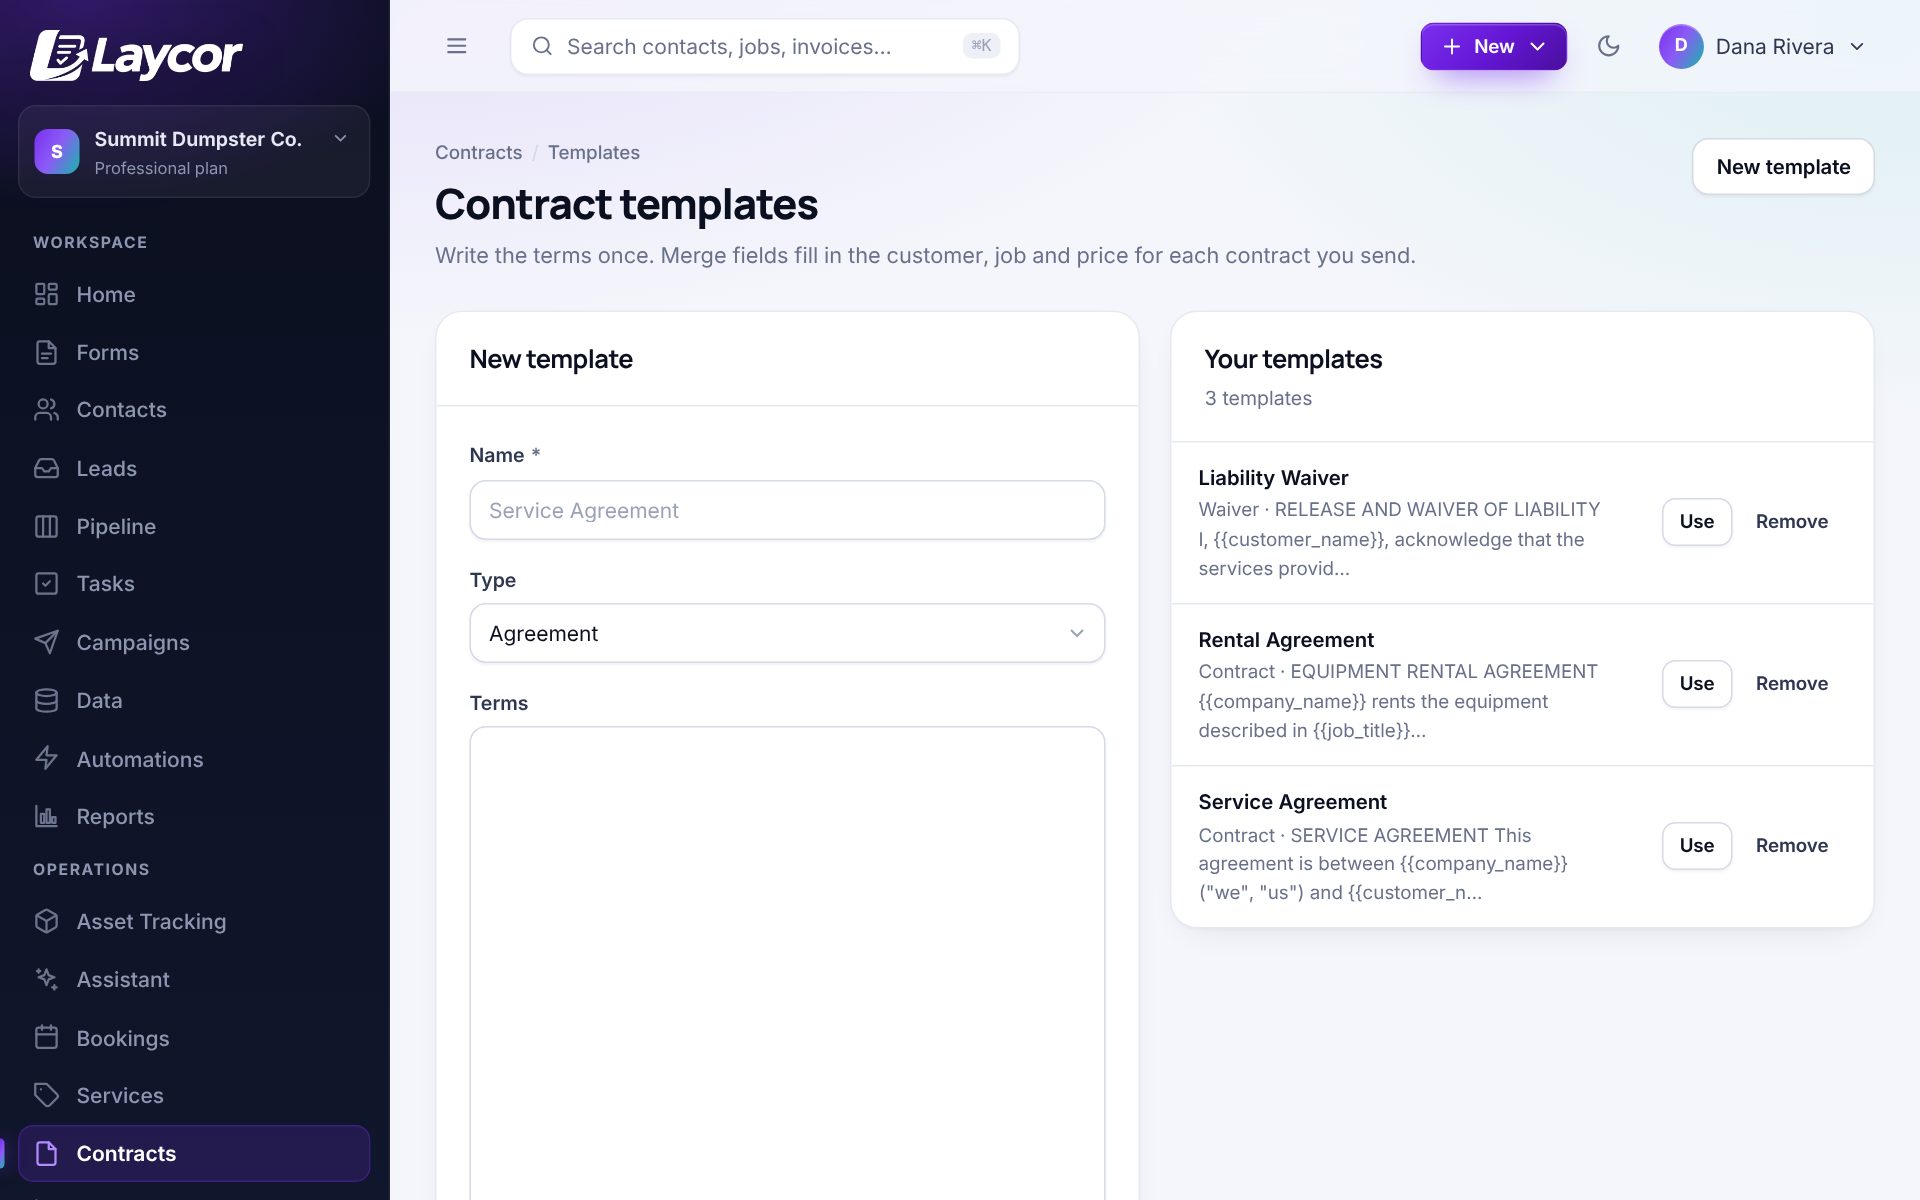
Write a service agreement, rental terms or liability waiver once with merge fields for the customer, job and price. Send a signing link; the customer draws or types a signature and you get a PDF with who signed, when, from where and a fingerprint of exactly what they saw.

How to use it

  1. Contracts → Templates. Edit the three starters or write your own using fields like {{customer_name}} and {{price}}.
  2. From a contact or job, choose Contract, pick the template and send the link.
  3. The customer reads and signs on any device. The signed PDF attaches to their record and the job.
  4. Signed contracts show on the Contracts page with their status: sent, signed or declined.
Contract templates for a liability waiver, rental agreement and service agreement
Do the work

Schedule it, route it, and give the crew a phone app they will actually use.

IncludedSidebar → Calendar

Scheduling

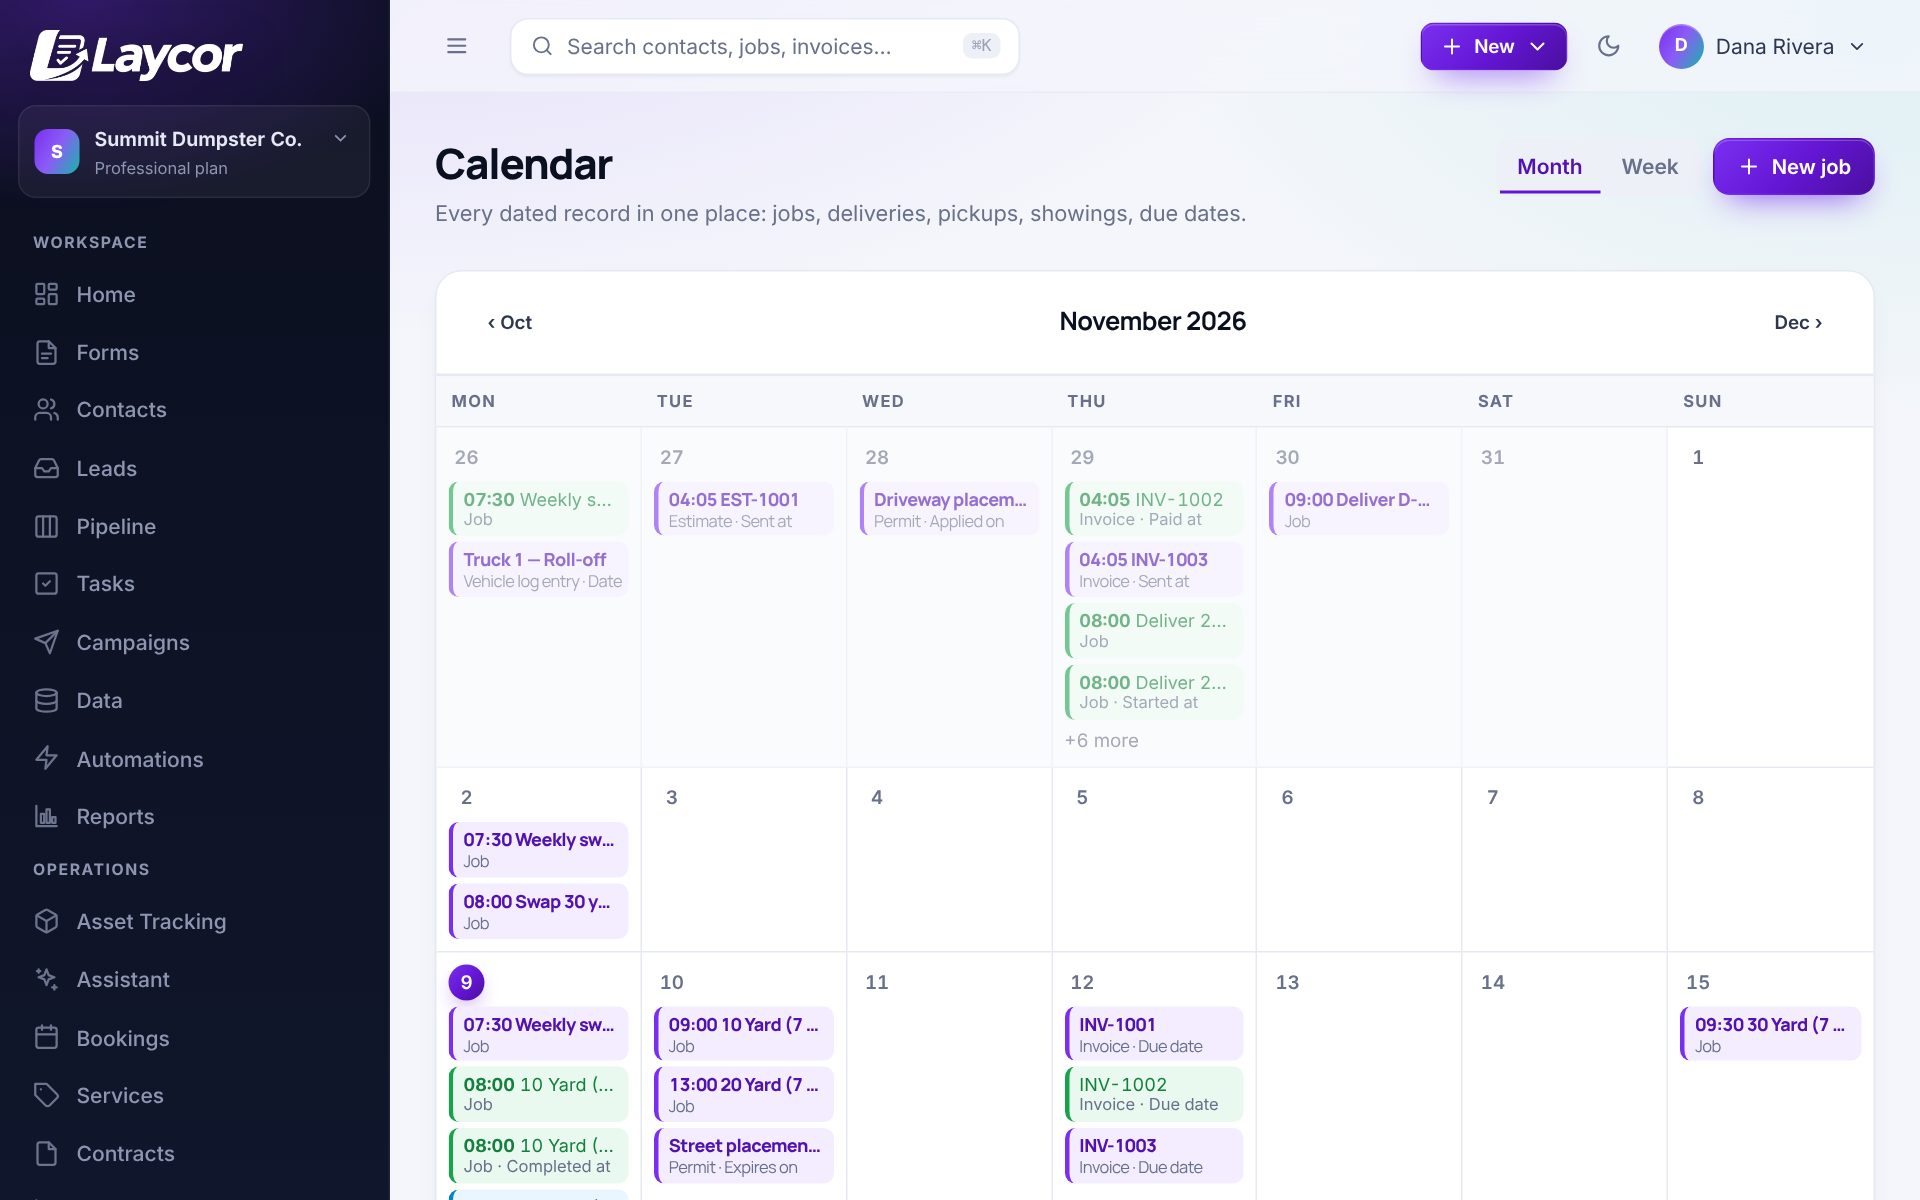
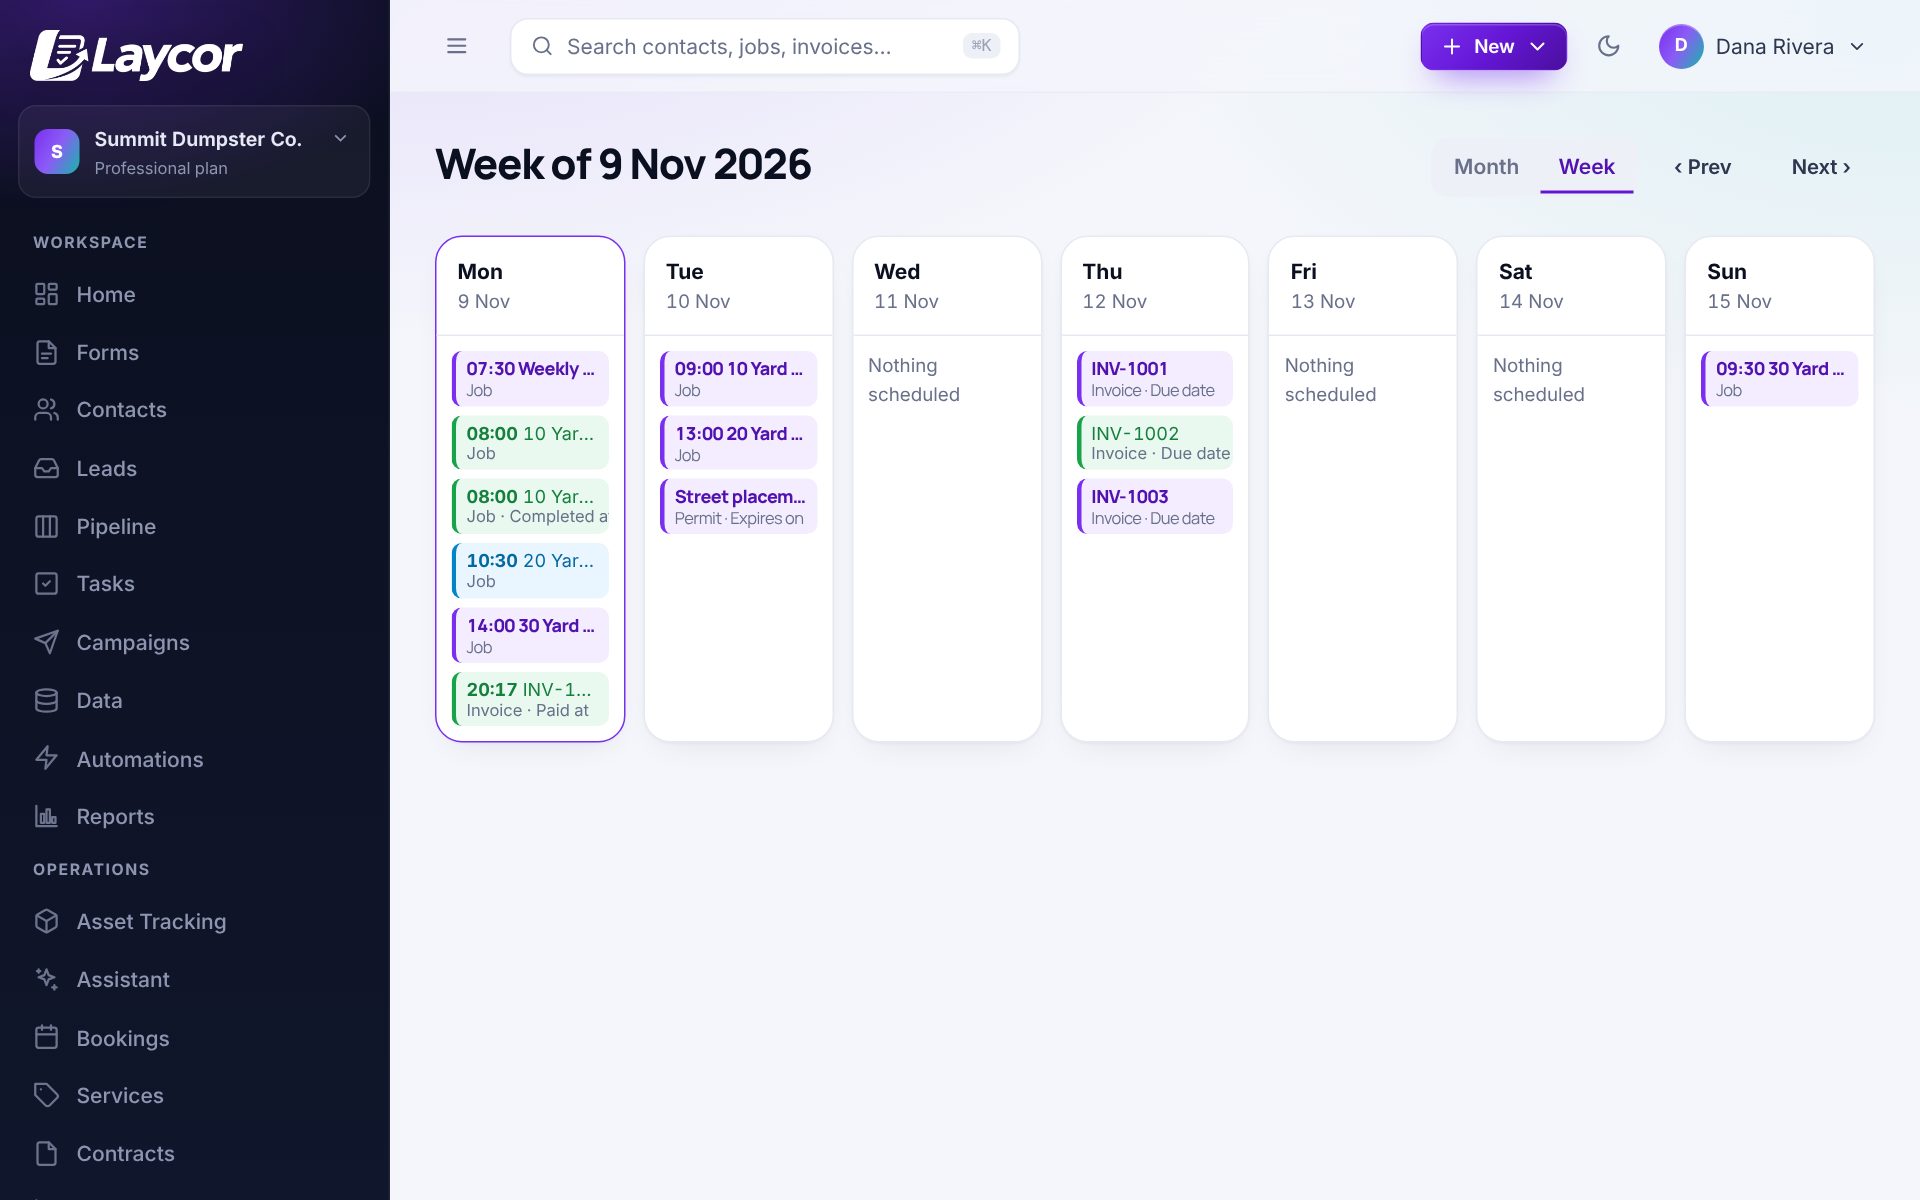
Jobs, deliveries, pickups and appointments on a shared calendar with technician assignment. Customers get a reminder the day before and a summary with photos after the visit.

How to use it

  1. Calendar → New job, or book one from a contact, estimate or booking.
  2. Set the time, duration, address, service, price and who is assigned. Month and week views; click to drag.
  3. Statuses run Scheduled → In progress → Done. Marking Done can create the invoice automatically.
  4. Reminders and post-visit summaries send on their own once SMS or email is set up.
The month calendar with color-coded jobs
The week view
Sidebar → Dispatch

Dispatch & Routes

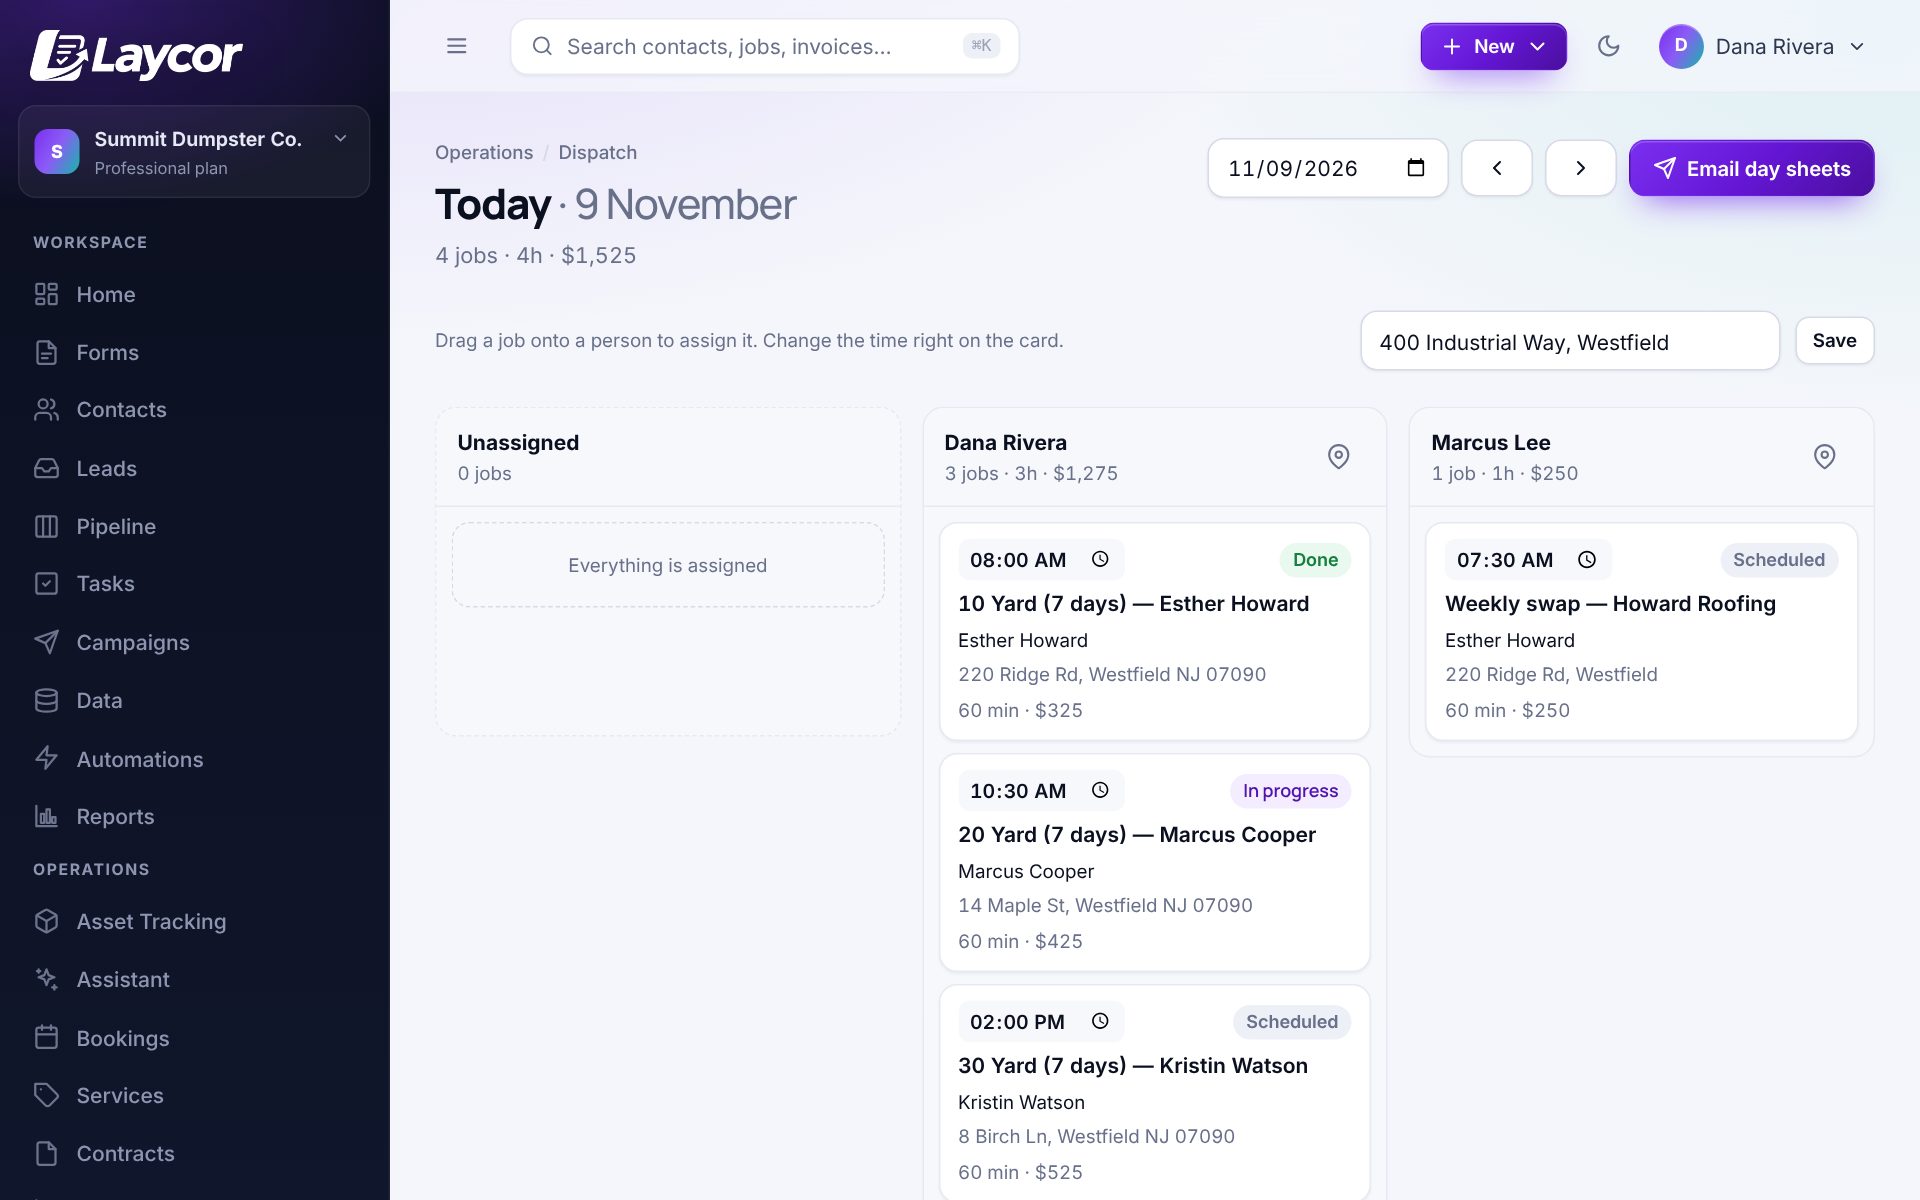
A day board with a column per team member. Drag jobs between people, nudge start times, see hours and revenue per route, open each route in Google Maps and email everyone their day sheet in one click.

How to use it

  1. Dispatch shows today. Use the date picker to plan ahead.
  2. Unassigned jobs sit in the first column; drag them onto a technician.
  3. Set the start depot so route distances and the Maps link are right.
  4. Email day sheets: every tech gets their stops, times and notes before they leave.
The dispatch board with a column per team member
IncludedSidebar → My Day (on a phone)

Field App

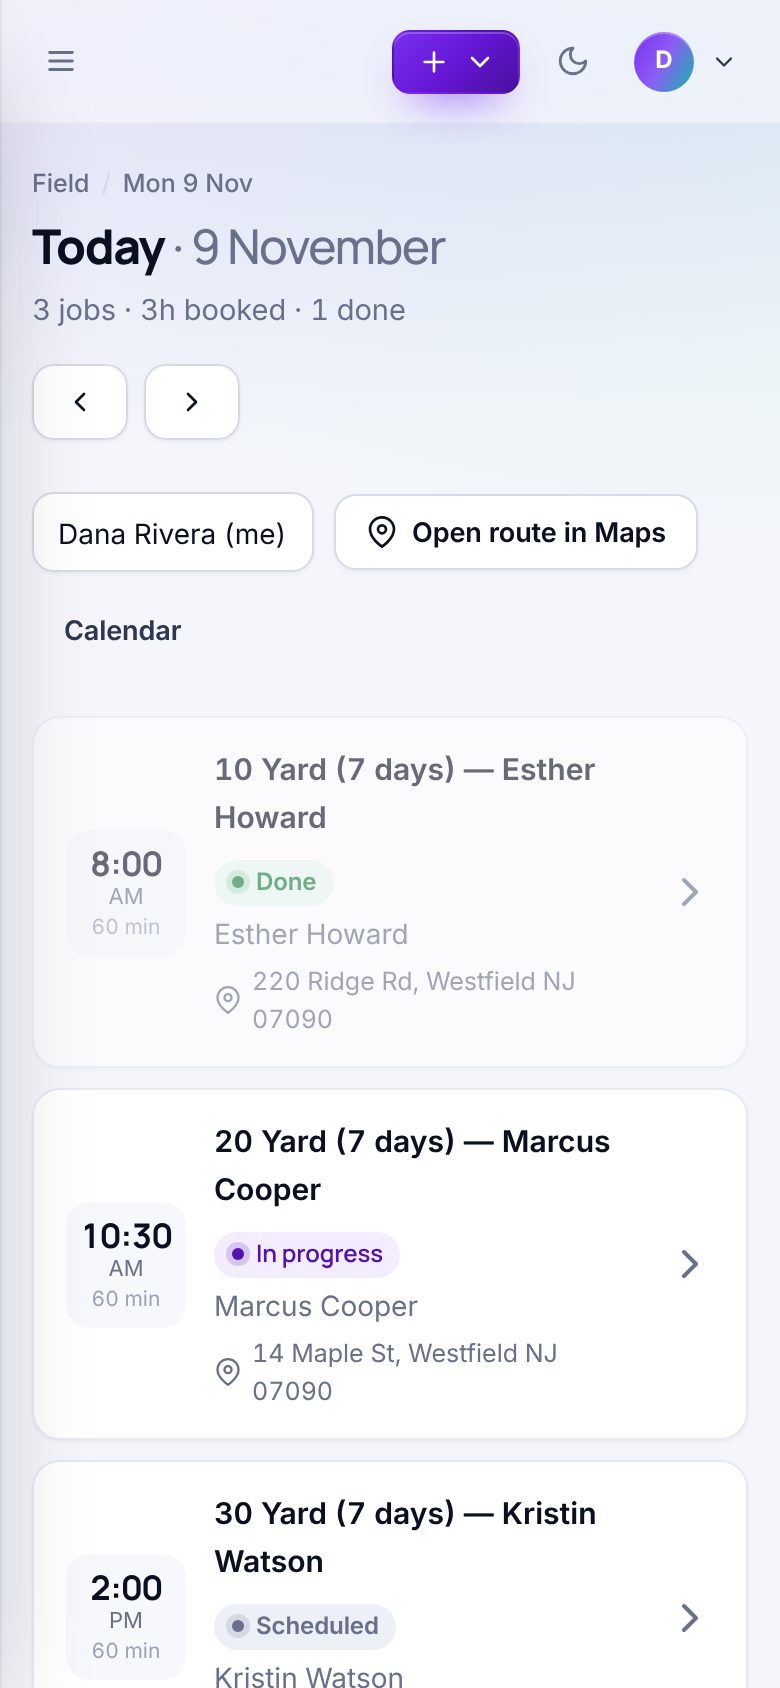
Technicians see their day, navigate to each stop, send an on-my-way text, clock in, log parts, take before and after photos, collect a signature and mark the job done. It runs in the phone browser and can be added to the home screen, so there is nothing to install.

How to use it

  1. Invite the technician under Settings → Team. They sign in on their phone and land in My Day.
  2. Tap a job to call or text the customer, open navigation, and send “on my way”.
  3. Start the job to clock in; add photos, parts from inventory and notes as you go.
  4. Collect a signature and mark Done. The office sees it instantly and the invoice is created.
The Field App on a phone showing today’s jobs
Sidebar → Recurring

Recurring Visits

Set a recurrence on any job and Laycor keeps the next visits on the calendar: weekly lawn care, monthly pool service, quarterly pest control, annual maintenance plans. Edit the latest visit and the change carries forward.

How to use it

  1. On a job, set Recurrence to weekly, every two weeks, monthly or a custom interval.
  2. Laycor generates upcoming visits ahead of time and keeps the series topped up.
  3. Change the time, price or technician on the newest visit and future ones follow.
  4. Recurring shows every active series and when it next runs.
Recurring visits placed on the calendar
Sidebar → Weather

Weather Scheduling

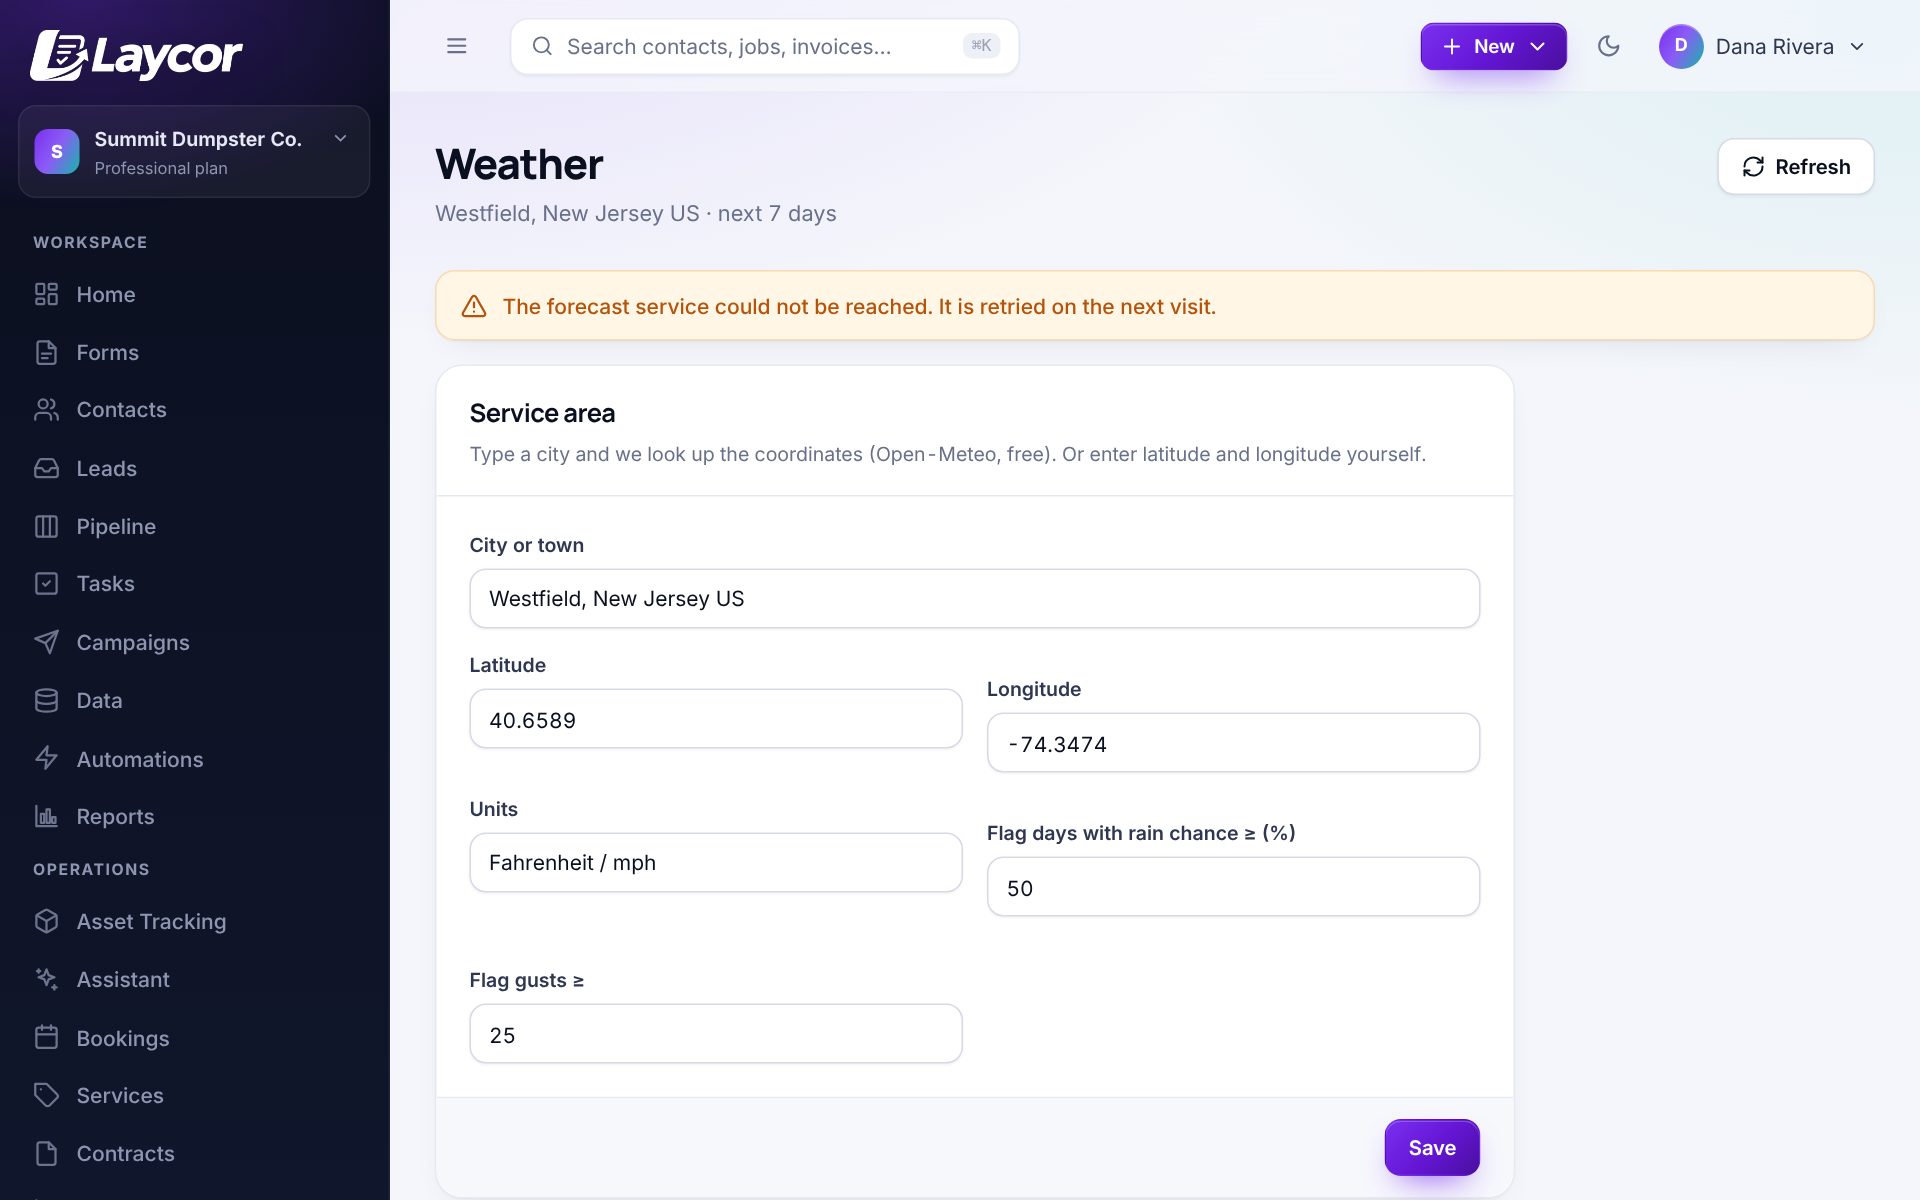
A 7-day forecast for your service area next to the jobs booked each day, with rainy or windy days flagged so you can move outdoor work early. Shows on Dispatch and in the Field App.

How to use it

  1. Weather → enter your town or coordinates and the rain chance and wind that should raise a flag.
  2. Flagged days show on Dispatch and the calendar with the jobs at risk.
  3. Drag the affected jobs to another day before the crew is already on the road.
Weather settings with the service area and the flag threshold
Run the office

Automate the follow-ups, text from one number, keep the back office in one place.

IncludedSidebar → Automations

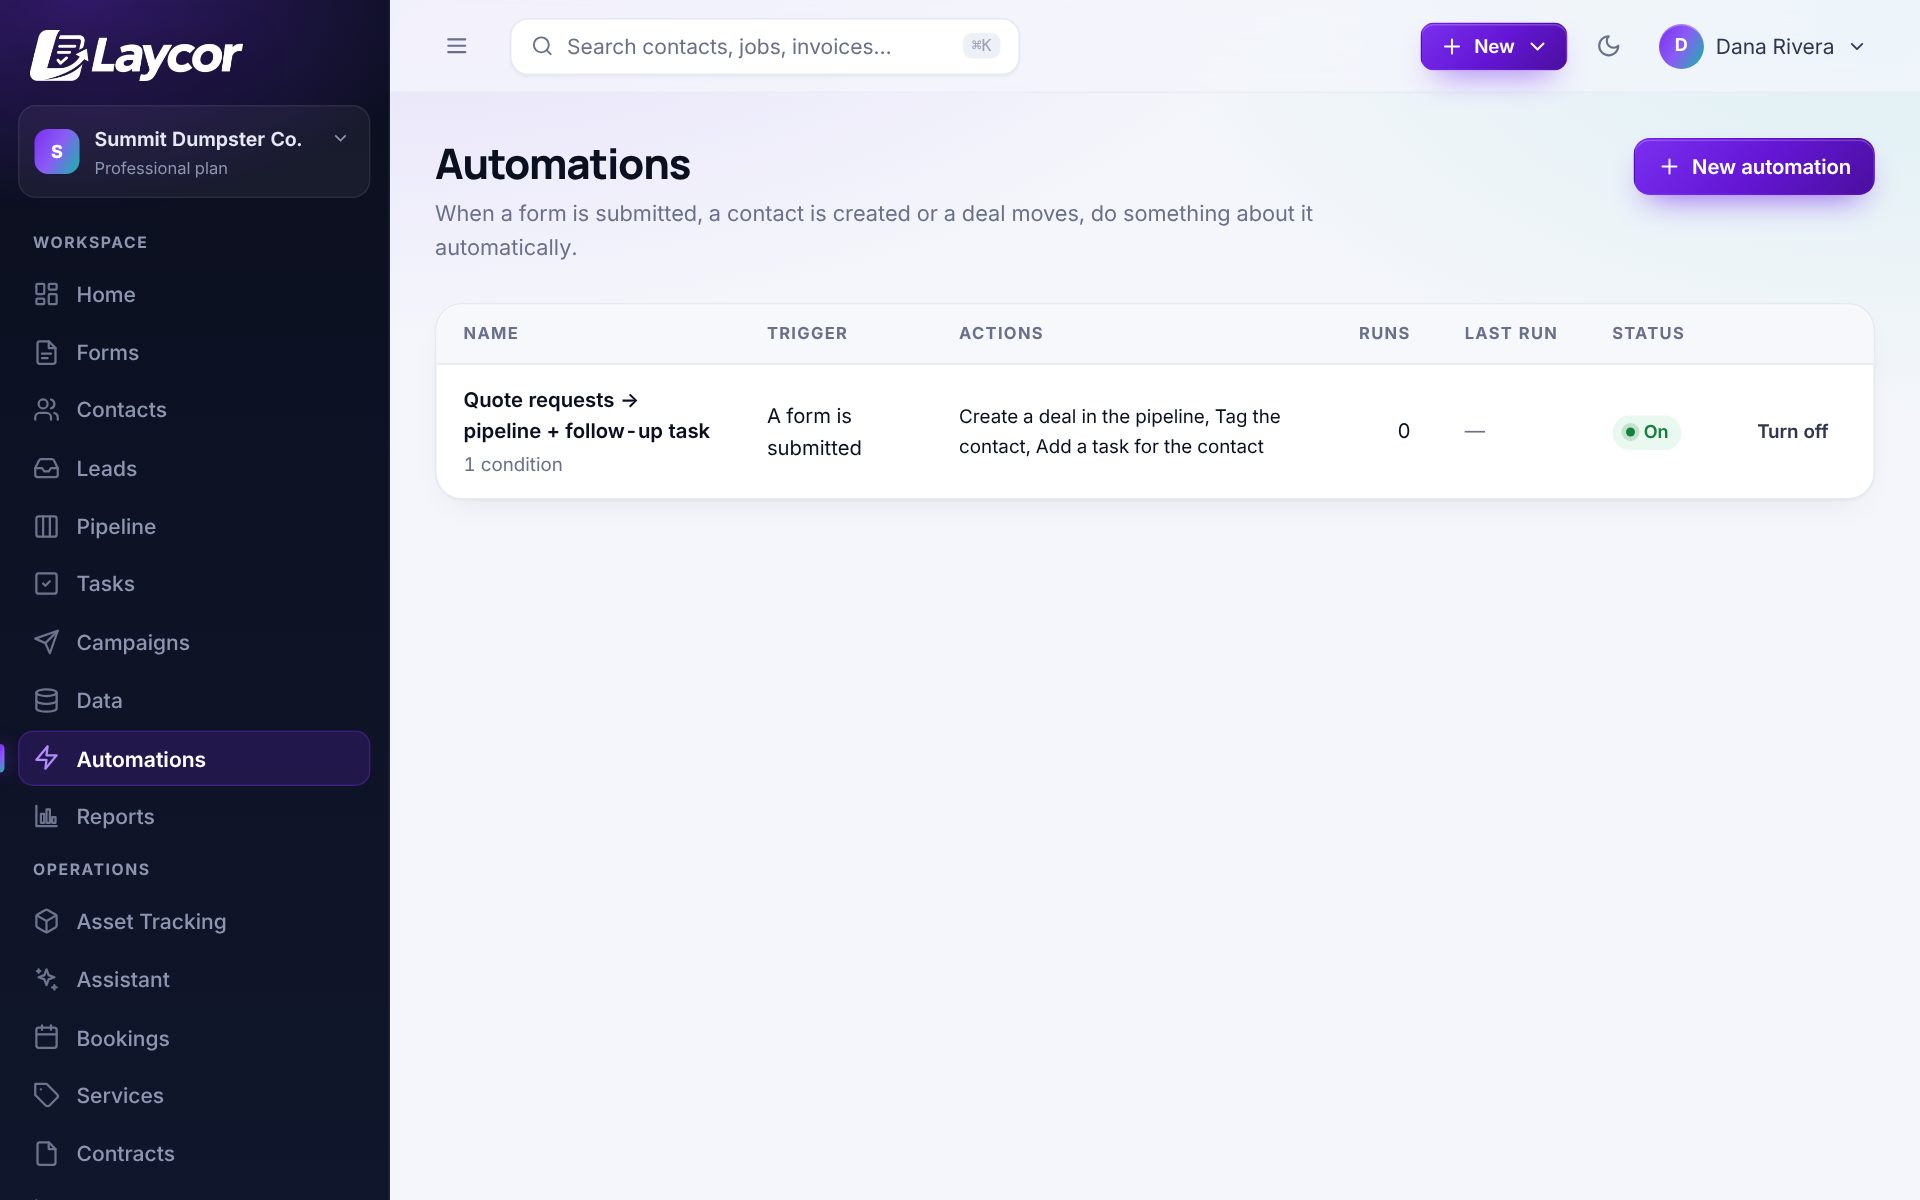
Automations

Rules that react to a submission, a new contact, a booking, a job status or a deal move: create a deal, tag the contact, send an email or text, add a task, call a webhook.

How to use it

  1. Automations → New automation. Pick the trigger, for example “Form submitted” or “Job marked Done”.
  2. Add conditions (which form, which service) and one or more actions.
  3. Turn it on. Each run is logged so you can see what fired and why.
  4. Common recipes: text the office on a new quote request; create a follow-up task three days after an estimate is sent.
Automation rules with trigger, actions and run counts
Sidebar → Messages

Texting (SMS)

Lead alerts, appointment reminders, on-my-way texts and two-way messaging from Laycor’s number out of the box, or from your own Twilio number. Opt-outs and quiet hours are enforced; usage is metered and shown before anything goes live.

How to use it

  1. Plugin Store → switch on SMS (paid plans). Nothing to configure unless you want your own number.
  2. Settings → Texting. Set quiet hours, allowed countries and daily caps.
  3. Text a customer from their record or let reminders, on-my-way and review requests go out automatically.
  4. Replies land in Messages and on the customer’s timeline.
Messaging a customer from their record
Included with ProfessionalSidebar → Assistant

AI Assistant

An assistant that knows your workspace: today’s jobs, who owes what, estimates waiting, stock running low. Ask plain questions and get straight answers, and have it draft review replies, follow-ups and website copy in your voice.

How to use it

  1. Assistant → ask “What does Thursday look like?” or “Who owes us money?”
  2. Draft something: pick a type, paste the context, copy the result.
  3. Included with Professional.
The dashboard the assistant answers questions about
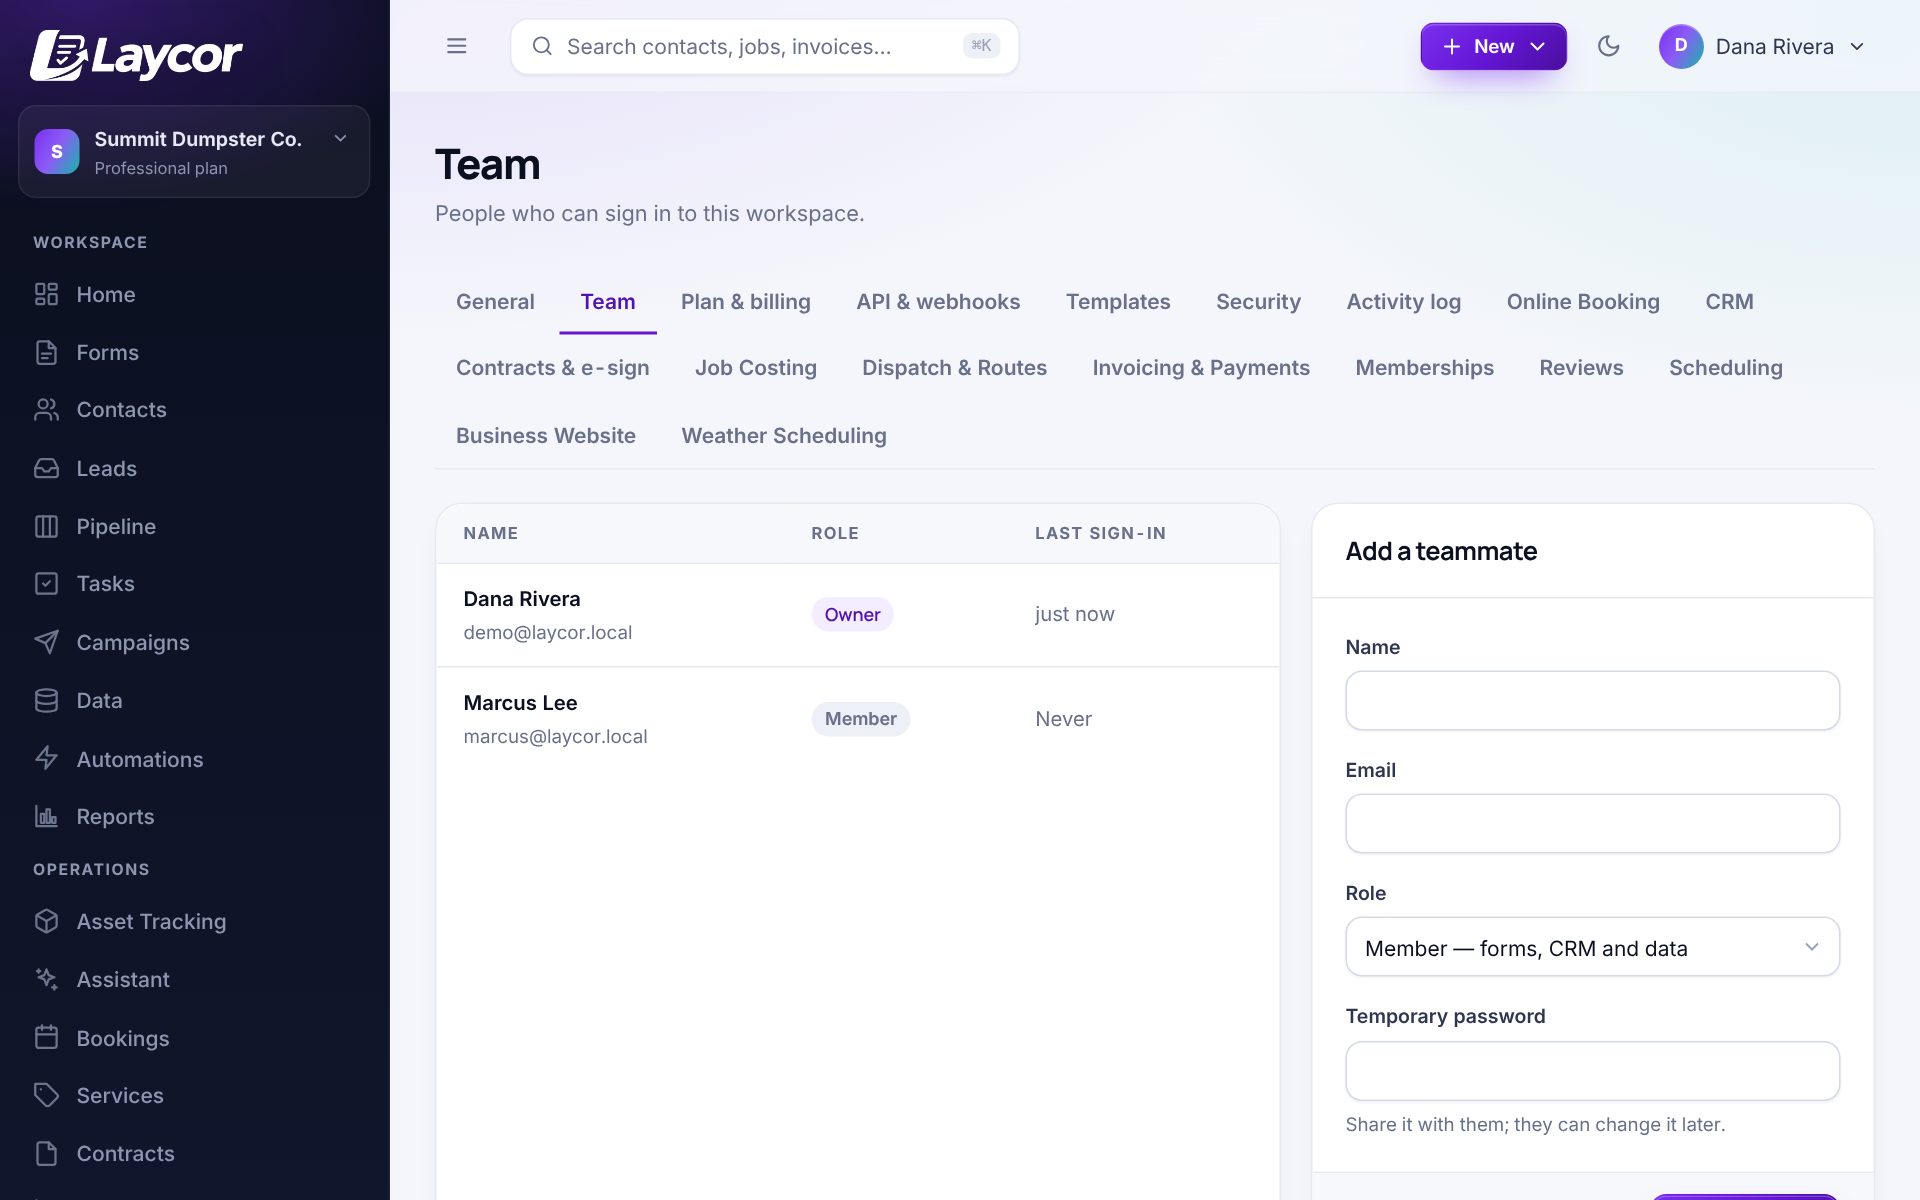
IncludedSettings → Team

Team, roles & security

Unlimited users on every plan. Owners, admins, members and field-only technicians; two-factor sign-in; an audit log of who changed what; single sign-on for larger teams.

How to use it

  1. Settings → Team → Add a teammate. Pick the role and send the invite, or set a temporary password.
  2. Settings → Security to require two-factor codes.
  3. Activity log, under Settings, shows every change with who made it.
Team settings with members, roles and an invite form
IncludedSidebar → Subcontractors

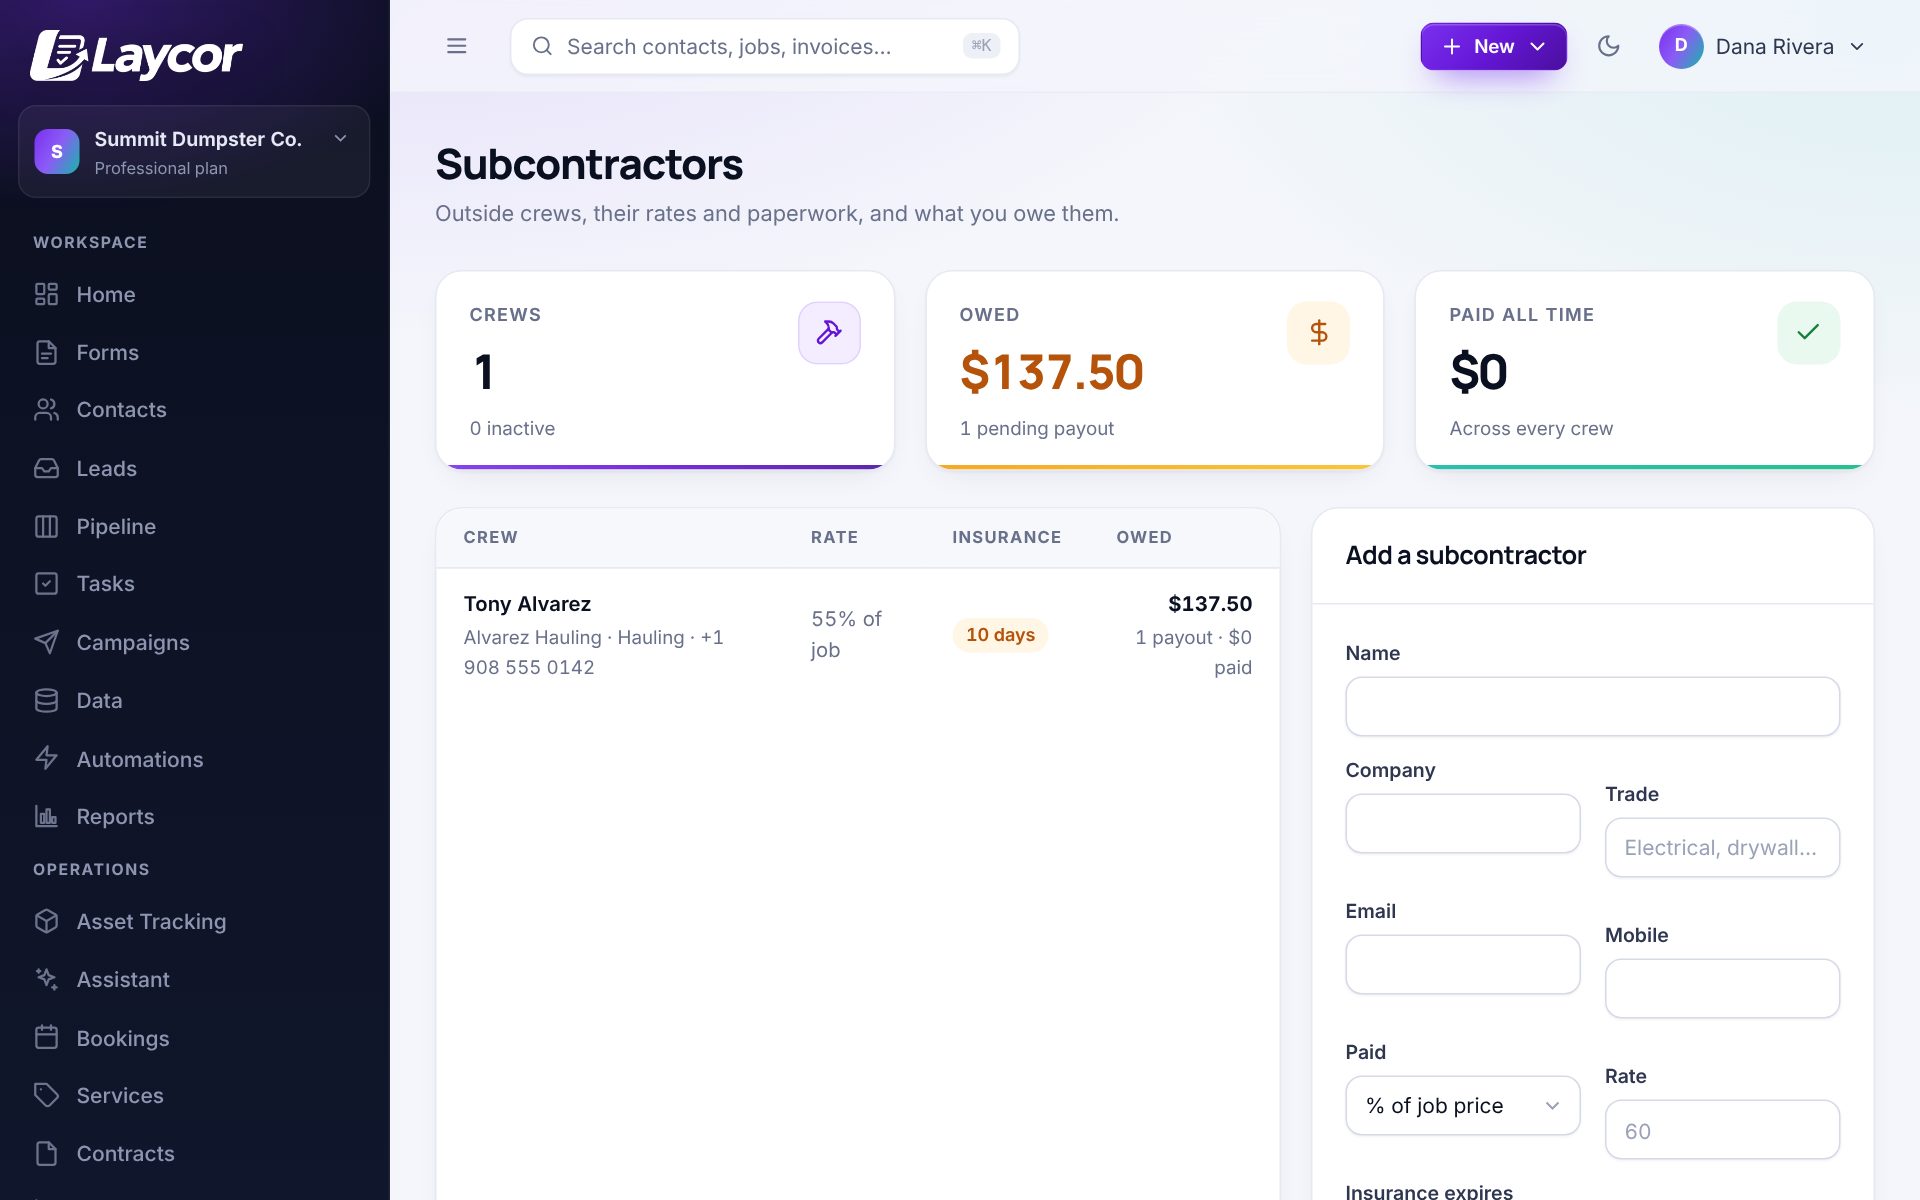
Subcontractors

A directory of subcontractors with their rate (a cut of the job, a flat fee or hourly), insurance and license dates, and an optional Field App login that only shows their own jobs. Every finished job adds a payout to their ledger.

How to use it

  1. Subcontractors → Add. Enter the rate type and amount, insurance expiry and whether they get a login.
  2. Assign them to jobs like any technician. They see only their jobs.
  3. Owed shows what is due; mark payouts paid in bulk and download a statement.
Subcontractors list with owed and paid totals
Sidebar → Inventory

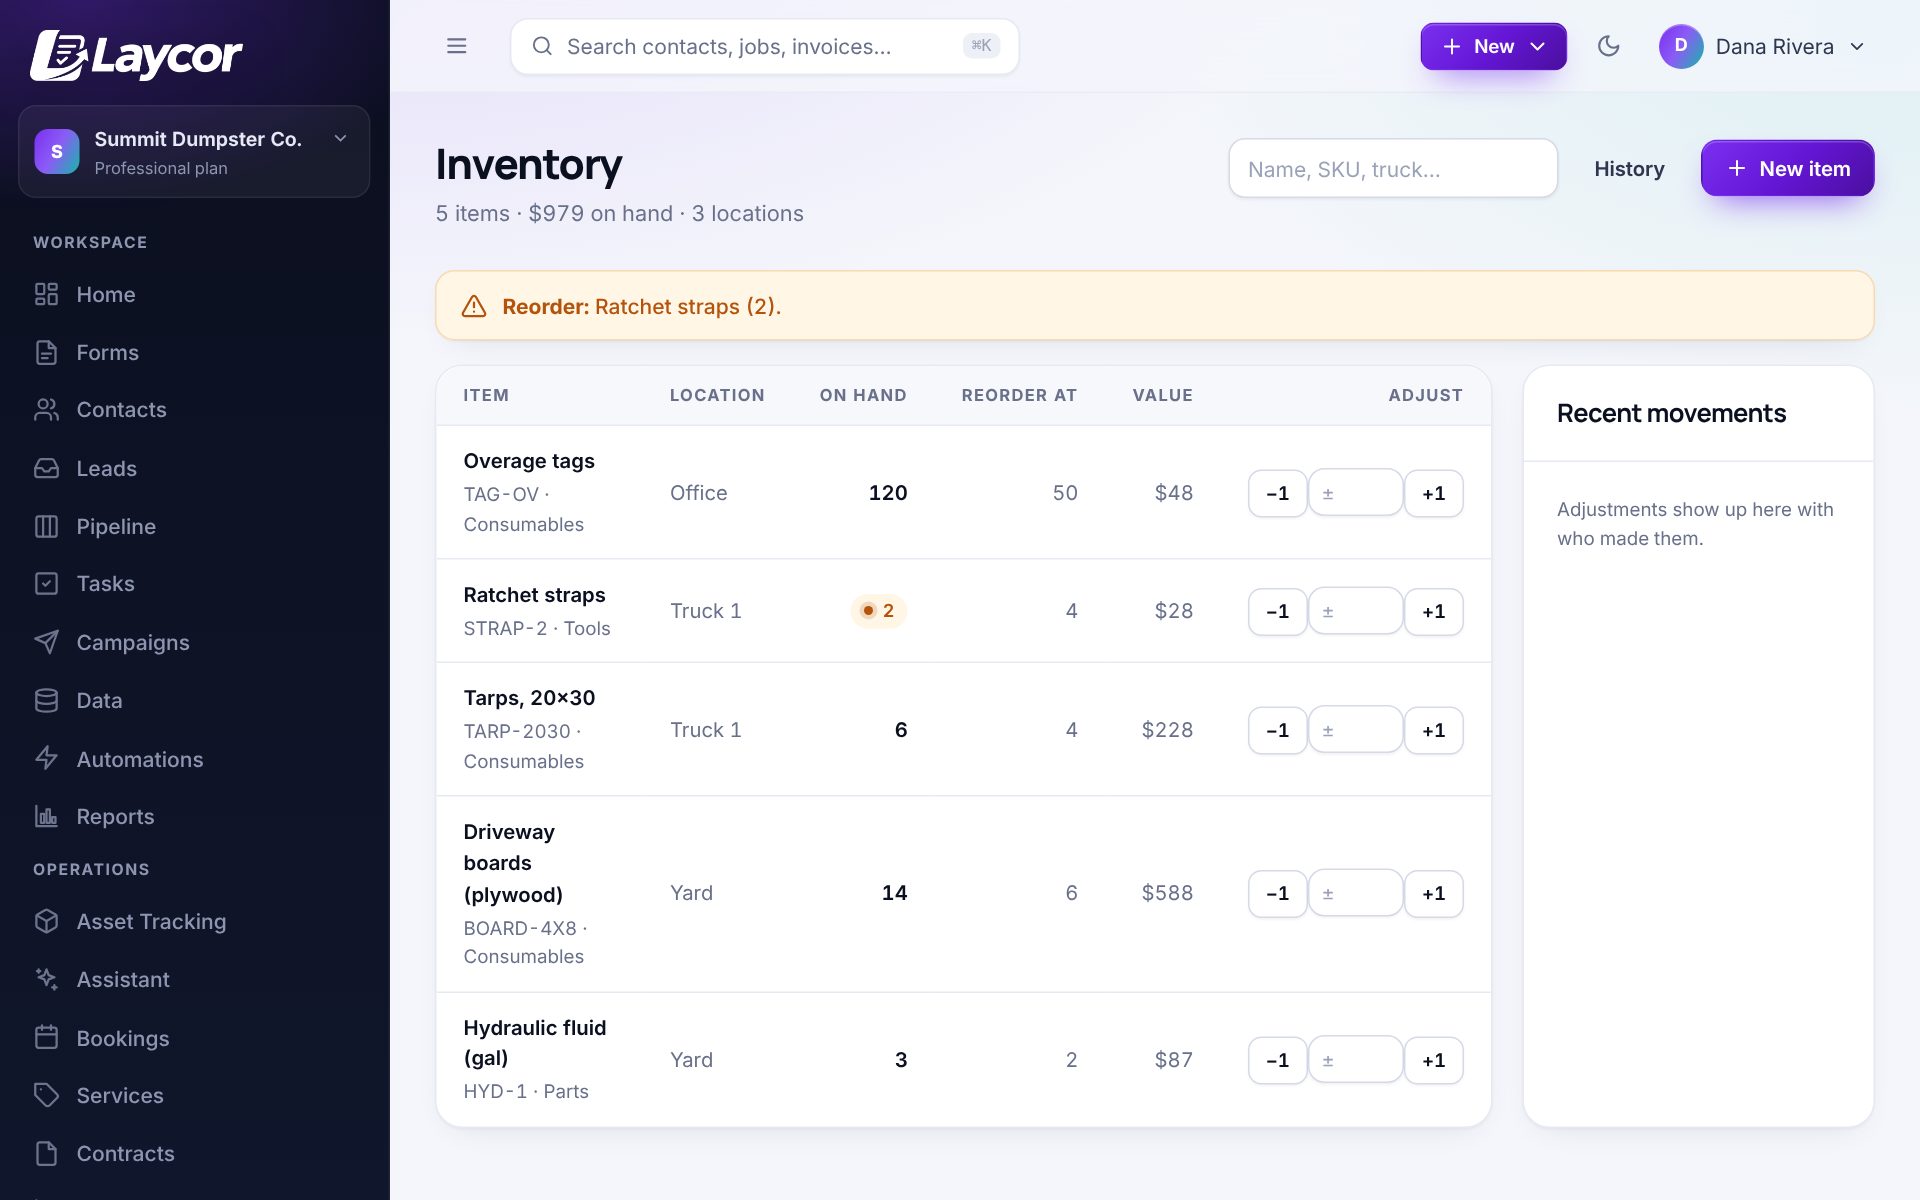
Inventory

Parts and consumables by location with on-hand counts, reorder points, unit cost and supplier. Adjust stock from the office or the truck and get a reminder when anything drops below its minimum.

How to use it

  1. Inventory → Add item with its location, on-hand count, reorder point and cost.
  2. Technicians log parts used on a job in the Field App; stock drops and the cost lands on the job.
  3. Low-stock items appear on the dashboard and in the daily reminder email.
Inventory items with on-hand counts and reorder points
Sidebar → Vehicles

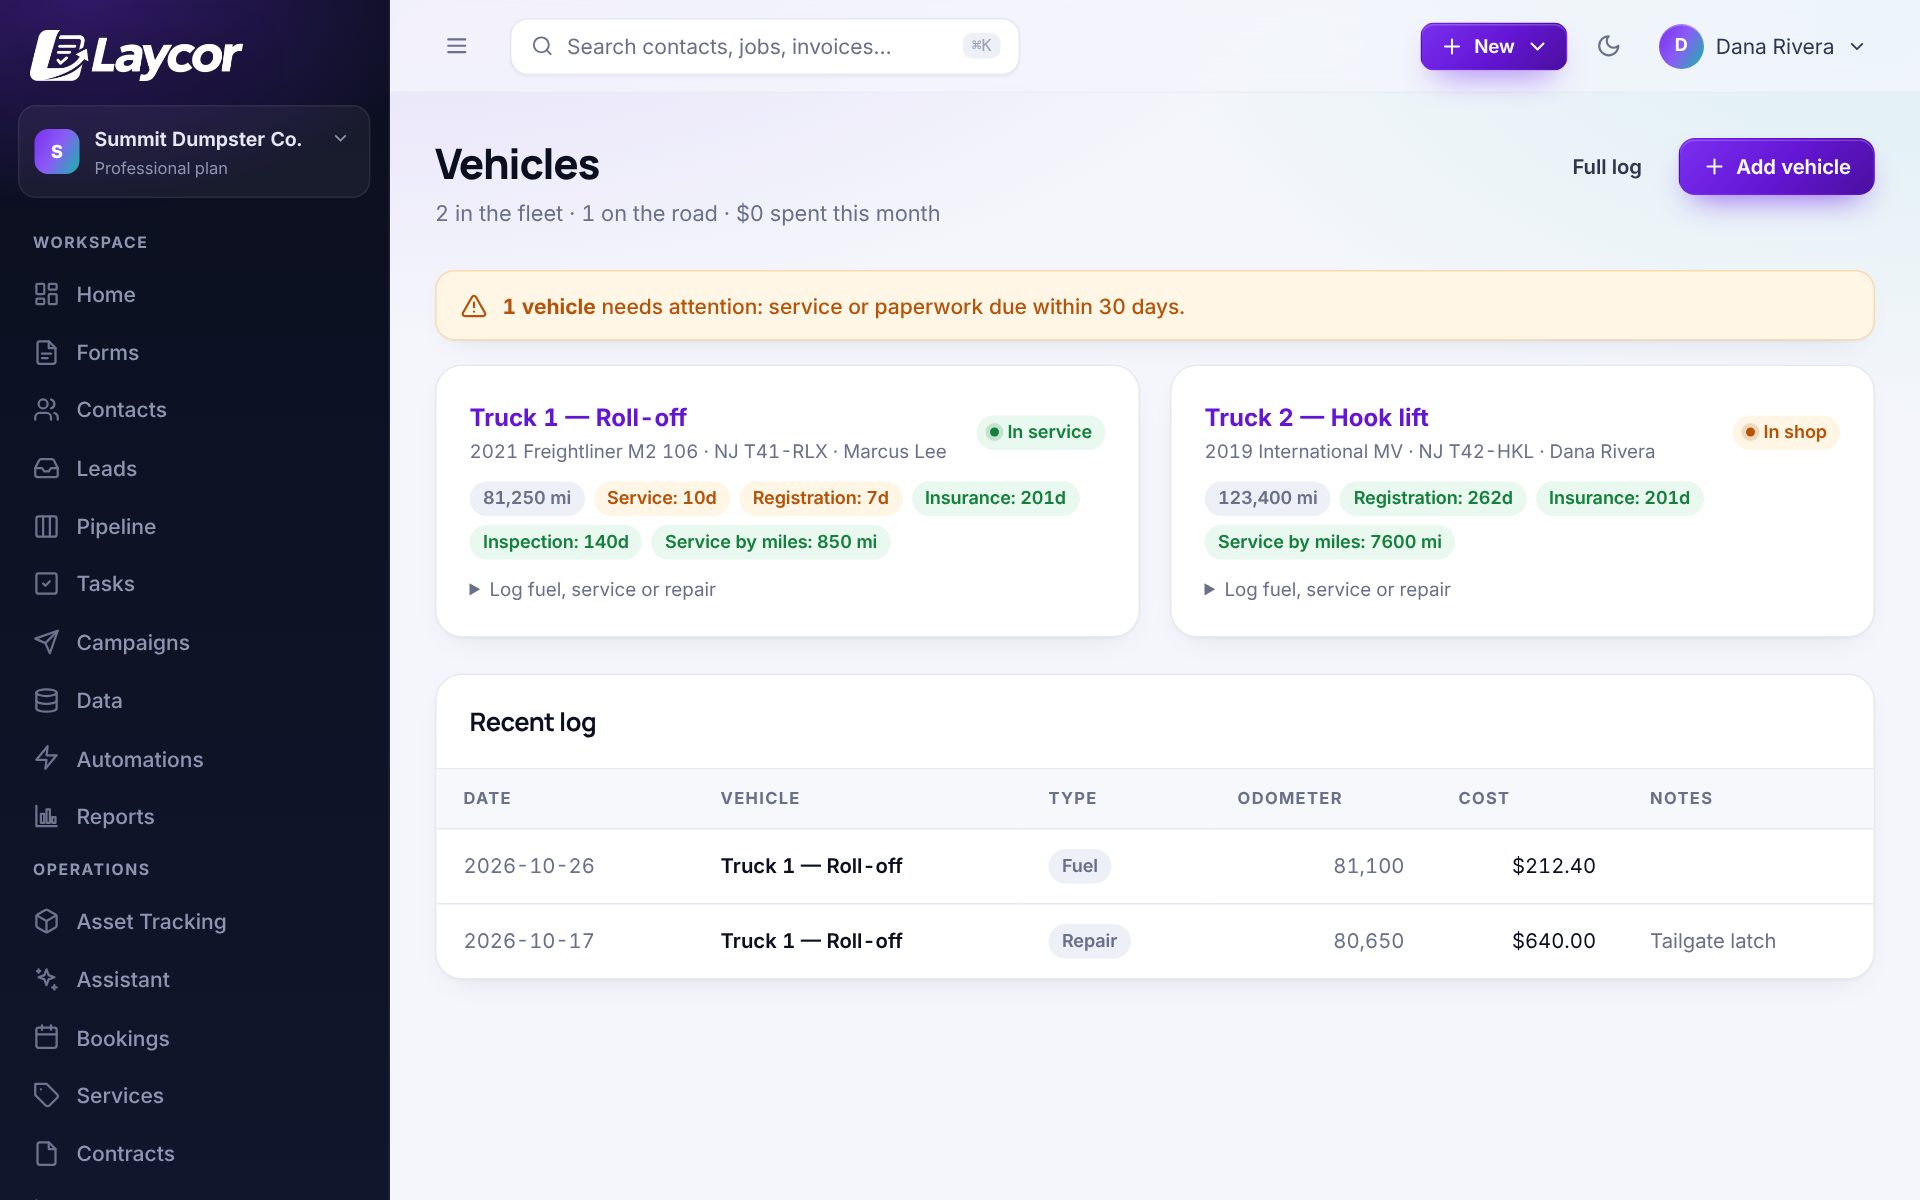
Vehicles

Fleet list with driver assignment, odometer, service intervals, registration and insurance expiry, and a running log of fuel, service and repairs with cost. Reminders before anything lapses.

How to use it

  1. Vehicles → Add vehicle with plate, driver, odometer and service interval.
  2. Log fuel, service and repairs as they happen; cost per vehicle adds up.
  3. Anything due in the next 30 days is flagged at the top and in the reminder email.
Fleet list with service, registration and insurance due dates
Sidebar → Permits · Warranties · Chemical Logs

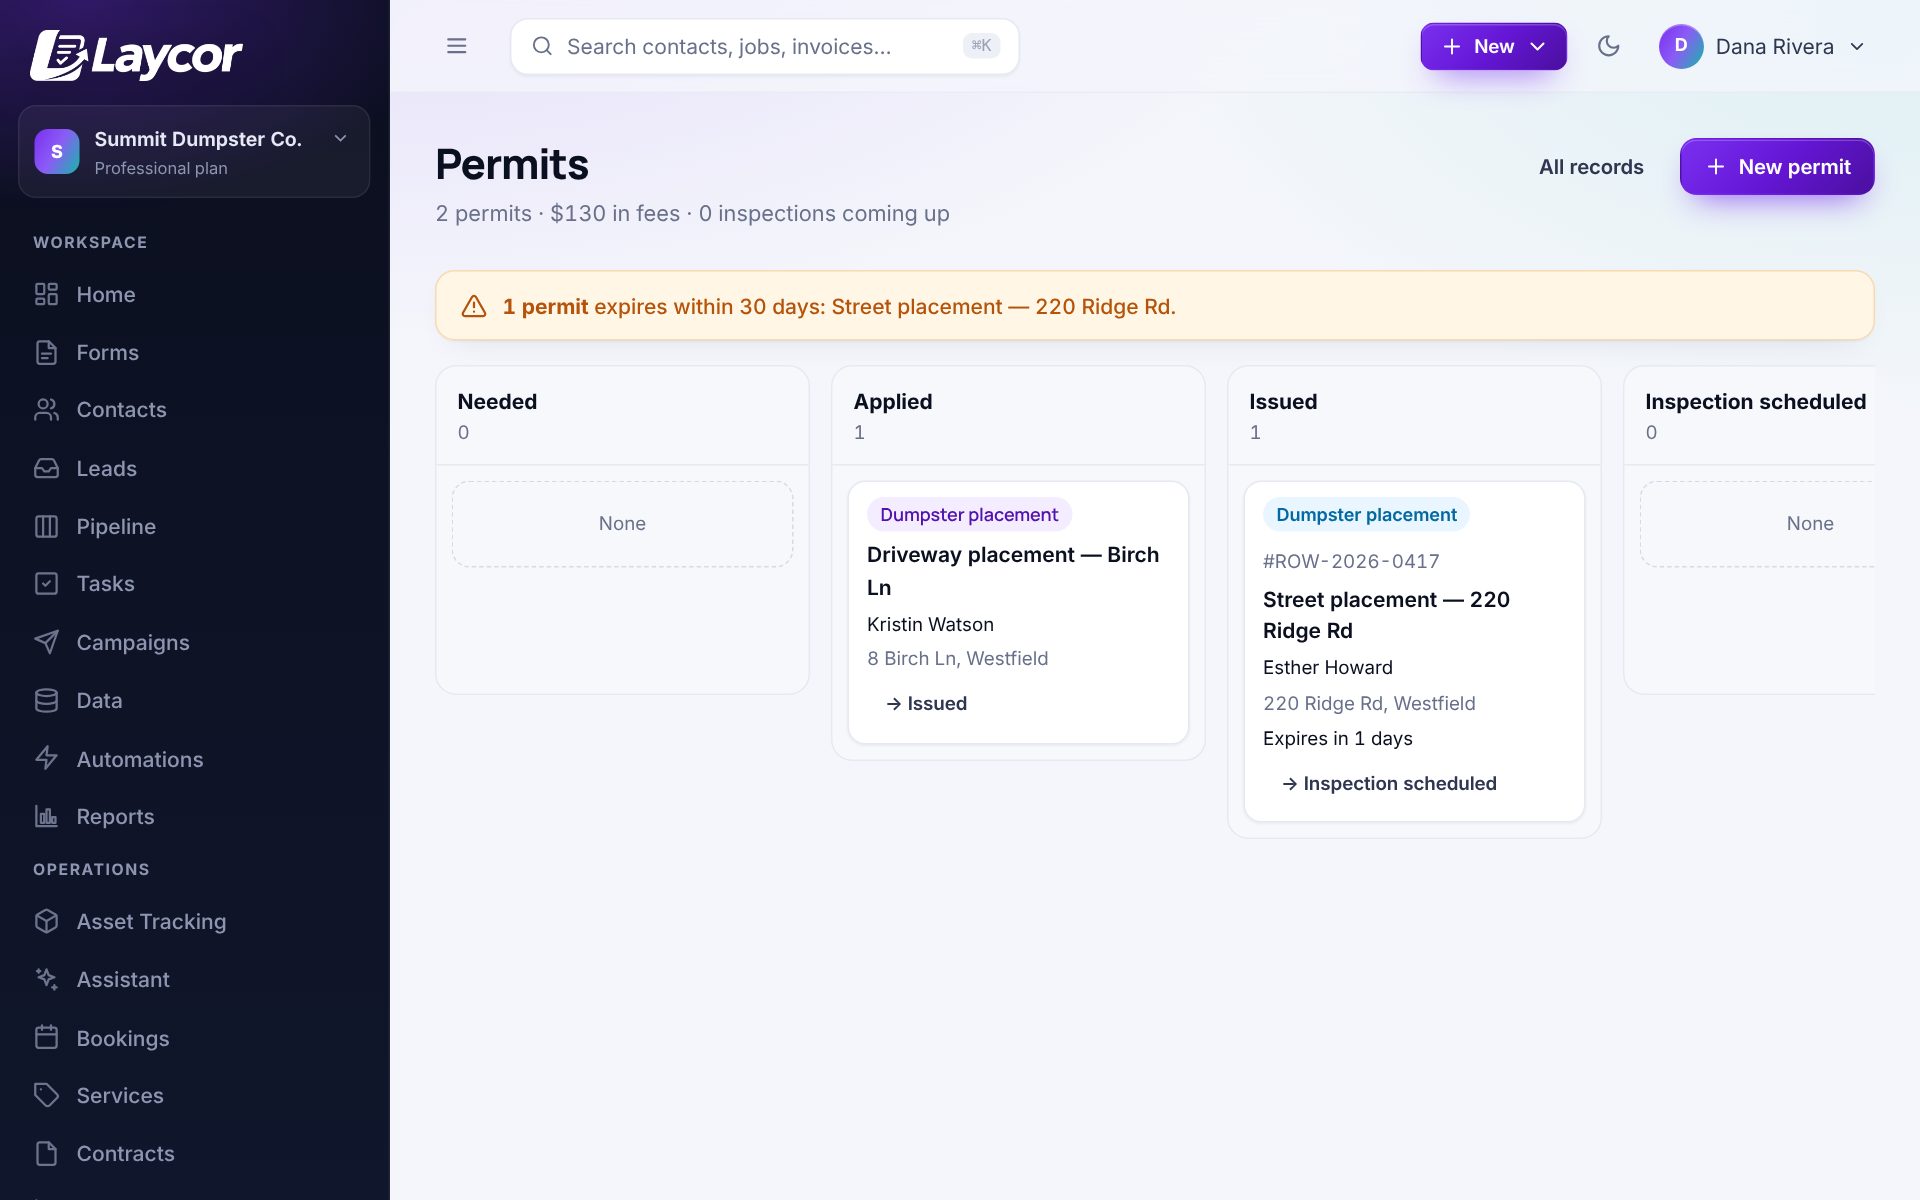
Permits, Warranties & Chemical Logs

Trade add-ons for the paperwork: permits per job with inspection dates and expiry reminders; warranties on installed equipment with claims and renewal reminders; chemical applications and water readings with a one-click CSV export for state inspections.

How to use it

  1. Switch on the ones your trade needs in the Plugin Store.
  2. Permits: add one from a job with the authority, number, fees and inspection date.
  3. Warranties: record brand, model, serial and coverage at install; look up coverage by customer in seconds.
  4. Chemical logs: technicians log product, amount, target and weather on each visit.
Permit tracking by stage: applied, issued, inspection scheduled
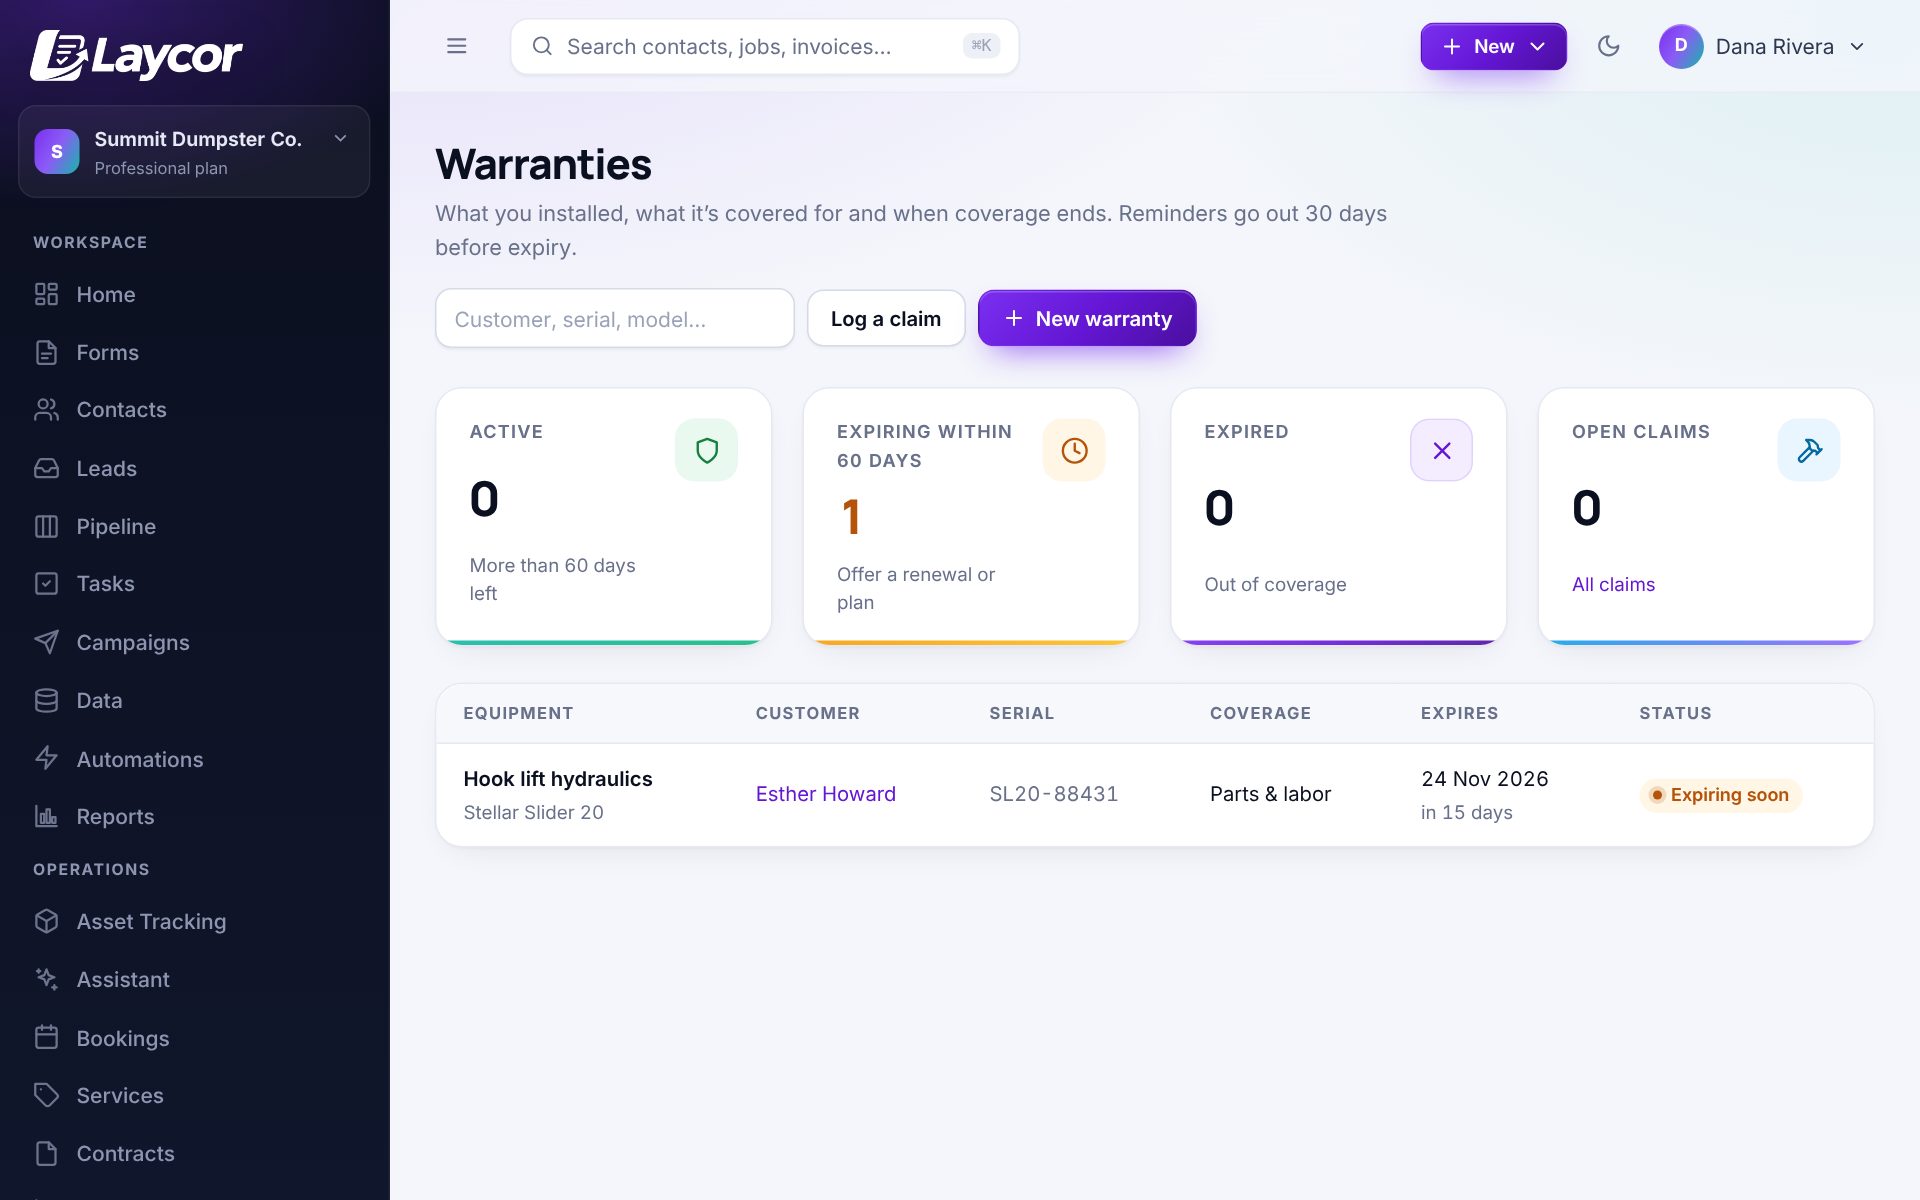
Warranty tracking with expiring coverage flagged
IncludedSidebar → Plugin Store

Plugin Store & billing

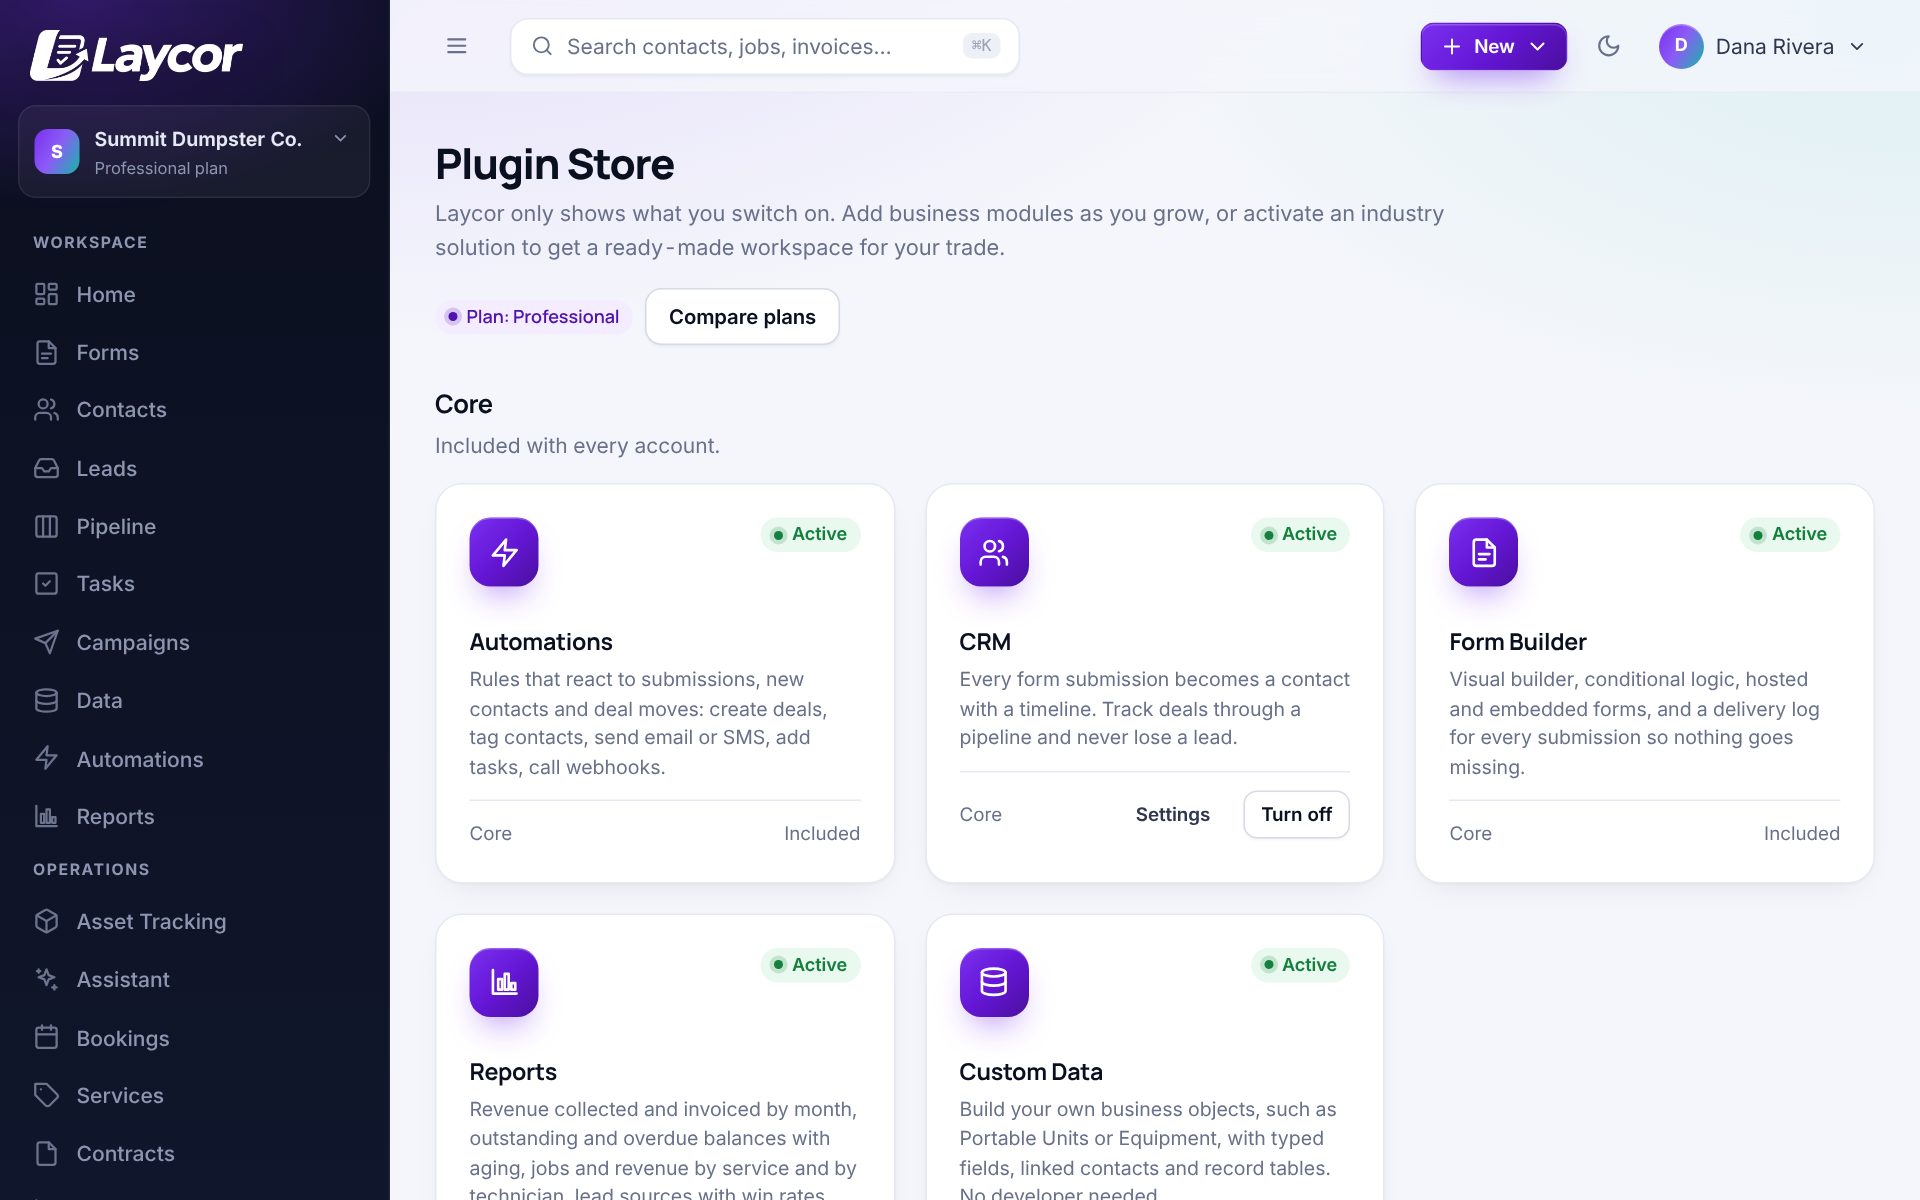
Laycor only shows what you turn on. Every module is a switch in the Plugin Store; add-ons are added to your bill, prorated, and Professional pays half. Turn one off and your data stays.

How to use it

  1. Plugin Store → browse by category. Active modules show in the sidebar.
  2. Switch an add-on on; the price is shown before you confirm.
  3. Settings → Plan & billing shows your plan, usage such as SMS, invoices and the card on file.
The Plugin Store with core modules and add-ons
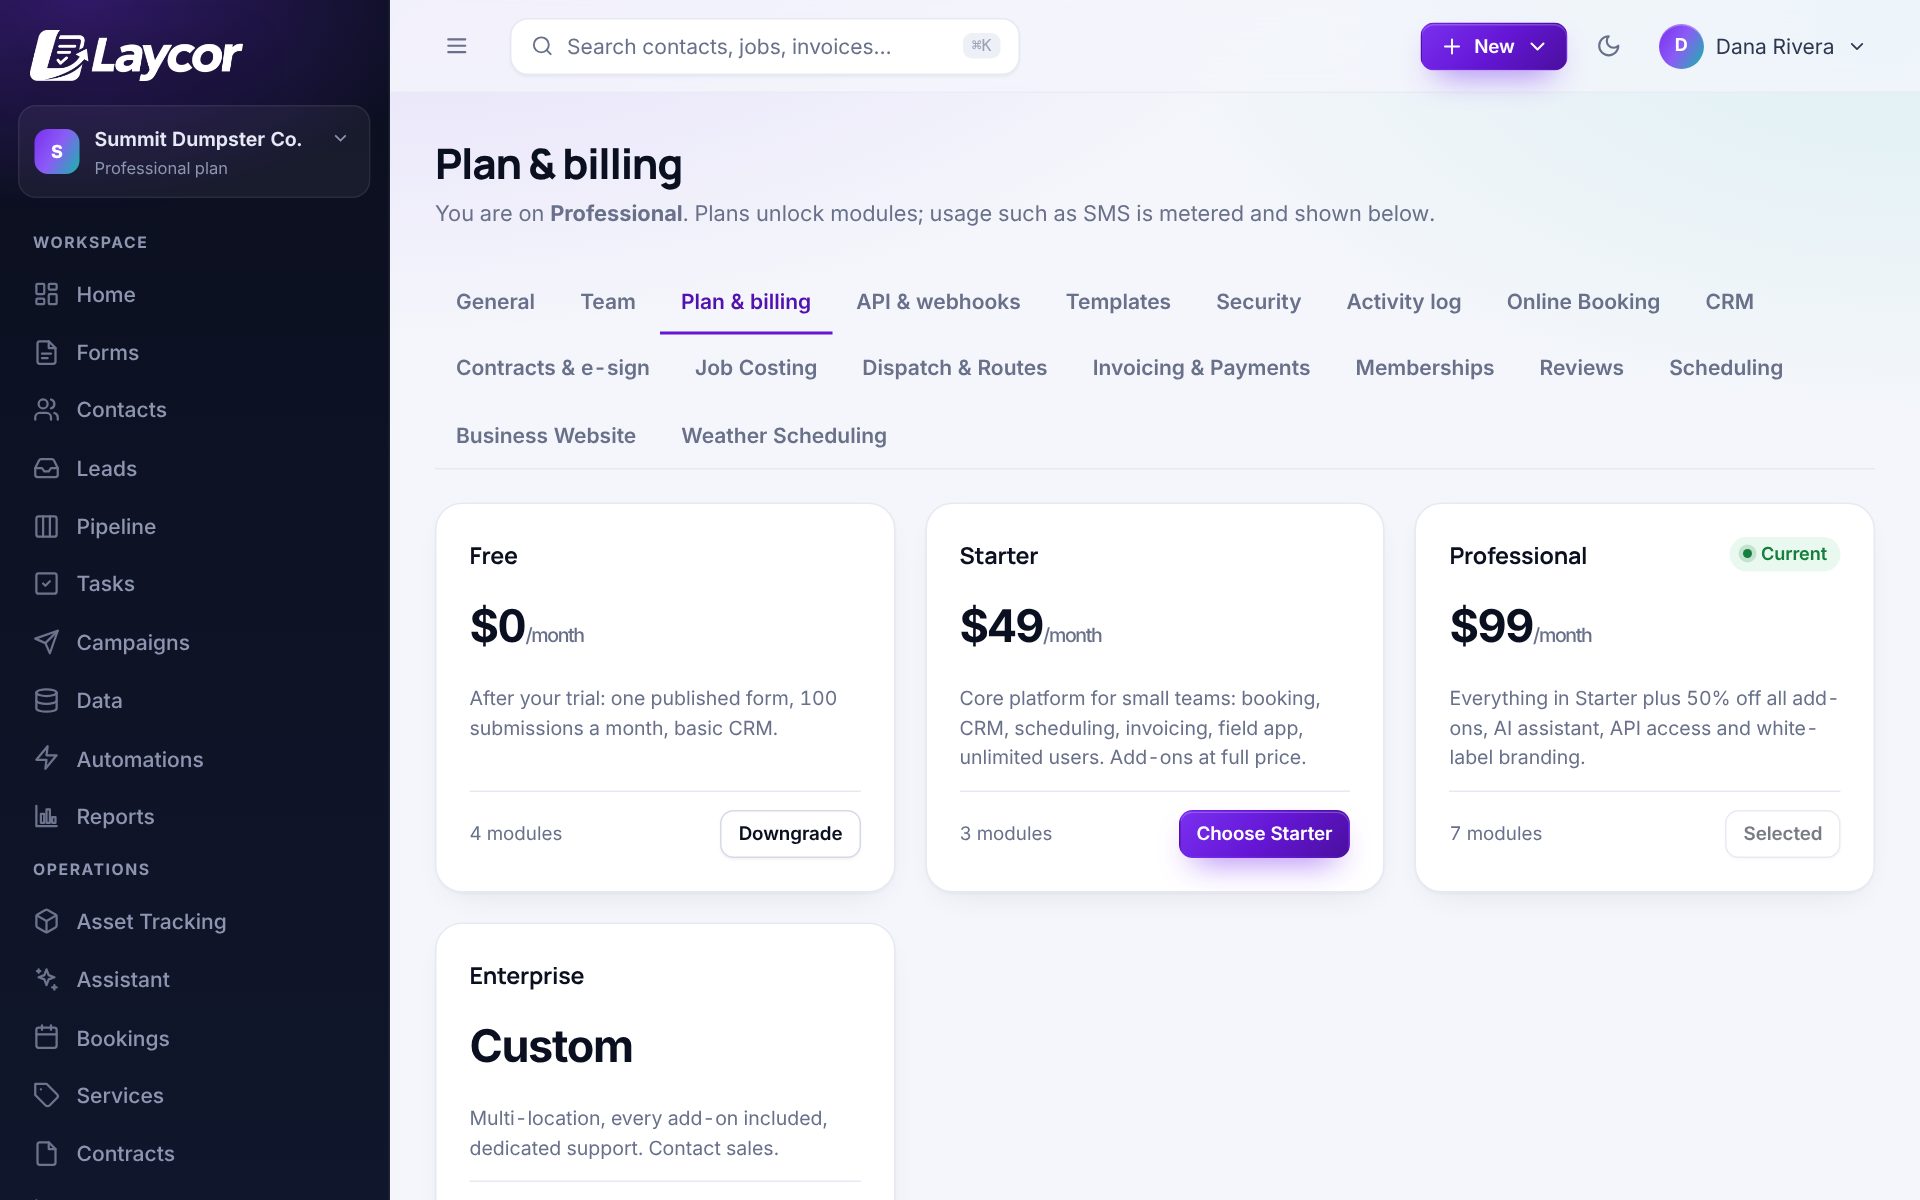
Plan and billing settings
IncludedSidebar → Home → Getting started

Getting started & sample data

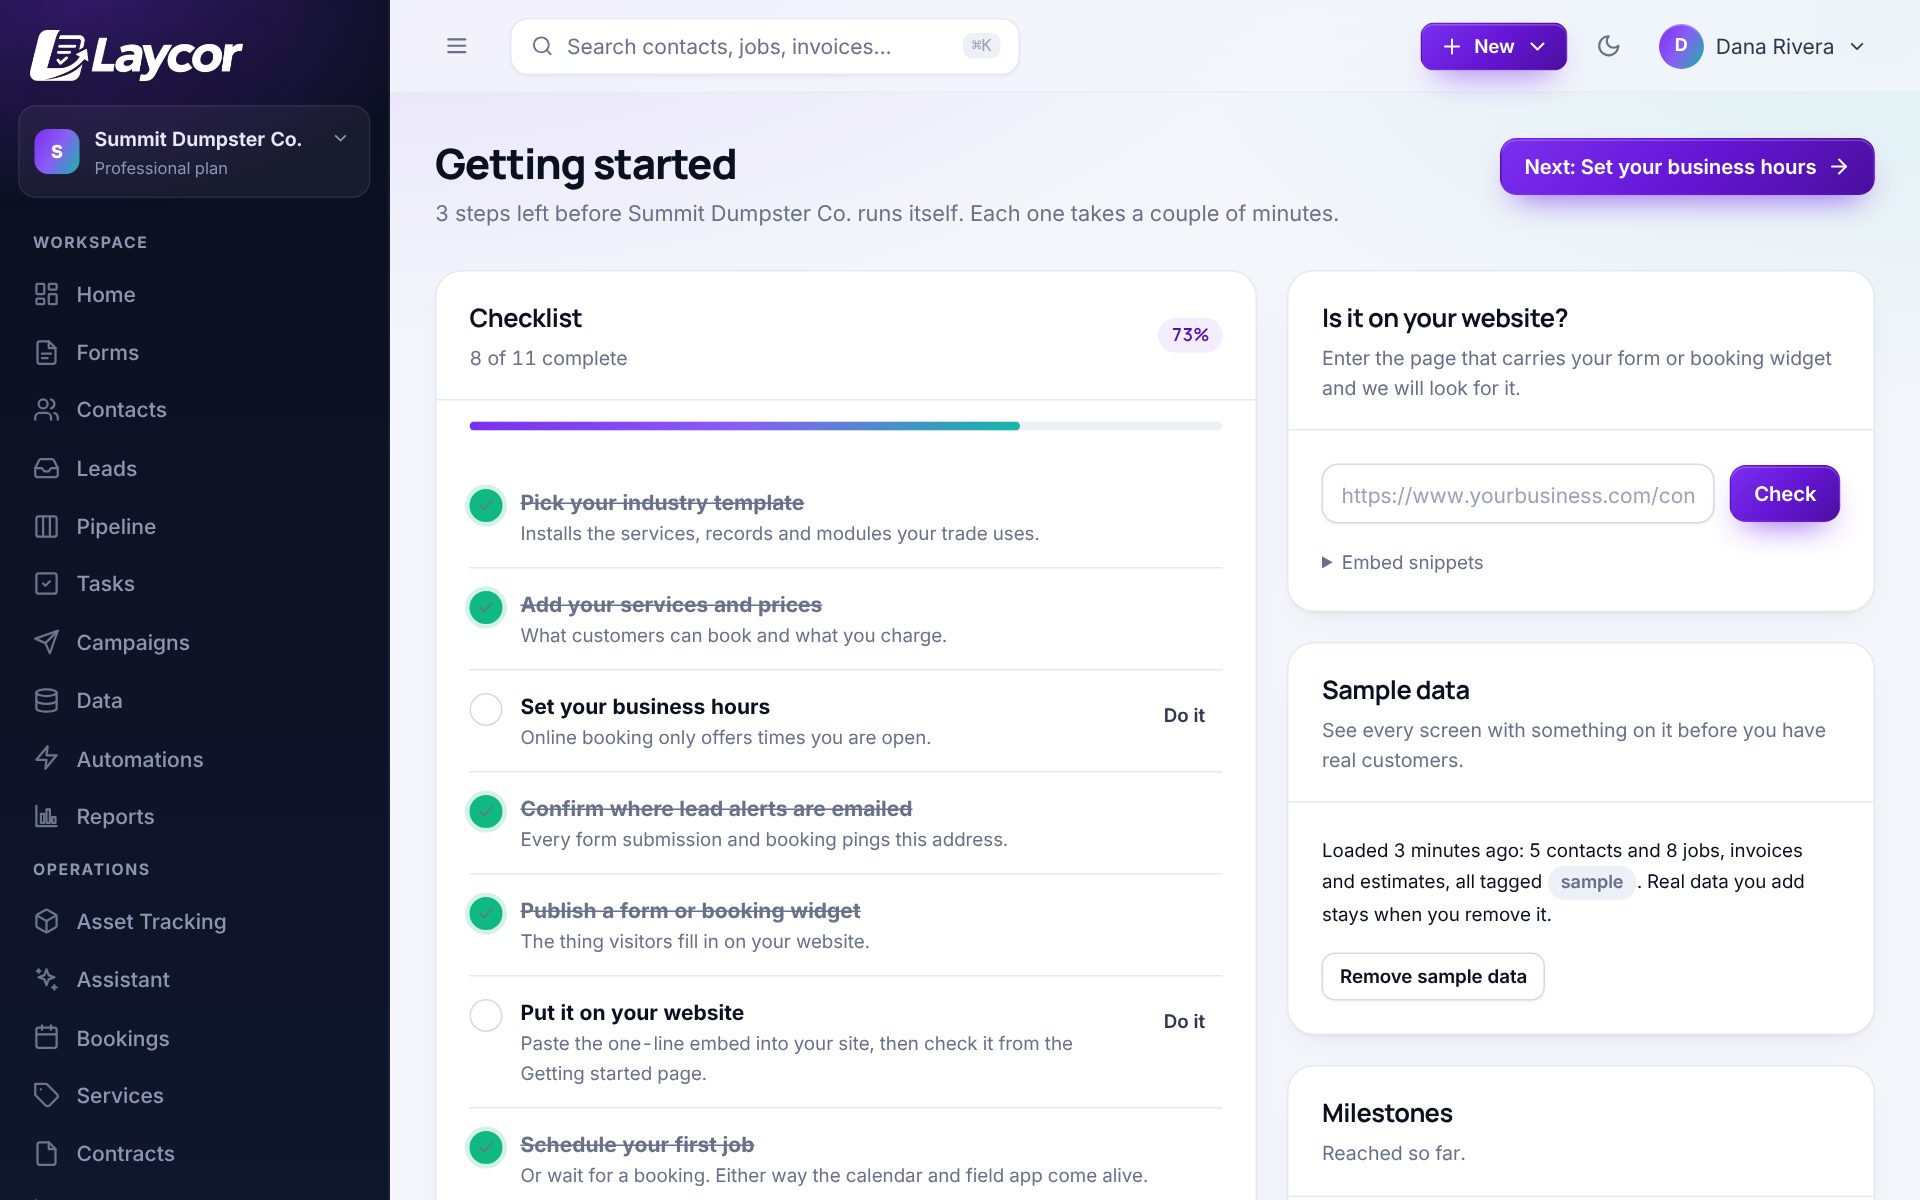
A checklist walks a new workspace through setup. Load sample customers, jobs, invoices and an estimate to see every screen working, then remove them in one click when you are done exploring.

How to use it

  1. Getting started → work down the checklist; each step links to the right screen.
  2. Load sample data to explore with realistic records. Remove sample data takes out exactly what it added.
  3. Paste your website address and Laycor checks that your form or booking widget is live on it.
  4. Press ⌘K anywhere to search contacts, jobs, invoices, pages and actions.
The getting started checklist with sample data and the embed check
Still have questions?

Try it with sample data instead of a demo.

Every new workspace can load realistic sample customers, jobs, invoices and an estimate in one click, click through every screen above, and remove them when you are done. No card, 14 days, unlimited users.

Your business, running itself by Friday.

14-day trial with every module unlocked and unlimited users. No card required, and your data is yours to export any time.